Pages

Saturday, November 28, 2020

Letters to North Pole - Last minute Christmas Cards!

Hello PND Fans! Betty here with another card. If you are still working on your last minute Christmas cards, you aren't the only one! Every year I say I'm going to start them early, but I don't get them started until November. The card I'm sharing today is simple and all I had to do was color this digital image from Paper Nest Dolls called, Letters to North Pole, and add some color for the sky and snow. This stamp also come in red rubber.


I used a frame die to cut the mat for my card front, added a few enamel dots. Then I printed a sentiment, cut it out, and I was done. Easy peasy! Give it a try, it's a fun stamp to color.

Supplies:
  • Paper Nest Dolls Stamp: Letters to North Pole Digital or red rubber.
  • White cardstock cut to 8-1/2"Wx5", scored at 4-1/2" and folded in half for base card
  • White cardstock to print digital or rubber stamp image and sentiment
  • Purple cardstock: Cut with 4"W x 5-1/4"H frame die or trim paper to 4"W x 5-1/4"H and to mat sentiment (depends on your sentiment and size)
  • Coloring medium of choice. I used Spectrum Noir Illustrators.
  • Purple enamel dots or rhinestones
  • Your favorite adhesive
Spectrum Noir Illustrators used:
  • Skin: AP3, FS8, FS7, FS6, FS9
  • Cheeks: FS4
  • Hair: MB3, TN3, TN2, TN1
  • Purple: PV4, PV3, PV1 (Pink Violet Tri-blend)
  • White: IG6, IG2, Blender
  • Gray: IG9, IG6, IG2
  • Brown: TN8, EB7, TN7, EB1
  • Turquoise: GT1, GT2, GT3 (Turquoise Tri-blend)
  • Orange: OR1, OR2, B01
  • Snow: VB1, HB, Blender
  • Sky: TB1, IB1, Blender


Instructions:
  • Print or stamp your image and color
  • Cut the image to fit the purple mat/cardstock and adhere
  • Print or stamp your sentiment, mat with purple cardstock, and adhere to card front.
  • Adhere card front to the base card.
  • Add your enamel dots or rhinestones.

Thank you for visiting and I hope you have a great week. Please leave any questions or comments below. ~Betty~

Tuesday, November 24, 2020

Emma with Panda


Hello friends!  How are you all doing today?!  I've been busy crafting and coloring and getting ready for the holidays!  

Today, I'm sharing this sweet Emma with Panda card!  To see more of my cards, you can follow me on Instagram @craftyandcreativevibes.

To make this card, I printed the digital image onto 80 lb. Neenah Solar White Cardstock.  I colored the image with Copic markers and then fussy cut it out.  I layered patterned paper, white cardstock, and then added some embellishments to finish the card off!  I used liquid glue and 3D foam squares to assemble the card.


Thank you so much for stopping by the Paper Nest Dolls Blog today!  I hope you have a very Happy Thanksgiving!
Xoxo,  Amanda


Monday, November 23, 2020

Emma with Panda by Céline

Hi
Céline here to share a another shaker card. I used Emma with Panda.


Copics used : 
Skin :  E13, 11, 21, 00, 000, R21, 20
Hair : E37, 35, 34, 31
Clothes : R56, 46, 29, 27, 24
Panda : 100, C8, 7, 6, 3, 2, 1

Thanks for stopping by.
Hugs
Céline

Friday, November 20, 2020

Ice Princess by Noelene

 Hi all,

Noelene here with you today to share my latest D.T. Christmas inspiration. Do you like to make your own Christmas ornaments?


Today I am sharing a cute little snow dome bauble I made using the cute Ice Princess image from the Princess Collection. I coloured the image & fussy cut it, then made a background to go into the dome. More details on how I did this can be found here.


Lastly I added the fake snow, decorated with dies, seam binding, ribbons & berries. 


Ice Princess can be found in rubber here & digi format here.

Hope you enjoyed my inspiration today!

Thanks for stopping by!

Hugs

Noelene x

Thursday, November 19, 2020

My Gingerbread Fun Fold Card

My Gingerbread Fun Fold Card

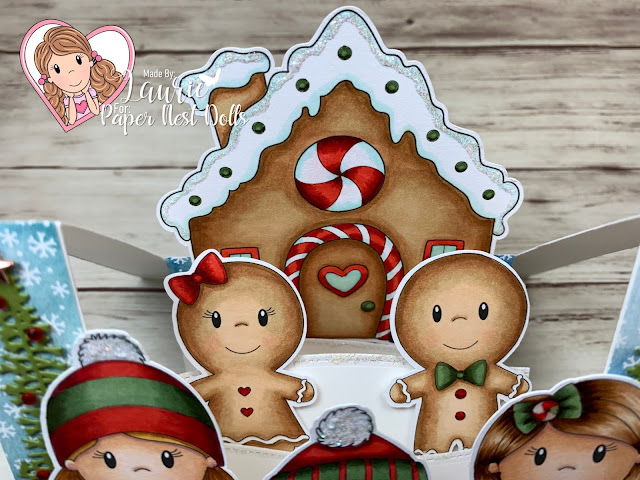
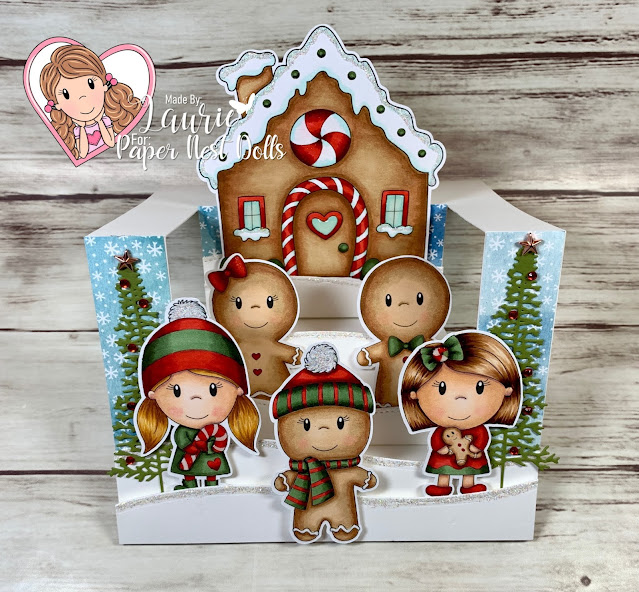
Hello Crafty Friends! It's Laurie here sharing My Gingerbread Fun Fold Card for the Design Team of Paper Nest Dolls. I used a number of digital stamps to create my fun gingerbread card including Gingerbread House, Gingerbread Boy, Gingerbread Girl, Gingerbread Winter Boy, Tiny Emma with Cookie and Tiny Ellie with Candy Cane.

My Gingerbread Fun Fold Card Showing Layers

I had so much fun creating this wonderland of gingerbread. I had an idea that I wanted to create a centre-step card and planned to use my colouring from the recent 30 Day Coloring Challenge to build my card. I’m so happy with how it turned out!

The Steps of My Gingerbread Fun Fold Card

I created a ton of layers with the snow banks that all sparkle with Stardust Stickles and then layered my characters between them in the different folds. Of course, that is not all that sparkles! The windows of the house, Ellies’s candy cane and Emma’s peppermint candy bow all have glossy accents. I even added Clear Wink of Stella to the peppermint swirl on the house, the gum drops in front of the house, the Gingerbread Girl’s bow and hearts and the heart on Ellie’s dress! Can’t have a Christmas card without Christmas trees all dressed up for Christmas with stars and red Christmas lights! The Snowflake Splendor Designer Series Paper by Stampin Up! was perfect to create my snowy scene.

--------------------------

Copic Markers:


Tiny Ellie with Candy Cane
Skin: E000/00/21/11/04/R20
Hair: E99/YR23/YR24
Reds: R39/R29/R27/R24
Greens: G99/G94/G21
Candy Cane: R39/R27/R24/C1/0, Glossy Accents
Stardust Stickles on Pompom

Tiny Ellie with Candy Cane and Gingerbread Winter Boy

Gingerbread Winter Boy
Cookie: E35/E33/E31/E30/R20
Reds: R39/R29/R27/R24
Greens: G99/G94/G21
Stardust Stickles on Pompom

Tiny Emma with Cookie

Tiny Emma with Cookie
Skin: E000/00/21/11/04/R20
Hair: E37/E35/E33/E30
Reds: R39/R29/R27/R24
Greens: G99/G94/G21
Candy Bow: R39/R27/R24/C1/0/G99/G94/G2
Cookie: E30/E33/E35/R29/R20
Glossy Accents on Peppermint Swirl in Bow

Gingerbread Girl:
Cookie: E35/E33/E31/E30/R20
Reds: R39/R29/R27/R24
Clear Wink of Stella on Bow

Gingerbread Boy and Girl

Gingerbread Boy:
Cookie: E35/E33/E31/E30/R20
Reds: R39/R29/R27/R24
Greens: G99/G94/G21

Gingerbread House

Gingerbread House:
Cookie: E35/E33/E31
Reds: R39/R29/R27/R24
Greens: G99/G94/G21
Snow: BG11/BG10/0
Glossy Accents on Windows
Clear Wink of Stella on Gum Drops/Peppermint Swirl
Stardust Stickles on Snow

--------------------------

Card Recipe for My Gingerbread Fun Fold Card:


Majestic Mountain Dies, Stampin’ Up!
Freezin’ Friends Dies, Stampin Up!
Snowflake Splendor Designer Series Paper, Stampin Up!
Star Designer Elements, Stampin Up!
Red Rhinestone Basic Jewels, Stampin’ Up!
Stardust Stickles
Glossy Accents
Clear Wink of Stella
Thick Whisper White Card Stock, Stampin’ Up!
Finished card size: 6” x 4 ½”

My Gingerbread Fun Fold Card

--------------------------

Hope you like My Gingerbread Fun Fold Card

Thank you for stopping by!

Hugs,
Laurie


Tuesday, November 17, 2020

Interactive North Pole Paper Dolls Play Set

 Hey friends!  It's Amanda here with a fun North Pole play set!  My kids have already stolen this sweet set from my craftroom!   


To create this set, I combined images from  the North Pole Set and the Gingerbread House Party.


I printed the images I wanted on 80# Neenah Solar White Cardstock.  

I colored all of my images using Copic markers and then cut them out with scissors.


On my gingerbread house, I added some candies and Frosted Sugar Powder.


I created little stands using strips of cardstock. 


Saturday, November 14, 2020

Thankful for Pumpkin Spice Season!

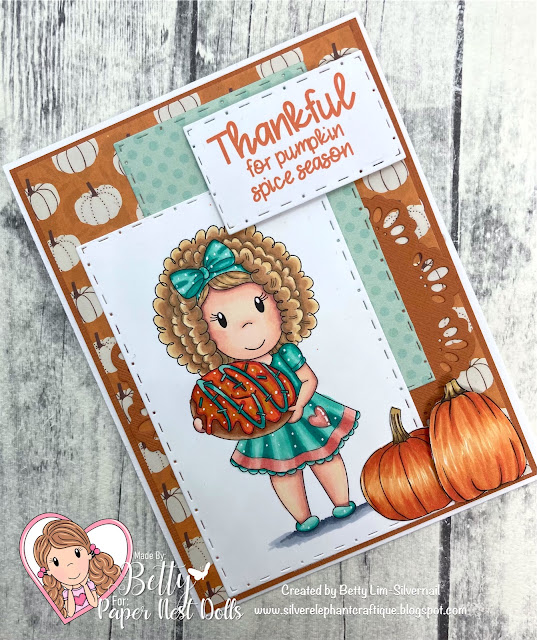
Hello Paper Nest Dolls Fans! Pumpkin spice is one of those flavors I love in baked goods, but not so much in drinks. My favorite is pumpkin spice cake donuts. I wish I can find a donut as big as Amara! Isn't she just adorable with that donut almost as big as her hair?! This stamp is available from Paper Nest Dolls in red rubber and in digital formats. This stamp is versatile and can be used for many occasions, such as birthday, thank you, friendship, etc.


I made this A2 card using the digital format (digi stamp) and colored it using Spectrum Noir Illustrator markers. This is a fun and easy card to make. Give it a try!


Supplies:
  • Paper Nest Dolls Stamp -  red rubber or digital.
  • White card stock cut to A2 size (4-1/4” x 5-1/2”) for base card
  • White card stock to stamp or print stamp image
  • Orange card stock cut to 4-1/8" x 5-3/8"
  • Pumpkin or fall patterned paper cut to 4" x 5-1/4"
  • Green pattern paper for accent cut to 2-1/4" x 3-3/4"
  • Doily die - if you don’t have a doily die, use a circle die with a scalloped edge
  • Sentiment - I created mine on my computer using Microsoft Word, printed, and cut it with a stitched rectangle die. Alternative is to use a stamp and cut it with a paper trimmer.
  • Pumpkin die cuts or digital stamps (two) -I used my Silhouette to cut out a digital stamp.
  • Paper trimmer or rectangle nesting dies
  • Your favorite adhesive
  • Adhesive foam dots or foam squares
  • Your favorite coloring medium - I used Spectrum Noir Illustrators
Spectrum Noir markers used:
  • Hair: MB2, TN3, TN2, TN1
  • Skin: AP3, FS8, FS7, FS6, FS9
  • Cheeks: FS4
  • Donut: TN7, TN5, TN3
  • Frosting: OR3, OR1, B01, LY1
  • Green: GT3, GT2, GT1, CR1, CR3, CR6
  • Shadow: IG6, IG2
  • Pumpkins: GB4, OR1, B03, B01
  • Pumpkin stem: GB4, EB4, TN1
Instructions:
  • Stamp or print image on white card stock 
  • Color the stamp 
  • Cut out the image using a paper trimmer or rectangle die
  • Adhere the layers of papers as shown on the card below. Be sure to use foam dots or squares for the sentiment and the top pumpkin.
 Thank you for stopping by. Have a wonderful pumpkin spice season! If you have any questions or comments, please leave them below. ~Betty~

Thursday, November 12, 2020

Coffee & Canines with Emma

Hi Crafty Friends,
I am sharing a card of my two FAVORITE THINGS! Puppies and Coffee! This cutie is called Dog Walker Emma and she has my dream job. I added a coffee cup and that cute sentiment because I'm sure she needs the caffeine kick to wrangle all those cute puppies.

Make Crafty Friends Q & A:
Q: What is your favorite kind of dog?
A: Me? Maltipoo! Just like my Maddie


Don't forget to subscribe, follow, and comment on my blog for your chance to win my November Prize (see right panel) and for more giveaways and inspiration follow me on Instagram @MadeByMeghanK

Supplies:
Paper Nest Dolls Dog Walker Emma
Kat Scrappiness Wavy Wonky Square Die
Cat's Pajama's Coffee Cup Die
The Ink Road Puppy Stamp


Wednesday, November 11, 2020

Avery Loves Coffee

Hi Crafty Friends,
I have a FUN COFFEE Card for you today featuring the Paper Nest Dolls Logo called Avery in Heart. I thought she made a perfect "O" for my COFFEE Slimline because who doesn't LOVE Coffee?

Make Crafty Friends Q & A:
Q: What is your favorite brand and kind of coffee?
A: Me? Laird Superfoods Organic Peruvian Dark Roast


Don't forget to subscribe, follow, and comment on my blog for your chance to win my November Prize (see right panel) and for more giveaways and inspiration follow me on Instagram @MadeByMeghanK

Supplies:
Paper Nest Dolls Avery in Heart
Kat Scrappiness Stitched Scalloped Slimline Die
Kat Scrappiness Uppercase Condensed Alphabet Dies

Cat's Pajamas Coffee Dies
Your Next Stamp The Perfect Blend Paper Pad


Saturday, November 7, 2020

pick your own pumpkins...

This gorgeous fall card using Avery with Pumpkin is one of 3 creations that are featured in the current issue of Making Cards Magazine ( Nov/ Dec issue ) Be sure to check it out ...they are all beautiful <3

Enjoy xx


Thursday, November 5, 2020

The Sweetest Season Christmas Card

Hello Crafty Friends! It's Laurie here sharing My Sweetest Season Christmas Card for the Design Team of Paper Nest Dolls. I used the cute Elf Avery with Candy Cane! Isn’t she just the sweetest digital stamp! Avery looks ever so pleased with her candy cane!


The Sweetest Season Christmas Card

When I coloured Avery with my Copic Markers, I knew that I wanted to use the Sweetest Border Dies with the die cut candy canes. Perfect for my card and what better use than to have the candy cane paper showing through the die cuts. It took me a couple tries to get the red die cut and the green die cut to match up, but I thought it helped to create a sweet background for Avery. I couldn’t resist using stickles on her hat trim and glossy accents on the berries to give her some sparkle. I loved the sentiment, but it was too long. So, I turned it on its side and added some embellishments from my stash.

Close Up of the Sweetest Season Christmas Card


-------------------------


Copic Markers:

Skin: E000/00/21/11/04/R20
Hair: E21/E25/E27/E29
Reds: R22/24/27/29/C3
Greens: YG91/93/95/97/99
Whites: C1/C0/0

--------------------------

Card Recipe for My Sweetest Season Christmas Card:

Elf Avery with Candy Cane, Paper Nest Dolls
Sweet Sentiment Premium Coloring Paper
Sweetest Border Dies, Stampin’ Up!
Sweetest Time Photopolymer Stamp Set, Stampin Up!
Mint Twist 6 ½” Paper Pad, KaiserKraft
Jolly Holly Washi Tape, Doodlebug Design Inc.
Jolly Holiday Sprinkle Shapes, Doodlebug Design Inc.
Pearls, Green, KaiserKraft
Basic Rhinestones, Stampin’ Up!
Stardust Stickles
Glossy Accents
Real Red, Mossy Meadow and Whisper White Card Stock, Stampin’ Up!
Finished card size: 5 ½” x 5 ½”

--------------------------

Hope you like My Sweetest Season Christmas Card
using Elf Avery with Candy Cane by Paper Nest Dolls!

Thank you for stopping by!

Hugs,
Laurie