Pages

Tuesday, December 31, 2013

Punk Owen

Hello everyone........
today I am sharing a card DT Doll Keeley Ainsworth did using Punk Owen. You can see more on her blog HERE.


Copic Hair Color 29...

Heather Huggins - The Paper Nest Dolls - Copic Hair Color

Hey everyone Heather here from Heather's Hobbie Haven.

How about a blonde this week.

The order I colored her:
E33
YR23
YR21
YR20

I color from dark to light, but if you color from light to dark that's great to.
Just reverse the color order.

See you next Tuesday with another hair color!


Monday, December 30, 2013

Hello everyone...
Today we have a card by our Guest Designer Elizabeth ! You can see more pics on her blog HERE
She did a wonderful job using Princess Ellie with Frog .

.

Sunday, December 29, 2013

Elf Ellie


Hello....
Here is an adorable card by Trine Kristiansen. She used Elf Ellie to create this beautiful Christmas card. You can see more on her blog HERE


Saturday, December 28, 2013

Caroling Snowman

Hello everyone.........
Today I would like to share with you an adorable card made by DT Doll Stephanie Beauchemin. She used Caroling Snowman for her project. Be sure to check out more pics on her blog HERE .


Friday, December 27, 2013

Christmas Fairy

Hello everyone!
Today is a holiday card by DT Doll Stéphanie Beauchemin
You can see more on her blog HERE


Tuesday, December 24, 2013

It's Christmas

I hope everyone has been good this year,
Father Christmas won't bring you any crafting goodies!

Today is Christmas Eve and I am like a big soft kid...... I can't wait, I'm so excited 
(even though I chose my own present - Magnolia Doo Hickey Dies... Yeh!!!)

I am here to share my card using the beautiful Gift Giving Avery from The Paper Nest Dolls, 
isn't she just the cutest!


I have used...

Simple Stories - Handmade Holiday paper pack
Die-namic Dies - Rolled Daisy
Magnolia Doo Hickey Christmas Tree die
Marianne Snowflake die
Joanna Sheen - Signature Dies - Holly Leaf 


Copics Used....


Skin E0000 00 11 RV10 & R20
Hair E40 41 43
Red R27 29 59
Beige E40
Cream E50 51 53
Brown E31 33 35 39


That is all for today, I'm off to prepare the turkey 
and 
I would like to wish everyone a 

"MERRY CHRISTMAS" 


Hugs.....
 photo keeleysignaturea_zpscff6569a.png
- See more at: http://craftdiddleyumptious.blogspot.co.uk/#sthash.MprUxgUS.dpuf

Copic Hair Color 28...

Heather Huggins - The Paper Nest Dolls - Copic Hair Color

Hey everyone Heather here from Heather's Hobbie Haven.

How about another brown.

The order I colored her:
E29
E27
E25
E21

I color from dark to light, but if you color from light to dark that's great to.
Just reverse the color order.

See you next Tuesday with another hair color!


Monday, December 23, 2013

Ice Skating Ellie!

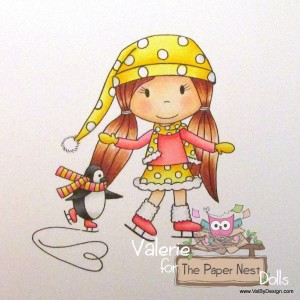
I have my first shaker card for today! It's a total coincidence (really!) that I was making a shaker card the same time that Jasmina's shaker card went live on Friday; oh well, that's OK, right?

I used Ice Skating Ellie (sorry for the horrible photograph of the image here; 
I should have waited until daylight to take the picture)
Paper Nest Dolls - Ice Skating Ellie
Shake shake shake!
Hee hee, that was fun!
I have all the supplies and more fun pictures on my blog, ValByDesign

Thanks so much for stopping by, and have a wonderful Holiday!


Sunday, December 22, 2013

Angel Ellie

Hello, everyone!  Today I want to share with you a card created by guest designer Cinzia Coniglio.
She used Angel Ellie to create this beautiful card.


Friday, December 20, 2013

Gift giving Avery

Hi, it’s Jasmina. Christmas is just around the corner, I hope all gifts are ready. Some gifts will bring you Avery. J

I made shaker card with adorable image Gift giving Avery. I colored her with Copic Sketch markers.


Copics I used:
Skin: E0000, E000, E00, E21, R11
Hair: C1, C3, C5, C6, C7
Outfit: RV11, RV13, RV14, B000, B00, B01
Boots: E40, E41

For more details please visit my blog

I hope you'll have a fabulous time preparing for Christmas,
Jasmina 

Thursday, December 19, 2013

Angel Ellie

Hello my fellow crafters! It's Valerie here, and I have Angel Ellie with me today!
I created a 6" x 6" Thank You card using My Mind's Eye Memorable collection, 
and I colored the image with Copic Sketch markers

To see more images, and all the details on products I used, come visit me on my blog, www.ValByDesign.com; and, have a wonderful day!

Wednesday, December 18, 2013

Garden Ellie

Happy Wednesday one and all. I truly hope you are all having a great week and are not getting to stressed that Christmas seems to be running at us rather than creeping up.

It's Lydia here at Paper Nest Dolls Blog and I've decided to go against the grain and make a non-holiday card..gasp..lol. ;)

I have used one of my favourites from the last release Garden Ellie.

<= h($product->name) ?>

How cute is she and the scene of flowers she is in is just perfect.. love her!


I have used G45 papers with this image that seem to match perfectly. 

Thank you all so much for popping by and I will catch you all real soon.

Love Lydia xxxx

Tuesday, December 17, 2013

Christmas Fairy Ellie

Hello Everyone....
Please check out this wonderful card made by DT Doll Trine Kristiansen. You can
see more on her blog HERE
ENJOY! =)


Copic Hair Color 27...

Heather Huggins - The Paper Nest Dolls - Copic Hair Color

Hey everyone Heather here from Heather's Hobbie Haven.

What about this color?

The order I colored her:
E59
E57
E37
E35

I color from dark to light, but if you color from light to dark that's great to.
Just reverse the color order.

See you next Tuesday with another hair color!


Monday, December 16, 2013

A bit Shabby and Chic.....


Good morning everyone! 
I am very excited to share with you today a special project I made.
I have used 3 adorable images on my wooden blocks.
* Look close at the letter O to see a pic of the real dolls ! *


I have tons more photos on my blog if you want to hop on over and get a closer look.

I also have some Paper Nest Doll Stamps up for blog candy. If you want hop on over to my blog and follow the rules to win.

You can click HERE to be taken to my blog.

THANKS FOR STOPPING BY TODAY!!
Don't forget you can get these adorable images HERE!!

Saturday, December 14, 2013

Downhill Racing Avery

Hello to you all! Today I`m going to show you a card using Downhill Racing Avery. I just love her! Hope you like her too! You can get her both in rubber and digi


Hugs Eva

Friday, December 13, 2013

Christmas Bella for Lucia

Hello, it's me Jill here today to share a special project with you.
Some of you may remember Christine drew a special image for me. She made a stamp called Christmas Bella for my daughter Gabriella. This special stamp is to celebrate Lucia Day.
 I am so happy the day is here, 13th december. Gabriella has really looked forward to this day and I have made her a gift.
Two weeks ago I found a video tutorial linked by a lovely friend of mine to a fantastic giftbag made by Roben-Marie Smith. I just knew I had to make something similar. I took some photos along the way and I would love to share them with you today.
The tutorial that inspired me is to be found here
This is my giftbag for Gabriella with the gorgeous stamp called
Christmas Bella.
I think she will like it . It is made in a way so that she doesn't have to tear it apart to open it. She wants to save it and keep in her room.

You will need two paperbags, booksheets or similar, an amazing PND image, glue, sewing mashine, dabber or acrylic paint, Frantage and some kind of twine.

Start by gluing the booksheets to one side of the bag. Use the side that dosen't  have the flip up or just flip it down. Try to glue the places you won't sew as your sewing machine does not like to much glue.

Sew around the whole base and also sew three times right over the bag. Don't trim the ends to much, but let them hang there for a shabby look.

Now the bag should look like this. Sew together the two paper bags, so that you now have one thick, wonderful bag. Don't sew the top!

Colour your image with Copic (or whatever you prefere)
Ink the edges and mat her on a piece of craft cardstock. Sew around image.

Make two holes in the top of your image and measure where to put the wholes on the bag.
Use a Cropodile.

Make dots with a Dabber or Acrylic paint.
I have used Snow Cap, White Dabber. My favorite as I looove white ;)

While the paint is wet put on some Frantage Shabby white and heat it with your heatgun.


Lovely effect from the Frantage.


Put your gift inside.
Bella gets a new Lip gloss that she wanted and two tickets to go to see a movie.
She is going to be superhappy ♥

Here it is ♥
Hope you like my little gift bag.
I loved making it and I will make some more for Christmas as I love to make special gifts for my friends.

Have a wonderful day all
I would love to hear your opinion about my little project, and you can find more on my blog HERE.
Want to have your own Christmas Bella?
You find her HERE in the PND shop, or if you live in Norway you will find this one and a whole lot other Paper Nest Dolls stamps at KREATIV SCRAPPING

HUGS, Jill ♥