Showing posts with label Spectrum Noir Illustrators. Show all posts

Tuesday, December 1, 2020

Ice Skating Avery - New Release

Hello PND Fans! Betty here to share another card! 

I love watching ice skating during the Olympics. I am always amazed at all the fancy jumps and twirls these athletes do. I love seeing all the fancy and sparkly outfits the girls wear for their performances, just like Avery in this adorable newly released digital stamp by Paper Nest Dolls called Ice Skating Avery

This is an A2 size card and I created it with a fancy fold called Dutch Door. The top half of the card front is cut off that forms a door on the bottom. The front panel with the stamped image can be any size you want. I made mine 2-3/4"W x 4-3/4"H.


For the back panel, I added patterned paper, washi tape, and sentiment on the top half of the card and left the bottom blank for a message area. 


I colored the digital stamp using Copic markers. Colors are listed below.

Copic markers used:
Skin: E04, E11, E21, E00, E000
Cheeks: R32, R30
Hair: E13, E11, E53, E50, plus yellow colored pencil
Purple: V25, V22, V20
Gray: C5, C3, C1
White: C3, C1, Blender


This is an easy fancy fold card to make. It's a great way to showcase your colored stamp. I hope you will give this card a try!


Thank you for stopping by! If you have any questions or comments, please leave them below. Have a great day! ~Betty~

Saturday, November 28, 2020

Letters to North Pole - Last minute Christmas Cards!

Hello PND Fans! Betty here with another card. If you are still working on your last minute Christmas cards, you aren't the only one! Every year I say I'm going to start them early, but I don't get them started until November. The card I'm sharing today is simple and all I had to do was color this digital image from Paper Nest Dolls called, Letters to North Pole, and add some color for the sky and snow. This stamp also come in red rubber.


I used a frame die to cut the mat for my card front, added a few enamel dots. Then I printed a sentiment, cut it out, and I was done. Easy peasy! Give it a try, it's a fun stamp to color.

Supplies:
  • Paper Nest Dolls Stamp: Letters to North Pole Digital or red rubber.
  • White cardstock cut to 8-1/2"Wx5", scored at 4-1/2" and folded in half for base card
  • White cardstock to print digital or rubber stamp image and sentiment
  • Purple cardstock: Cut with 4"W x 5-1/4"H frame die or trim paper to 4"W x 5-1/4"H and to mat sentiment (depends on your sentiment and size)
  • Coloring medium of choice. I used Spectrum Noir Illustrators.
  • Purple enamel dots or rhinestones
  • Your favorite adhesive
Spectrum Noir Illustrators used:
  • Skin: AP3, FS8, FS7, FS6, FS9
  • Cheeks: FS4
  • Hair: MB3, TN3, TN2, TN1
  • Purple: PV4, PV3, PV1 (Pink Violet Tri-blend)
  • White: IG6, IG2, Blender
  • Gray: IG9, IG6, IG2
  • Brown: TN8, EB7, TN7, EB1
  • Turquoise: GT1, GT2, GT3 (Turquoise Tri-blend)
  • Orange: OR1, OR2, B01
  • Snow: VB1, HB, Blender
  • Sky: TB1, IB1, Blender


Instructions:
  • Print or stamp your image and color
  • Cut the image to fit the purple mat/cardstock and adhere
  • Print or stamp your sentiment, mat with purple cardstock, and adhere to card front.
  • Adhere card front to the base card.
  • Add your enamel dots or rhinestones.

Thank you for visiting and I hope you have a great week. Please leave any questions or comments below. ~Betty~

Saturday, November 14, 2020

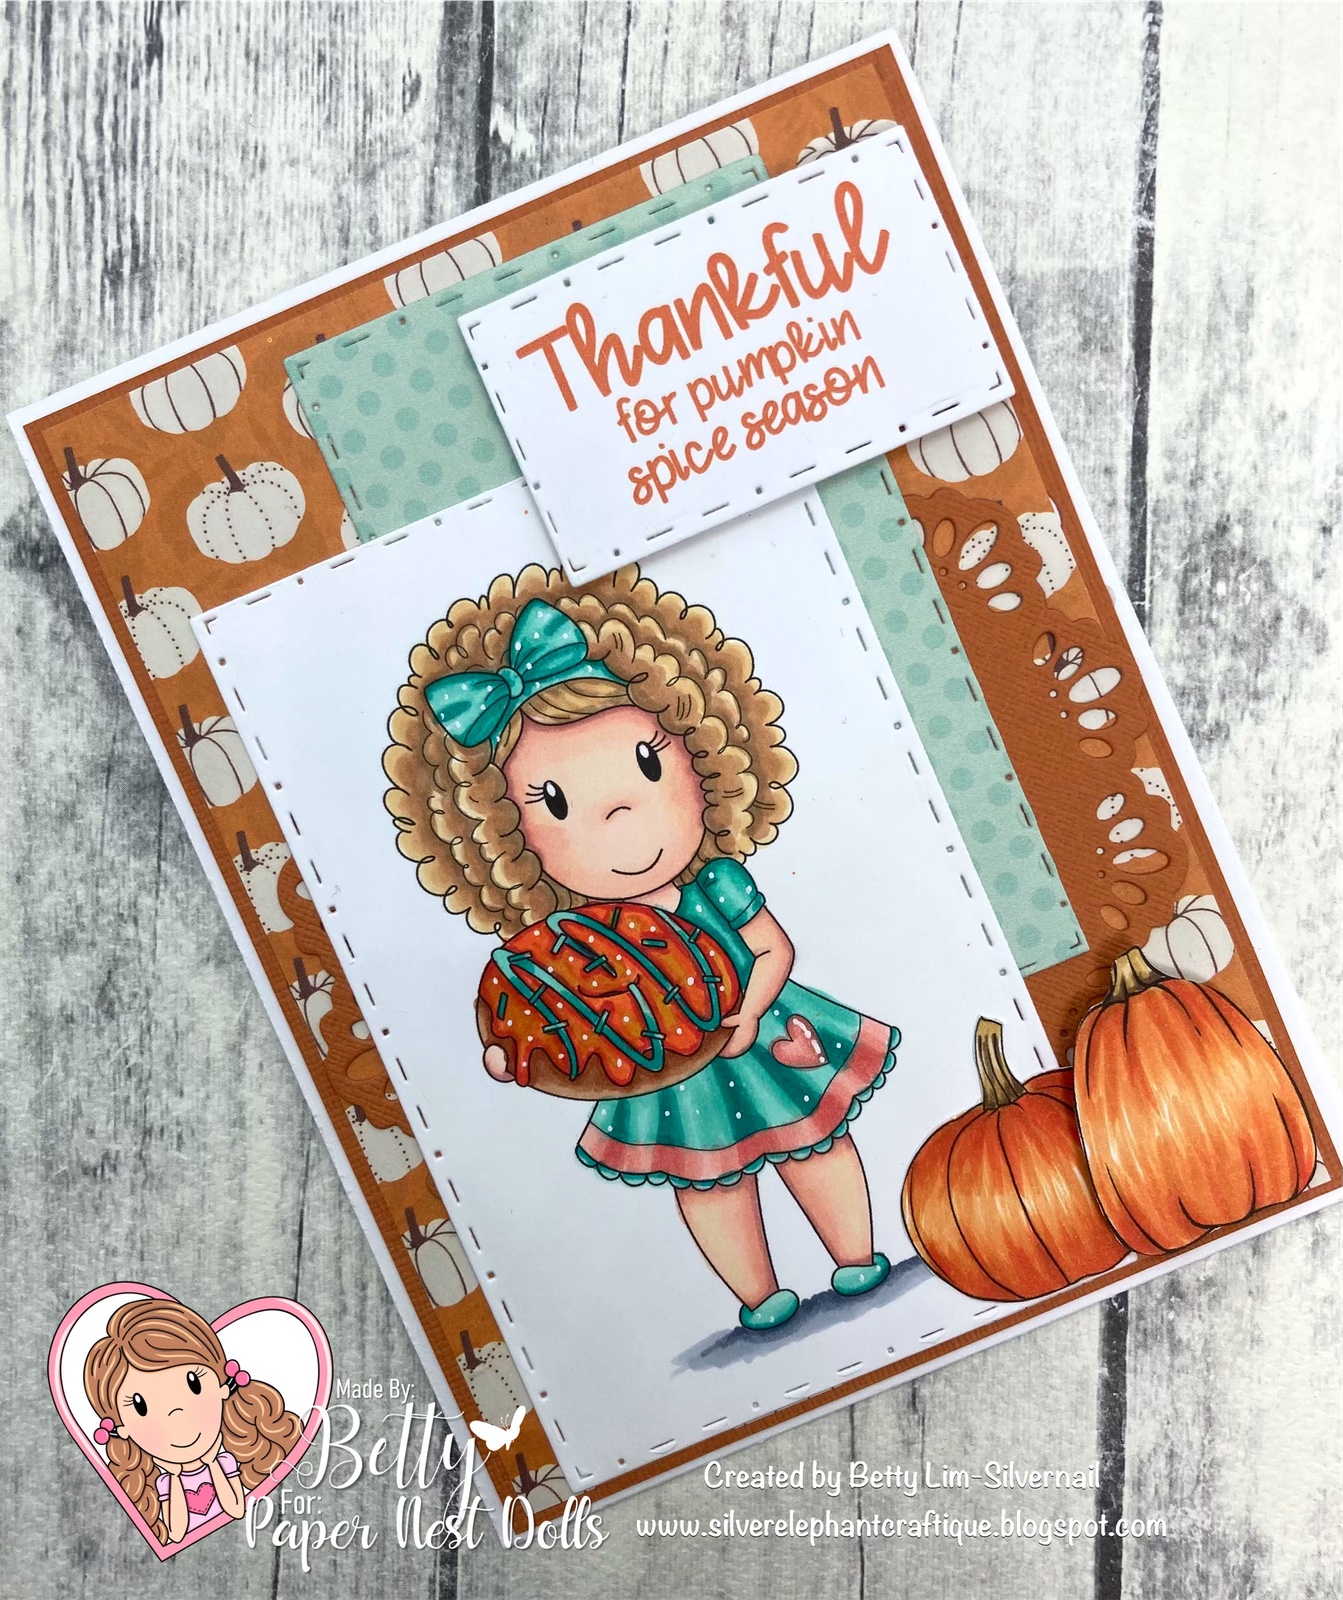
Thankful for Pumpkin Spice Season!

Hello Paper Nest Dolls Fans! Pumpkin spice is one of those flavors I love in baked goods, but not so much in drinks. My favorite is pumpkin spice cake donuts. I wish I can find a donut as big as Amara! Isn't she just adorable with that donut almost as big as her hair?! This stamp is available from Paper Nest Dolls in red rubber and in digital formats. This stamp is versatile and can be used for many occasions, such as birthday, thank you, friendship, etc.


I made this A2 card using the digital format (digi stamp) and colored it using Spectrum Noir Illustrator markers. This is a fun and easy card to make. Give it a try!


Supplies:
  • Paper Nest Dolls Stamp -  red rubber or digital.
  • White card stock cut to A2 size (4-1/4” x 5-1/2”) for base card
  • White card stock to stamp or print stamp image
  • Orange card stock cut to 4-1/8" x 5-3/8"
  • Pumpkin or fall patterned paper cut to 4" x 5-1/4"
  • Green pattern paper for accent cut to 2-1/4" x 3-3/4"
  • Doily die - if you don’t have a doily die, use a circle die with a scalloped edge
  • Sentiment - I created mine on my computer using Microsoft Word, printed, and cut it with a stitched rectangle die. Alternative is to use a stamp and cut it with a paper trimmer.
  • Pumpkin die cuts or digital stamps (two) -I used my Silhouette to cut out a digital stamp.
  • Paper trimmer or rectangle nesting dies
  • Your favorite adhesive
  • Adhesive foam dots or foam squares
  • Your favorite coloring medium - I used Spectrum Noir Illustrators
Spectrum Noir markers used:
  • Hair: MB2, TN3, TN2, TN1
  • Skin: AP3, FS8, FS7, FS6, FS9
  • Cheeks: FS4
  • Donut: TN7, TN5, TN3
  • Frosting: OR3, OR1, B01, LY1
  • Green: GT3, GT2, GT1, CR1, CR3, CR6
  • Shadow: IG6, IG2
  • Pumpkins: GB4, OR1, B03, B01
  • Pumpkin stem: GB4, EB4, TN1
Instructions:
  • Stamp or print image on white card stock 
  • Color the stamp 
  • Cut out the image using a paper trimmer or rectangle die
  • Adhere the layers of papers as shown on the card below. Be sure to use foam dots or squares for the sentiment and the top pumpkin.
 Thank you for stopping by. Have a wonderful pumpkin spice season! If you have any questions or comments, please leave them below. ~Betty~
copyright © 2013 the paper nest · graphics by erica belton · web design by red peach designs