Showing posts with label Halloween. Show all posts

Tuesday, October 31, 2023

The Spooky Season


Hello Crafty Friends! Happy Halloween! It's Laurie here! I am sharing The Spooky Season using Scary Doll Owen and Scary Doll Emma by Paper Nest Dolls as my Design Team Inspiration Card. I couldn’t resist squeaking in one final Halloween card!

The Details of My Card


For my card, I had to do some research! I’m not a big horror fan. So, I had to google what these characters were and colour them according to the photos online. Lol! I used my Copic markers to colour them and added Glossy Accents to the shovel and the knife. Also, I added silver gelly roll pen to all the metallic trim on Emma’s jacket.

Since I had two stamps to place on my card, I decided to create a slimline card, but I thought it would be fun to use the tag “Tis the Season to be Spooky”. So, I brushed Black Soot along the edges to give it a distressed feel. Next, I added a black mat to the tag and rubbed Brushed Iron wax on the mat, the die cut gates, and the mat of my card to tie them all in together. Once I did that, I placed my sentiment sticking above the card with an iron gate on either side of it with my characters layered in front.

I love the oval dies that I used for the black mat and the Skull and cross bone paper! Such a fun and interesting shape!

For embellishments, I used several bats and black rhinestone stickers, as well as a spider trinket that I placed over the printed spider on the tag. The only other thing that I added was the reverse “Scary” word to the tag. It summed up my card perfectly!

--------------------------

Copic Markers:


Scary Doll Owen
Skin: E000/E00/E21/E11/E04
Hair: E18/E08/YR18/YR14
Overalls: B99/B97/B95/B93/B91
Reds: R29/R27/R24/R22
Stripes: B95/B91/YG63/YG61/YG03/B39/B37/R29/R27/R24/R22
Shoes: R29/R27/R24/R22/C3/C1/0
Shovel: C6/C4/C3/C1/E18/E15


Scary Doll Emma
Skin: E000/E00/E21/E11/E04/R20
Hair: E53/E51/E50
Jacket: C9/C7/C6/C4
Dress: C3/C1/0
Boots: C9/C6/C4
Knife: C6/C4/C3/C1/E18/E15


--------------------------

Card Recipe for The Spooky Season:


Scary Doll Owen and Scary Doll Emma, Paper Nest Dolls
Paper Basics - Stamper's Select White Cardstock, Papertrey Ink
Fright Night 12” x 12” Collection Pack, Photo Play Paper
#9 Slim Stitched Box Oval Dies, Photo Play Paper
Tim Holtz Gate Keeper Thinlits Dies, Sizzix
Reverse Cut Halloween Words, Frantic Stamper Inc.
Brushed Iron Metallique Wax, Art Alchemy
Black Soot Ink, Ranger
Blending Brush, Stampin’ Up!
Bat Stickers, Recollections, Michaels Arts & Crafts
Black Rhinestone Stickers, Recollections, Michaels Arts & Crafts
Spider Trinket, Stampin’ Up!
Glossy Accents, Ranger
Silver Gelly Roll Pen, Sakura

Basic Black and Pumpkin Pie Card Stock, Stampin’ Up!

Finished card size: 3 ½” x 8 ½”

-------------------------- 

Hope you like my Design Team Inspiration Card using Scary Doll Owen and Scary Doll Emma for Paper Nest Dolls!

Thank you for stopping by!

Hugs,
Laurie


Thursday, October 5, 2023

Scary Cute Halloween Card

Hello Crafty Friends! It's Laurie here! I am sharing my Scary Cute Halloween Card using Vampire Ellie by Paper Nest Dolls as my Design Team Inspiration Card.

The Details of My Card

For my card, I had so much fun colouring Vampire Ellie with my Copic markers! I knew that I wanted to give her black hair and decided to go with a ghoulish green and red since she is a vampire. I made her skin a bit lighter by not using E04 for my shadows to give her a deathly pallor. Lol!

For the balloons, I went with an ectoplasm green like in Ghostbusters and a black for the bat. I used my white gelly roll pen to make bat’s fangs stand out and for the highlights on both balloons. The balloons also had glossy accents add to them to make them look like real balloons. Star Dust Stickles were added to the red bows and red trim of her dress. 

I decided to create a mini slimline card since I wanted to create a spooky graveyard scene with my dies. Of course, if you have a vampire, you must have a moon dripping blood! Lol! So, I stamped the blood drips first before die cutting the moon out. That way the craters on the moon die did not cause voids in the stamped dripping blood. Next, I brushed Fossilized Amber Distress Oxide Ink around the edges of my moon to make it glow.

Then, I die cut the graveyard in Basic Black and Basic Gray to help differentiate the two layers. Don’t you love how the spooky sky and moon show through the gate to the graveyard!

For the sky, I went with some spooky green skulls paper to match my colouring. Plus, they reminded me of all the ghosts in the graveyard.

A couple of black glimmer bats add some sparkle to the sky. The “Scary” sentiment was die cut from red glimmer paper to match my red colouring.

Finally, the finishing touch was a scattering of red rhinestones and black sequins to match my colour scheme.

--------------------------

Copic Markers:

Skin: E000/E00/E21/E11/R20
Hair: N10/N8/N6
Greens: G29/YG67/YG17/YG03
Reds: R39/R37/R35R32
Shoes/Bat Balloon: N10/N8/N6
Skulls: C3/0

--------------------------

Card Recipe for My Scary Cute Halloween Card:

Vampire Ellie, Paper Nest Dolls
Paper Basics - Stamper's Select White Cardstock, Papertrey Ink
Kelly Panacci Halloween Designer Mat Pad, K & Company
Red Glimmer Paper, Stampin’ Up!
Black Glimmer Paper, Stampin’ Up!
Boneyard Edgers Dies, Frantic Stamper Ins.
Full Moon Dies, Lawn Fawn
Reverse Cut Halloween Words, Frantic Stamper Inc.
Bat Punch, Stampin’ Up!
Fossilized Amber Distress Oxide Ink, Ranger
Blending Brush, Stampin’ Up!
Ghoulish Grunge Stamp Set, Stampin’ Up!
Cherry Cobber Ink Pad, Stampin’ Up!
Metallic Sequin Assortment, Stampin’ Up!
Red Rhinestone Basic Jewels, Stampin’ Up!
Glossy Accents, Ranger
Star Dust Stickles, Ranger
White Gelly Roll Pen, Sakura

Basic Black, Very Vanilla and Basic Gray Card Stock, Stampin’ Up!

Finished card size: 3 ½” x 6”

--------------------------

Hope you like my Design Team Inspiration Card using Vampire Ellie for Paper Nest Dolls!

Thank you for stopping by!

Hugs,
Laurie

Tuesday, October 18, 2022

Happy Hauntings Halloween Card


Hello Crafty Friends! It's Laurie here! I am sharing my Happy Hauntings Halloween Card as my Design Team Inspiration Card for Paper Nest Dolls using Secret Girl Emma.

The Details of My Card

For my card, I decided to create a Halloween card and colour her with my Copic markers like Coraline in the movie. But Emma would be great for Spring, back to school, birthday and so many more occasions!

I had to add a spooky spider web panel with a glittery spider on it. The openings of the spider web allowed me to add some bootackular paper behind it! Lol! I thought it would be fun having her walking by a graveyard as she is trick-or-treating. The sentiment is from the Chit Chat and I just cut off the pointy speech bubble part to make it non-directional and more like a sentiment.

The Halloween candy banner was perfect for my card since she is trick-or-treating! A couple of sprinkles to match her jacket/boots and a black rhinestone were all the other embellishments this card needed.

--------------------------

Copic Markers:

Skin: E04/E11/E21/E00/E000/R20
Freckles: E15
Hair: B24/B97/B39/B99
Yellows: Y11/Y13/Y15/Y17
Reds: R56/R39/R59
Blues: BG75/BG72/B52


Card Recipe for My Happy Hauntings Halloween Card:

Secret Girl Emma, Paper Nest Dolls
Paper Basics - Stamper's Select White Cardstock, Papertrey Ink
Cute Halloween 6” x 6” Designer Series Paper, Stampin’ Up!
Carnival Candy Chit Chat, Doodlebug Design Inc.
Boneyard Edgers Die, Frantic Stamper Inc.
Spiderweb Card Panel Die, Frantic Stamper Inc.
Spider Glitter Sticker, Jolee’s Boutique
Candy Banner Sticker, Jolee’s Boutique
Halloween Assortment Sprinkles, Doodlebug Design Inc.
Black Rhinestone Jewels, Stampin’ Up!
Glossy Accents, Ranger (Boots)
Clear Wink of Stella, Stampin’ Up! (Hair Barrett)
Black Stampin' Dimensionals, Stampin’ Up!
Basic Black, Basic White and Crushed Curry Card Stock, Stampin’ Up!

Finished card size: 5 ½” x 4 ¼”

Stamp Size: 4” Tall

--------------------------

Hope you like my Design Team Inspiration Card for Paper Nest Dolls!

Thank you for stopping by!

Hugs,
Laurie

Sunday, October 16, 2022

Have a Haunted Halloween

Hello PND Fans! Betty here today. Have you ever visited a haunted house? When I was in high school, my friends and I went to a Halloween haunted house and it was so scary! It was the last time I went to one. I don't like being scared and this is also the reason I avoid horror movies! However, I don't mind cute scary things, like this adorable "Frankie" stamp from Paper Nest Dolls. This stamp comes in red rubber and in digital formats.

Supplies used:
  • Frankie digital stamp
  • Perfect Pearls in Mint, Perfect Pearl, and Perfect Gold
  • Graveyard Gate die and sentiment:  Stampin' Up-Graveyard Gate

Copic markers and Prismacolor pencils used:
Skin: YG67, YG63, YG61
Hair: BV08, BV13, BV11 + Prismacolor: PC932, PC938
Orange: YR18, YR16, YR12
Yellow: Y19, Y15, Y13
White: N3, N1, 0


For the background, I mixed Perfect Pearls with water to create some glitter watercolors and painted the sky and moon on black Bristol paper. I wanted to create an eerie, scary feeling for a haunted Halloween card. I added the graveyard gate to the scene. 


I hope you give this card a try! It's a cute and fun card to make. Thank you for stopping by and I hope you have a Happy Halloween! ~Betty~

Wednesday, October 12, 2022

Happy Halloween With Bad Witch Ellie

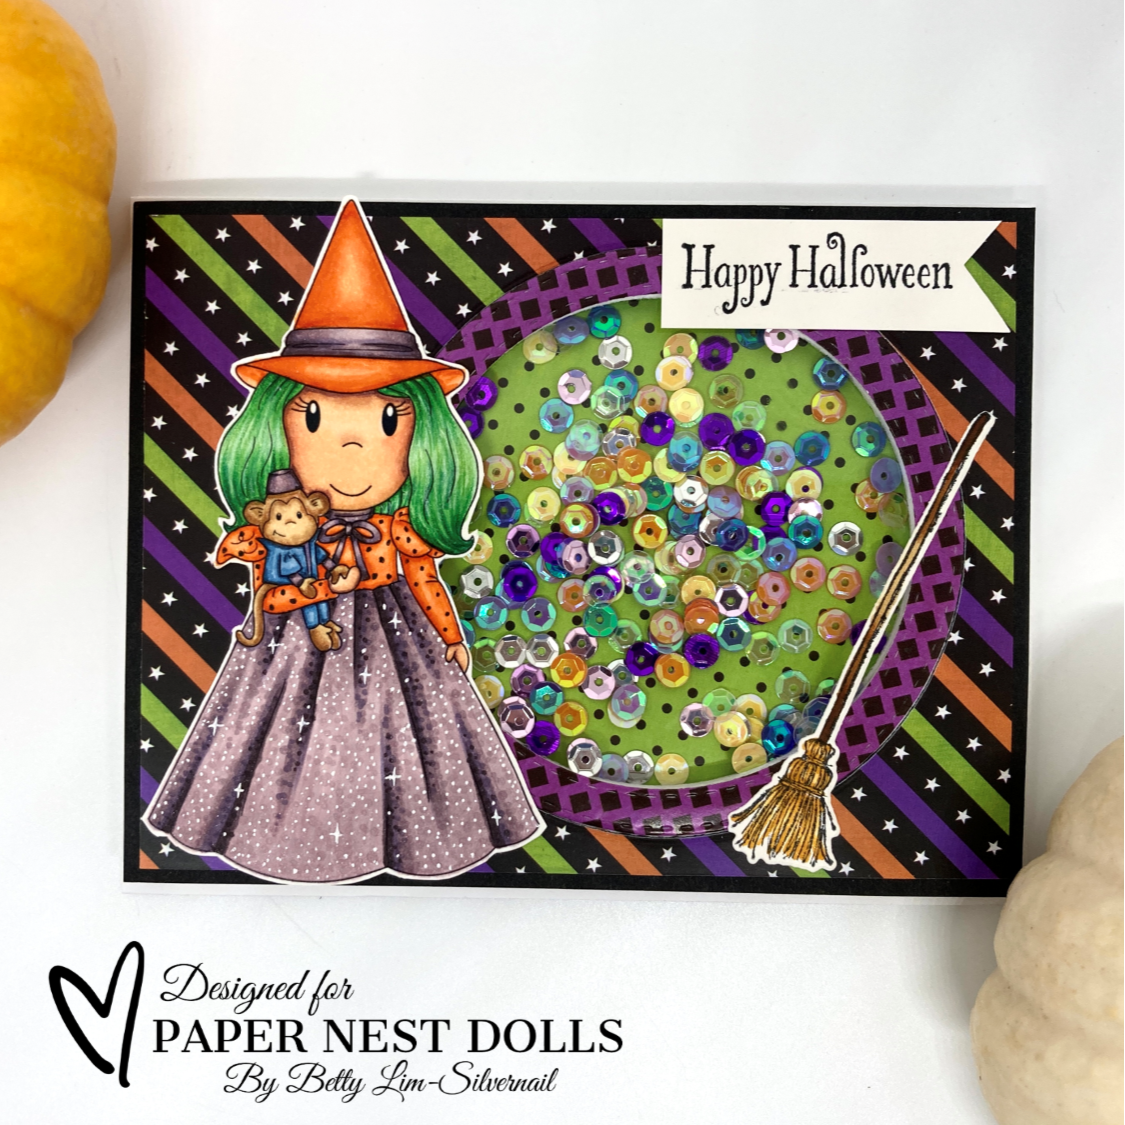
Hi PND Fans! It's Betty here today. I can't believe Halloween is less than three weeks away! I love creating cute Halloween cards to send to friends. I made this shaker card using the adorable Paper Nest Dolls stamp called Bad Witch Ellie. Bad Witch Ellie comes in both red rubber and digital formats. I used the digital format so that I could make the image the size I want.

Products used:
  • Paper Nest dolls Bad Witch Ellie Digital Stamp
  • Broom die:  Stampin' Up
  • Patterned papers: Stamp Anniething
  • Sequins: Hobby Lobby
Copic Markers & Prismacolor Pencils Used:

Witch:
Skin: E04, E11, E21, E00, E000
Cheeks: E93
Hair: G17, G14, G12 + PC908, PC909, PC912, PC938
Dress/Purple: V99, V25, V95, V93
Orange: YR07, YR68, YR02, YR61

Monkey:
Brown: E35, E33, E31, E30
Blue: B97, B95, B93
Purple: V99, V25, V95, V93

Broom: YR24, YR23, YR21


This stamp is so cute and fun to color! I hope you give it a try. 

Thank you for visiting today. I hope you have a wonderful and creative week! ~Betty~

Tuesday, October 4, 2022

My Pop & Twist Halloween Card


Hello Crafty Friends! It's Laurie here! I am sharing My Pop & Twist Halloween Card as my Design Team Inspiration Card for Paper Nest Dolls. I was honoured to have been asked to present my colouring and a project this past weekend for the Paper Nest Dolls’ Not So Spooky Magical Weekend! So, I created a tag for the event, but I had so much fun that I created a card using the stamps from the retreat and based it on my tag with a twist!

The Details of My Card

For my card, I decided to create a Pop & Twist card. I love how when you open the card, the stamps on the inside fold out and pop up!


The front of the card was based on the tag that I presented with a few tweaks to fit the card size.


The inside was where all the magic happened as you open the card! When I saw these cute critters, I knew I wanted to create a twist and pop card!

I used very little decorations on the inside since I wanted the card to fold as flat as possible, but I couldn’t resist some glittery bats and Halloween words.

--------------------------

Copic Markers:

Spooky Signpost

Pumpkins: E15/YR18/YR15/YR14/YR12
Pumpkin Eyes: YR18/YR14/Y15
Wood Post/Pumpkin Stems: E29/E25/E21
Orange Sign: YR18/YR15/YR14/YR12
Yellow Sign: Y38/Y17/Y15
Red Sign: R29/R27/R24/R22
Gray Sign/Spider: C5/C3/C1
Grass: G99/G94/G21

Girl Ghost

Sheet: B0000/B000/0
Nose/Mouth: C7/C5/C3
Bow: R29/R27/R24/R22/C5/C3/0

Dog

Fur: E39/E37/E35/E33/E31
Scarf: C7/C5/C3/C1
Collar: B99/B95/B93
Pumpkin: E15/YR18/YR15/YR14/YR12
Pumpkin Eyes: YR18/YR14/Y15

Boy Ghost

Sheet: B0000/B000/0
Nose/Mouth: C7/C5/C3

Cat

Fur: C7/C5/C3/C1/R20
Hat: B97/B95/B93
Scarf: B0000/B000/0
Pumpkin: E15/YR18/YR15/YR14/YR12

--------------------------

Card Recipe for My Pop & Twist Halloween Card:

Not So Spooky Magical Weekend Stamps, Paper Nest Dolls
Paper Basics - Stamper's Select White Cardstock, Papertrey Ink
Boo Crew, Simple Stories
Black Glimmer Paper, Stampin’ Up!
Brother Scan & Cut
Creatables Border with Pumpkins, Marianne Design
Spooky Bat Punch, Stampin’ Up!
Precision Die - Halloween Reverse-cut Words, Frantic Stamper
Black Stampin' Dimensionals, Stampin’ Up!
Cheese Cloth, My Kitchen
Black Sharpie
Basic Black and Pumpkin Pie Card Stock, Stampin’ Up!

Finished card size: 5 ½” x 4 ¼”

--------------------------

Stamp Sizes:

Spooky Signpost: 4 ½” Tall
Girl Ghost: 2 ½” Tall
Dog: 2 ½” Tall
Boy Ghost: 2 ½” Tall
Cat: 2 ¾” Tall

--------------------------

Hope you like my Design Team card for Paper Nest Dolls!

Thank you for stopping by!

Hugs,
Laurie

Sunday, October 31, 2021

Tombstone Treat Boxes


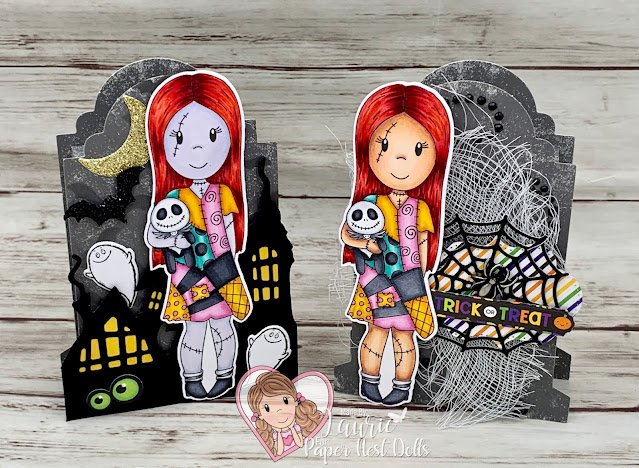
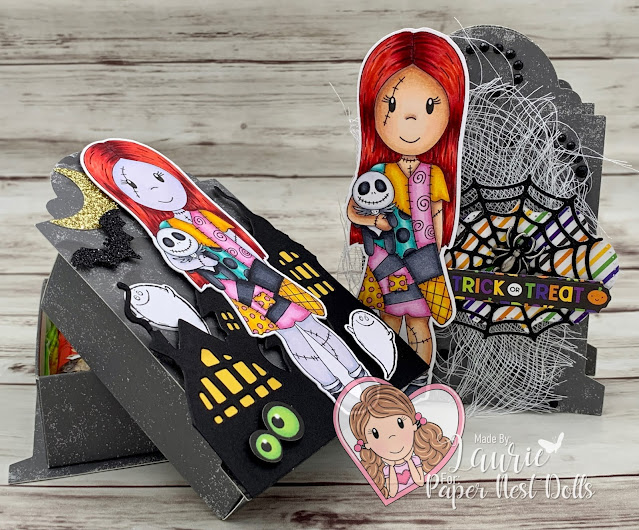
Happy Halloween Crafty Friends! It's Laurie here! Today I am sharing My Tombstone Treat Boxes as my Design Team Inspiration for Paper Nest Dolls using Ragdoll Sally.

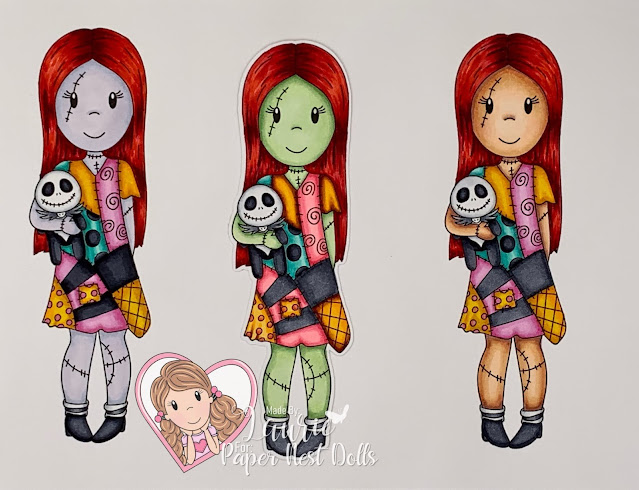
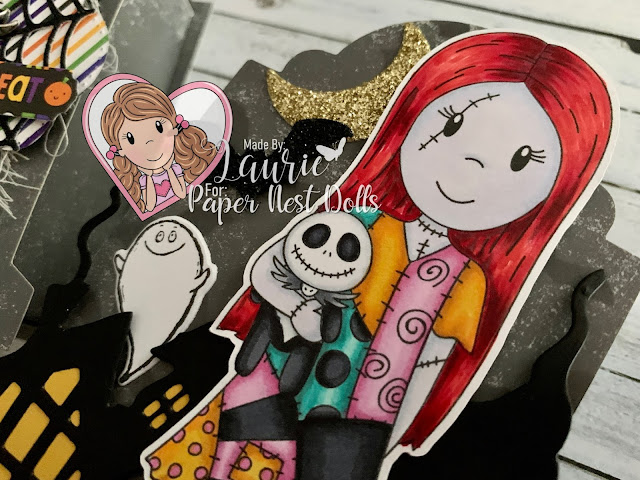
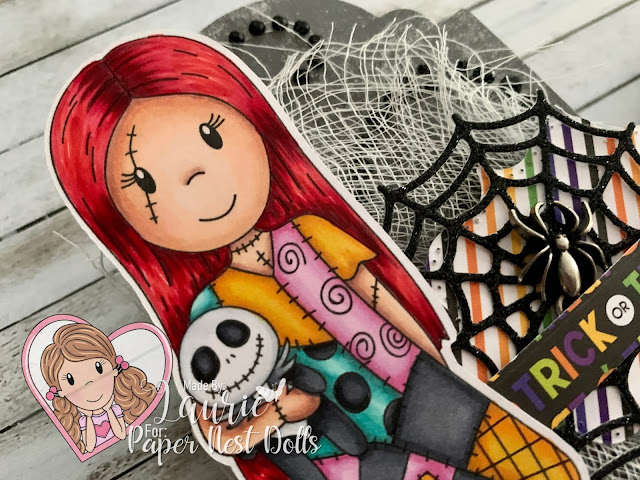
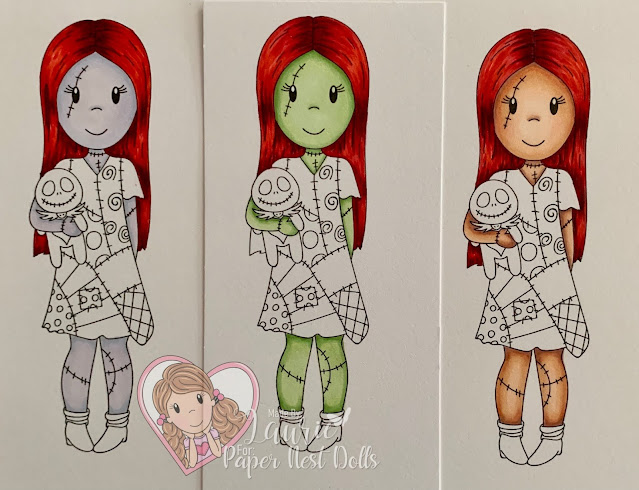
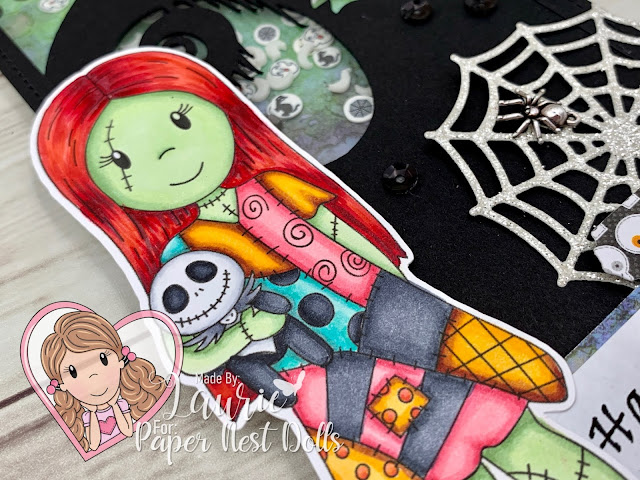
I had a lot of fun colouring this cutie with my Copic Markers! In fact, I coloured her skin in three different tones. So, I created a poll in The Paper Nest Dolls Inspiration Facebook Group on which skin tone was the most popular. The most popular green skin tone was used to create a card (Link to it here), but I couldn’t resist colouring the other two to create my treat boxes.


Since it’s Halloween what better way to celebrate with treat boxes to give out to all those cute trick-or-treaters! The Stampin’ Up! Tombstone Treat Boxes were so fun to decorate with lots of little bits from my stash! And the finishing touch was my coloured Ragdoll Sallys!

--------------------------

Copic Markers:


Hair: R29/R27/R24/C5
Purple Skin: BV20/B60/V20
Natural Skin: E000/E00/E21/E11/E04
Blacks on Dress: C7/C5/C4
Blues: BG18/BG15/BG13/BG11
Yellows: Y38/YR23/Y15
Pinks: RV55/RV63/RV52
Shoes: C7/C5/C4
Socks: C4/C3/C0
Jack Stuffie: C9/C7/C5
Jack’s Head: C3/C0/3
Jack’s Collar: C5/C4/C3


--------------------------

Recipe for My Tombstone Treat Boxes:


Ragdoll Sally, Paper Nest Dolls
Paper Basics - Stamper's Select White Cardstock, Papertrey Ink
Tombstone Treat Boxes, Stampin’ Up!

Treat Box 1
Black Glimmer Paper, Stampin’ Up!
Gold Glimmer Paper, Stampin’ Up!
Scary Town Builder Dies, Stamp AnnieThing
Cauldron Bubble Bundle, Stampin’ Up!
Sliding Star Framelits Dies, Stampin’ Up!
KP Halloween Die-Cut Cardstock, K& Company
Spooky Bats Punch, Stampin’ Up!
Basic Black and Crushed Curry Card Stock


Treat Box 2
Ghouls & Goodies 6” x 6” Paper Pad Doodlebug Design Inc.
Frightful Tags Dies, Stampin’ Up!
Black Glimmer Paper, Stampin’ Up!
Haunted Adhesive Rhinestones, Recollections
Idea-ology Adornments, Tim Holtz
Cheese Cloth
Basic Black Card Stock


Finished Treat Boxes size: 3.5” x 5”

--------------------------

Hope you like my Design Team Inspiration using
Ragdoll Sally by Paper Nest Dolls!

Thank you for stopping by!

Hugs,
Laurie


Tuesday, October 26, 2021

Birthday Slimline Shaker Card

Birthday Slimline Shaker Card

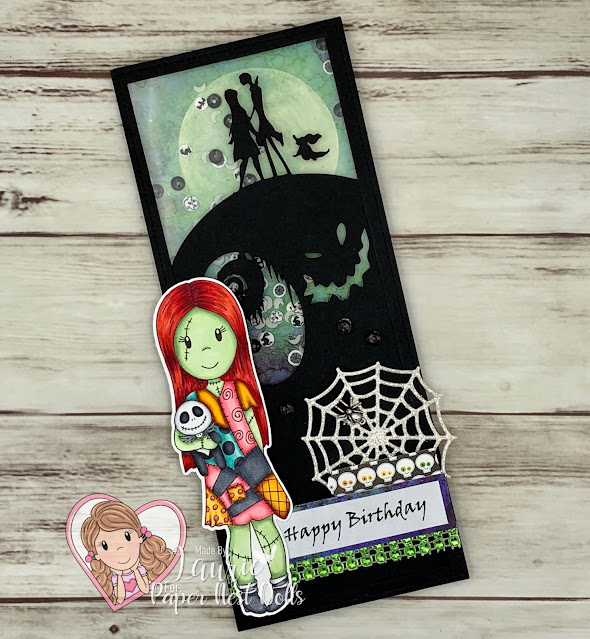
Hello Crafty Friends! It's Laurie here! Today I am sharing My Birthday Slimline Shaker Card as my Design Team Inspiration Card for Paper Nest Dolls using the Ragdoll Sally. Every year, my Hubby and I watch Nightmare Before Christmas for Halloween. It’s also my Hubby’s birthday on Thursday and I thought a birthday card with Ragdoll Sally would be perfect for him.

I had a lot of fun colouring this cutie with my Copic Markers! In fact, I coloured her skin in three different tones. So, I created a poll in The Paper Nest Dolls Inspiration Facebook Group on which skin tone was the most popular. It turned out that the green skin tone was the winner. So, I used her for my card.


Of course, I also coloured the others and created Halloween treat boxes with them which I plan to share later this week.

For my card, I decided to create not only a slimline card, but a shaker card with glow in the dark moons! So fun! I know my Hubby will get a kick out of it! I found this cool graphic on Etsy for Nightmare Before Christmas. So, I used my Silhouette Cameo to tweak it to fit my shape and then die cut it out. The moon paper was 6” x 6”, but since I only needed it for the top half of my card, I trimmed it down to fit.

The Happy Birthday sentiment was printed out on my computer using Word and the Viner Hand ITC font. I created a collage of different items around the sentiment including the glittery spider web and spider trinket. Don’t you love the pop of green that the mesh created at the bottom of the card to mirror her skin and the Lavinia moon paper!

--------------------------


Copic Markers:


Hair: R29/R27/R24/C5
Skin: G24/G21/G20/G40
Blacks on Dress: C7/C5/C4
Blues: BG18/BG15/BG13/BG11
Yellows: E18/E15/Y38/Y35
Pinks: RV14/RV13/RV21
Shoes: C7/C5/C4
Socks: C4/C3/C0
Jack Stuffie: C9/C7/C5
Jack’s Head: C3/C0/3
Jack’s Collar: C5/C4/C3


--------------------------


Card Recipe for My Birthday Slimline Shaker Card:


Ragdoll Sally, Paper Nest Dolls
Paper Basics - Stamper's Select White Cardstock, Papertrey Ink 
Spellbound 2 SceneScapes 6” x 6” Paper, Lavinia Stamps
October 21St. 6" x 6" Paper Pad, Doodlebug Design Inc.
Window Sheet, Stampin’ Up!
Dazzling Diamonds Glimmer Paper, Stampin’ Up!
Jack Skellington Bundle, SunMagicArt, Etsy
Silhouette Cameo
Small Slimline with Lift the Flaps, Lawn Fawn
Large Slimline with Sliders, Lawn Fawn
Frightful Tags Dies, Stampin’ Up!
Rhinestone Mesh, Crafts, Dollarama
Moon-Glow in the Dark Shakers, Dress my Crafts
Halloween Shakers, Dress my Crafts
Black Sequins, My Stash
Spider Trinkets, Stampin’ Up!
Basic Black Card Stock

Finished card size: 3.5” x 8.25”

--------------------------

Hope you like my Design Team Inspiration Card using
Ragdoll Sally by Paper Nest Dolls!

Thank you for stopping by!

Hugs,
Laurie


Thursday, October 7, 2021

Perfectly Wicked Interactive Card

Perfectly Wicked Interactive Card

Hello Crafty Friends! It’s Laurie here! Today I am sharing Perfectly Wicked Interactive Card as my Design Team Inspiration Card for Paper Nest Dolls using the Evil Fairy.

I was honoured to have been asked to present at the Paper Nest Dolls’ Party with the Villains Virtual Weekend Retreat that was this past weekend. I had so much fun creating my cards for the event that I made an extra one that I thought I would share with you today. The other cards that I presented at the Retreat will be posted at the end of this post.

To get in the mood and for inspiration, I just had to watch the movies both the live action and the cartoon! Any excuse to watch Disney is a good excuse in my books! Lol!


For this card, I coloured the Evil Fairy with my Copic Markers to matched the Disney cartoon. I have been wanting to use the Give a Whirl Dies from Stampin’ Up! and thought it would be perfect for my card! It is so fun to spin that little dial and see all the fun sentiments! These sentiments… “Perfectly Wicked!” and “Bad Girls Have More Fun!” …were created in Word. I added one of the digital papers behind them to blend in with the paper that I used on my card base. Since the Evil Fairy turns into a dragon at the end of the movie, I couldn’t resist adding a bright green dragon with a dusting of Black Soot on its edges. A castle and a few stars that were brushed with the Aged Brass were the only other elements that I added to my card.


--------------------------

Copic Markers:


Skin: E04/E11/E21/E00/E000/R20
Blacks: T10/T8/T7/T6/T5 (could use Cs instead)
Purples: V09/V06/V04
Dress: RV17/RV14/RV13
Staff: YG09/YG06/YG03/TG00
Crows: C9/C7/C6/C5/YR04/YR02

Close Up of The Evil Fairy on My Card
 
--------------------------

Card Recipe for Perfectly Wicked Interactive Card:


Evil Fairy, Paper Nest Dolls
Build a Castle Dies, Whimsy Stamps
Give It A Whirl Dies, Stampin’ Up!
Black Soot Distress Ink, Ranger Ink
Mini Ink Blending Tool, Ranger Ink
Art Alchemy-Metallique Wax-Aged Brass, Prima Marketing
Clear Star Gelly Roll Pen
Gorgeous Grape, Granny Apple Green and Black Card Stock

Finished card size: 4.25” x 5.5”


--------------------------

Cards from the Party with 
The Villains Retreat Weekend


Spinner Card Using Evil Queen and Princess and Apple by Paper Nest Dolls

Centre-Step Card with Evil Fairy by Paper Nest Dolls

--------------------------

Hope you like my Design Team card using
Evil Fairy by Paper Nest Dolls!

Thank you for stopping by!

Hugs,
Laurie

Tuesday, August 24, 2021

Evil Queen Card

Evil Queen Card

Hello Crafty Friends! It's Laurie here! I am sharing my Evil Queen Card as my Design Team Inspiration Card for Paper Nest Dolls using the new release Evil Queen digital stamp. She is also available as a rubber stamp here. She makes an awesome Halloween card!

--------------------------

Copic Markers:

Skin: E04/E11/E21/E00/E000/R20
Dress: BV08/V17/V15
Sleeves: V17/V15/V12
Blacks: C9/C7/C6/C5
White: C3/C/0
Reds: R39/R37/R35
Gold: E15/Y38/Y35/Y060/0
Green: YG09/YG06/YG03/YG00
Apple Stem: E15
Rhinestones: R37

Close Up of My DT Card

--------------------------

Card Recipe for My Evil Queen Card:

Evil Queen, Paper Nest Dolls
Paper Basics - Stamper's Select White Cardstock, Papertrey Ink
13th Hour 6.5” x 6.5” Paper Pad, Kaiser Craft
Witches Brew 6” x 6” Paper Pad, Jillibean Soup
Black Soot Distress Ink, Ranger
Blending Brush, Stampin’ Up!
Midnight Magic Overlays, Recollections, Michaels Arts & Crafts Store
Spider Web Doily, Stampin’ Up!
Adhesive Rhinestones, Recollections, Michael’s Arts & Crafts
Red Rhinestones Basic Jewels, Stampin’ Up!
Apple Sour, Nuvo Glow Drops
Glossy Accents, Ranger
White Gelly Roll Pen
Old Paintbrush
Basic Black Card Stock, Stampin’ Up!

Finished card size: 5.75” x 5.75”

--------------------------

Hope you like my Design Team card using the Evil Queen by Paper Nest Dolls!

Thank you for stopping by!

Hugs,
Laurie


Sunday, August 22, 2021

Evil Fairy by Noelene

 Hi everyone, Noelene back again today to share some D.T inspiration for the Paper Nest Dolls.

 Do you like to make your Halloween decorations?


For my project today I used the new image from the newest Villains Collection called Evil Fairy.
I created this shadow box for my daughters room by using cut files to make the shadowbox, flowers & cut vinyl for the name.


Copic Markers:
Dress: N0, N01, N04, N05, N07, N08, N09, N10, RV69, RV66, RV63, V17, V15
Skin: G0000, G000, G00, G12, BV02
Crystal Ball: YG11, YG06, YG03, YG00


Evil Fairy can be found in rubber here & in digital format here.

Thanks for stopping by!

Hugs

Noelene x


Tuesday, October 27, 2020

Halloween Sign by Noelene

 Hi all,

Noelene here with you today to share with you my latest D.T. inspiration. 


With the current situation around the world at the moment things may be a little different this year with Halloween & how you go about Trick or Treating, but that does not mean you have to miss out on all the fun. 


So for my inspiration today I wanted to share with you an easy project I made for Halloween. I filled an acetate box with some yummy lemon & orange Skittles. I then decorated with some fun Halloween themed paper & ribbon. I finished off with a tag I made using the spook-tac-ular image from Paper Nest Dolls called Halloween Sign. 


There you have it a simple Halloween treat gift!

Halloween sign is available in rubber here & in digi format here.

Thanks for stopping by!

Hugs

Noelene x


Thursday, October 22, 2020

A Goth Family Portrait


Hello Crafty Friends! It's Laurie here sharing my Goth Family Portrait for the Design Team of Paper Nest Dolls. This card incorporates 4 different digital stamps that include Goth Dad, Goth Mom, Goth Boy and Goth Girl from the October New Release to create my family portrait!

A Goth Family Portrait

When I was little, I loved to watch the Addams Family in B&W on TV. I was so excited when I saw this month’s release! I decided to colour the family in the colours from the Addams Family movies. So, I gave them very pale skin, but with dark clothing using only T Copic Markers to achieve the effect. I love the pop of colour with the rose and the alligator. I thought they would want to have their portrait taken in front of some of their ancestors that are hung on the wall. Being a Halloween card, you have to have spider webs with spiders in the corners. I hope you like my take on my family portrait!

Close Up of A Goth Family Portrait


--------------------------

Copic Markers:

Goth Dad
Skin: E50/E51/E53
Hair: T9/T7/T5/T3
Suit: T9/T7/T5 (dark stripes), T5/T3/T1 (light stripes)
Tie: T9/T7/T5/T4
Shirt: T2/0
Shoes: T9/T7/T5

Goth Mom
Skin: E50/E51/E53/R20
Hair: T9/T7/T5/T4/T3
Dress: T9/T7/T5/T3
Rose: R39/R37/R35/R32/G21/G94/G99

Goth Boy
Skin: E50/E51/E53
Hair: E57/E43/E53/E50
Shirt: T9/T7/T5 (dark stripes), T2/T1/0 (light stripes)
Pants/Socks/Shoes: T9/T7/T5
Alligator: YG03/YG17/YG67
Leash: E57/E43

Goth Girl
Skin: E50/E51/E53/R20
Hair: T9/T7/T5/T3
Dress: T5/T4/T3/T2/T1/0
Shoes: T9/T7/T5
Socks: T9/T7/T5 (dark stripes), T2/T1/0 (light stripes)
Doll: Same colours as Girl

--------------------------

Card Recipe for Goth Family Portrait:

Goth Dad, Goth Mom, Goth Boy, Goth Girls, Paper Nest Dolls
Cauldron Framelits Dies, Stampin’ Up!
Pinewood Planks 3D Embossing Folder, Stampin Up!
Magic in this Night Designer Series Paper, Stampin Up!
Monster Bash Designer Series Paper, Stampin Up!
Spider Trinkets, Stampin’ Up!
Basic Black Card Stock, Stampin’ Up!

--------------------------

Hope you like my Goth Family Portrait
using The Goth Digital Stamps by Paper Nest Dolls!

Thank you for stopping by!

Hugs,
Laurie


copyright © 2013 the paper nest · graphics by erica belton · web design by red peach designs