Monday, July 26, 2021

Making Memories

Hello PND Friends! Betty here today. I haven't done any traveling since the COVID pandemic started and my family decided to wait until 2022. We had an Alaskan cruise scheduled in May of 2020 that was canceled. Our goal is to go sometime next year. As soon as we get our cruise booked, I will start packing my bags so I don't forget anything. I will try not to over pack like Emma on my card, LOL! This stamp is from Paper Nest Dolls called Bon Voyage Emma. I used a sentiment from Whimsy Stamps to make this card versatile so it can be used for any going-away occasion.


I first stamped and colored Bon Voyage Emma with Copic markers, Prismacolor pencils, and Arteza glitter and metallic pens. It is fun to color with a variety of mediums.


Medium & Colors Used

Skin: Copic E15, E13, E11, E21, E00
Hair: Copic E59, E57, E31
Shirt and Bows: Prismacolor PC1006, PC992; Arteza Glitter Pen - Pink
Skirt: Prismacolor PC1063, PC929, PC928; Arteza Glitter Pen - Pink
Teddy Bear: Prismacolor PC946, PC943
Suitcase (Gray): PC1056, PC1054, PC1051; Arteza Metallic Pen - Silver
Suitcase (Teal): PC PC1006, PC992; Arteza Metallic Pen - Silver
Tags: Prismacolor PC929, PC928
Grass: Copic G17, G09, Prismacolor PC992 (undercoat)
Flower: Arteza Glitter Pen Pink and Green

The patterned paper is from Freepik, Designed by macrovector. The pink and teal papers are from Photoplay.  I cut all papers to fit an A6 card. I used a wacky stitch die from Gina Marie Designs to cut out a mat/frame for the colored image. To finish the card, I added some enamel dots from my stash.


Thank you for stopping by and I hope you all have a creative week! ~Betty~

Sunday, July 25, 2021

Welcome Wagon by Noelene

 Hi everyone, Noelene here today to share with you a baby card I recently made using the super cute PND image called Welcome Wagon.


After colouring with Copics I created this slimline card with minimal dies & enamel dots to embellish.


Copic Markers:
Elephant/Duck: B000, B00
Wagon: C01, C0
Bear: V01, V00, V000
Banner: G00, G000


Welcome Wagon can be found in rubber here & in digital format here.

Thanks for stopping by!

Hugs

Noelene x


Friday, July 23, 2021

Sunshine Ellie

  Hello my crafty friends!!

It's Candace here today on the Paper Nest Dolls blog!!

Today I'm showcasing the stamp Sunshine Ellie.  She comes in red rubber and digital stamp image.  I used the digital image, colored her up and added to the front of mason jar box card.  The sentiment was perfect with her!!


Thanks for stopping by and have a great day!

Sunday, July 11, 2021

Emma with Camera by Noelene

 Hi all,
Noelene back again today to share some D.T inspiration. Today I am sharing a card using Paper Nest Dolls image called Emma with Camera.


I have made this pretty card using dies & layering my papers & die cut shapes.


Copics Markers:
Hair: E49, E47, E43, E42
Skin: E11, E00, E000, E0000, R20, R30
Clothes & Camera: C4, C1, C0, C00, R85, R83, R81, RV00


Emma with Camera can be found in rubber here & in digital format here.

Thanks for stopping by!

Hugs

Noelene x


Saturday, July 10, 2021

Paper Nest Dolls Christmas in July with Scrapbook Expo 2021

 Good morning friends!

Today, July 10th is the Scrapbook Expo Home Edition! It is also my birthday!! I digress...

For the Home Edition Expo, I made a little shaker ornament. This is super easy, fun, and oh so adorable! This would totally make an awesome kids' Christmas party craft. 


You can find the video tutorial HERE...https://www.facebook.com/SCRAPBOOKEXPO/videos/353505146160760


COPIC COLORS

White: C5, C3, C2, C1
Cheeks: R30
Arms: E27, E23
Nose: YR09, YR07, YR04
Hat and Scarf: BG15, BG11, BG10, BV08, BV04, BV02


Did you notice the top piece changed colors from picture to picture? Where the twine is for the hook? The paper I used is iridescent. I got it from packaging out of a box for toys or something. The paper kind of reminds me of a mirror. 

Anyway...the top didn't actually change colors. It's just the angle and lighting. 

I cut all the pieces with my Cricut. I created the shaker frame in Design Space using a Cricut image. You can find the link to the project HERE... https://design.cricut.com/landing/project-detail/60d7e435ca8c560e7c9580bc

When you are done with your ornament please share it with us in the Paper Nest Dolls Facebook group https://www.facebook.com/groups/papernestsdolls/

Thank you for popping in for a visit! Have a TOADALLY craftastic day!! 

Tina. 


Friday, July 9, 2021

Avery with Summer Drink

 Hello my crafty friends!!

It's Candace here today on the Paper Nest Dolls blog!!

Today I'm showcasing the stamp Avery with Summer Drink.  She comes as a digital image HERE.  I found this adorable mini cup box file, cut it out and assembled and then added Avery to the front.  I filled the mini cup with lemonade packets that you just add to water.  Thought this was a super fun summer treat!


Thanks for stopping by and have a great day!

Thursday, July 8, 2021

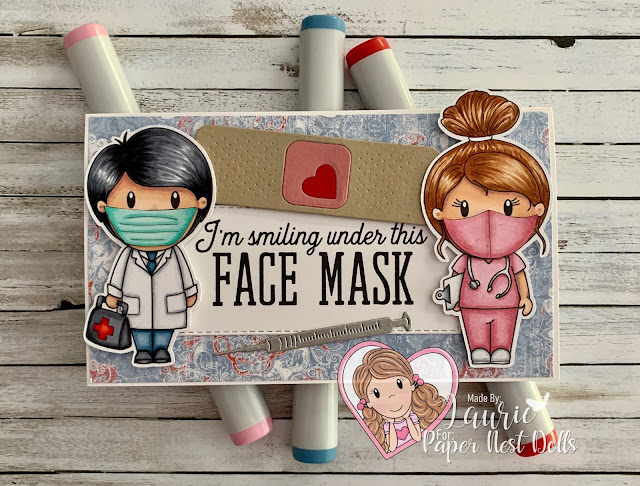
I’m Smiling Under This Face Mask

 My Covid Card

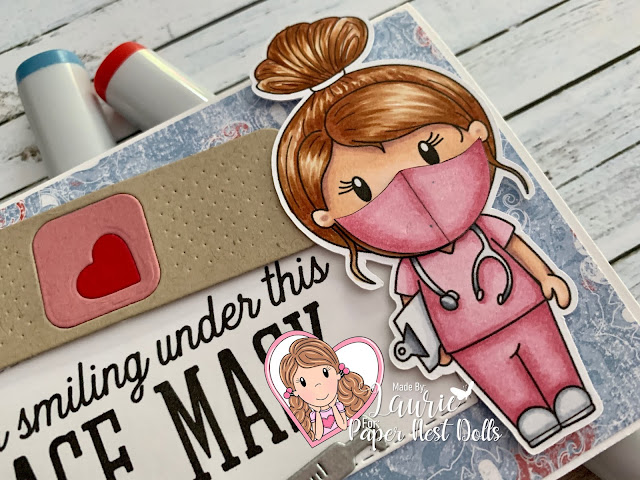
Hello Crafty Friends! It's Laurie here! I am sharing I’m Smiling Under this Face Mask as my Design Team Inspiration Card using a number of digital stamps by Paper Nest Dolls including Essential Worker (Doctor), Essential Worker (Nurse), Essential Workers (Masks Set) and Avery in Heart.

I just received my second dose of the Covid vaccine on Monday and my Hubby received his on July 1st, which was Canada Day for us. So, I made a card for my Hubby and a different one for me to give to the medical staff as our way of showing our appreciation for what they are doing.

Avery In Heart

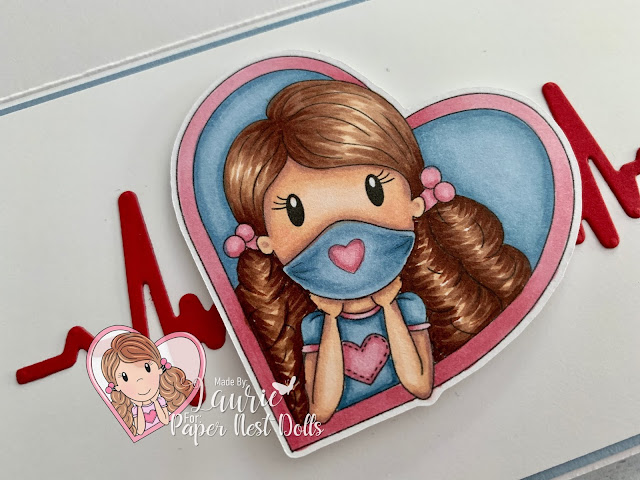
I love how you can add the Essential Workers (Masks Set) to a digital stamp either afterwards like I did with the doctor and nurse or add it directly to the stamp. I decorated the inside of my card with the Avery in Heart digital stamp, but I added a mask directly to her using Word. I coloured her with my Copic markers to match the nurse and doctor on the front of my card. I then layered her onto the heart beat which I die cut from a die in my stash.

Another Covid Card

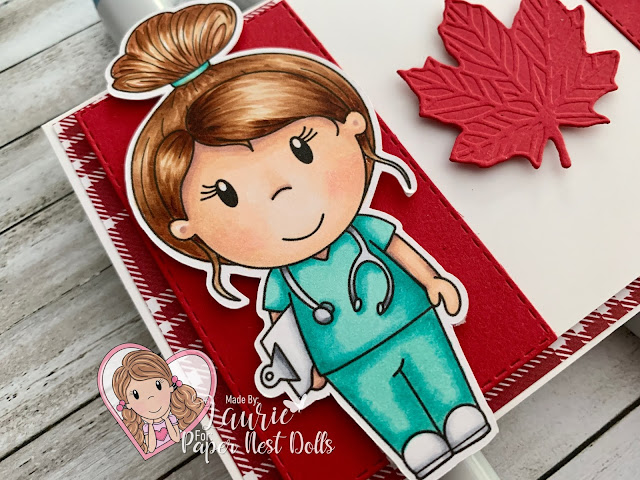
For my Hubby’s card, I created a Canadian flag on the front since he was getting it done on Canada Day. I even used “red/white checked flannel” Designer Series Paper for the background. Can’t get any more Canadian than that! Lol! Instead of using the Essential Workers (Masks Set), I left their faces bare. Isn't it neat how you can get two different looks with and without the masks!

--------------------------

Copic Markers:


Masked Doctor
Skin: E04/E11/E21/E00/E000/R20
Hair: C9/C7/C6/C5/C3
Pants/Tie: B99/B97/B95
Coat/Shirt: C3/C0/0
Doctor Bag: R29/R27/R24/R22/C3/C5/C7
Shoes: C7/C5/C3
Mask: BG13/BG11/BG10

Masked Doctor

Masked Nurse
Skin: E04/E11/E21/E00/E000/R20
Hair: E39/E37/E35/E33/E31
Uniform/Mask: R85/R83/R81
Shoes/Stethoscope/Clip Board: C5/C3/C1

Masked Nurse

Doctor
Skin: E04/E11/E21/E00/E000/R20
Hair: E25/YR24/Y26/Y21
Pants: E37/E35/E33/E31
Tie: B99/B97/B95
Coat/Shirt: C3/C0/0
Doctor Bag: R29/R27/R24/R22/C3/C5/C7
Shoes: C7/C5/C3

Doctor

Nurse
Skin: E04/E11/E21/E00/E000/R20
Hair: E39/E37/E35/E33/E31
Uniform: BG13/BG11/BG10
Shoes/Stethoscope/Clip Board: C5/C3/C1

Nurse

Avery in Heart
Skin: E04/E11/E21/E00/E000/R20
Hair: E29/E27/E25/E23/E21
Blues: B99/B97/B95
Pinks: R85/R83/R81

Avery in Heart

--------------------------

Card Recipe for I’m Smiling Under This Face Mask:


Paper Basics - Stamper's Select White Cardstock, Papertrey Ink
Share Sunshine PDF Download, Stampin’ Up!
Heart Beat Die, From my Stash
Heart Punch Pack, Stampin’ Up!

My Card
Woven Threads Designer Series Paper, Stampin’ Up!
Galvanized Metal Paper, Stampin’ Up!
Nurse’s Gear Precision Cutting Dies, Frantic Stamper Inc.
Adhesive Bandage Precision Cutting Dies, Frantic Stamper Inc.
Seaside Spray, Crumb Cake, Rococo Rose
and Basic White Card Stock, Stampin’ Up!

Hubby’s Card
Frostwood Lodge Designer Series Paper, Stampin’ Up!
Gathered Leaves Dies, Stampin’ Up!
Stitched Rectangle Dies, Stampin’ Up!
Real Red and Basic White Card Stock, Stampin’ Up!

Finished cards size: 3.5” x 6”

--------------------------

Hope you like my Design Team Inspiration Card using

Thank you for stopping by!

Hugs,
Laurtie

Wednesday, July 7, 2021

Paris Glam Girl


Hi Crafty Friends,
I have a fancy GLAM card for you today featuring French Girl Celine from Paper Nest Dolls. I love the pink and black combo with the silver pearls to make her GLAM.

Make Crafty Friends Q & A:
Q: Have you ever been to France?
A: Me? No, but maybe one day


Don't forget to subscribe, follow, and comment on my blog for your chance to win my July Prize and for more giveaways and inspiration follow me on Instagram @MadeByMeghanK

 
Supplies:
Paper Nest Dolls French Girl Celine
Concord & Ninth Plaid Coverplate Dies
Kat Scrappiness Uppercase Alphabet Dies
Kat Scrappiness Silver Pearls

Sunday, July 4, 2021

Happy Fourth of July!

Hi Crafty Friends,
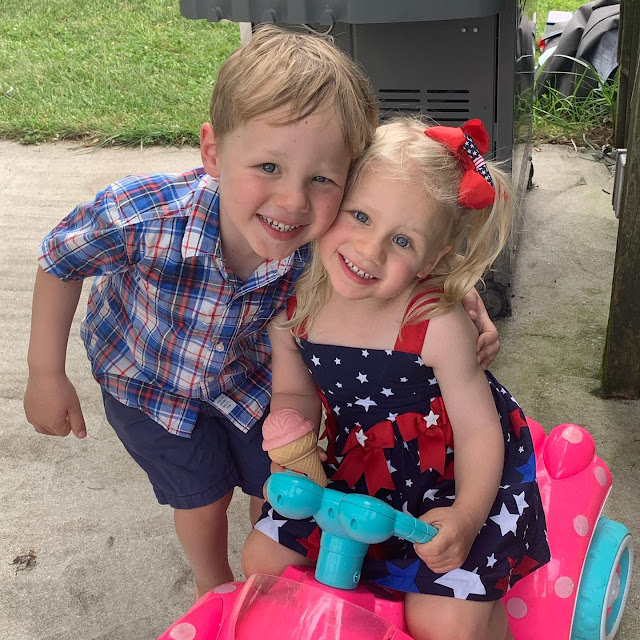
Happy 4th of July! I have a FABULOUS FOURTH card for you using Paper Nest Dolls Superstar Ellie! I colored her up in Red, White, and Blue! I hope you are enjoying some time off and an outdoor BBQ today! I was inspired by my niece and nephew's RWB outfits below.

Make Crafty Friends Q & A:
Q: Do you watch fireworks on the fourth?
A: Me? We used to go downtown Chicago and watch them every year but I haven't seen fireworks in probably 5+ years


Don't forget to subscribe, follow, and comment on my blog for your chance to win my July Prize and for more giveaways and inspiration follow me on Instagram @MadeByMeghanK

Supplies:
Paper Nest Dolls Superstar Ellie
Taylored Expressions Starstruck Stamp & Stencil Set
Gina K Glitter Gelz
Newton's Nook Frames Dies

Saturday, July 3, 2021

Have a Fairy Happy Birthday

Hello PND Fans! Betty here today.  I can't believe it's July already! I have several family members and friends that have July birthdays so I decided to make this cute slimline fairy birthday card for one of them. I used the Paper Nest Dolls digital Fairy Set that comes with a fairy house, 4 fairies and 3 sets of flowers. You can use the stamps together or use them separately. They are digital, so you can make the image any size you like. 


I colored the fairies using Copic markers. I used a Spectrum Noir Sparkle pen to add some sparkle to the wings. I used stencil butter from The Crafter's Workshop and a stencil from Blank Page Muse to create the background. The sentiment was created using Microsoft Word. Very easy and simple card to make. 


Copic Markers Used
Skin: E15, E13, E11, E21, E00
Cheeks: R20
Hair: C9, C7, C5, C3 
I also used Prismacolor pencils in Black and White after
I got a big blob from my new C7 Copic.
Pink: R85, RV63, RV52, V000
Wings: R85, RV63, Y15, B02, BG05 


Copic Markers Used
Skin: RV34, E13, E02, E01, E00
Hair: E37, E35, E34, E31
Green: YG67, YG17, YG13, YG11
Lady Bug: R29, R24, R21, T5, T3
Wings: T5, T3, YG17, YG13

Copic Markers Used
Skin: E04, E11, E21, E00, E000
Cheeks: R20
Hair: E18, E08, YR18, YR14
Aqua: BG07, BG05, BG02, BG01
Wand: E35, E33, E31; Star: E25, Y38, Y31
Wings: RV93, RV02, BG0001, BG01, Y15


Thank you for stopping by today. Have a very creative week! ~Betty~

copyright © 2013 the paper nest · graphics by erica belton · web design by red peach designs