Showing posts with label Copics. Show all posts

Tuesday, October 18, 2022

Happy Hauntings Halloween Card


Hello Crafty Friends! It's Laurie here! I am sharing my Happy Hauntings Halloween Card as my Design Team Inspiration Card for Paper Nest Dolls using Secret Girl Emma.

The Details of My Card

For my card, I decided to create a Halloween card and colour her with my Copic markers like Coraline in the movie. But Emma would be great for Spring, back to school, birthday and so many more occasions!

I had to add a spooky spider web panel with a glittery spider on it. The openings of the spider web allowed me to add some bootackular paper behind it! Lol! I thought it would be fun having her walking by a graveyard as she is trick-or-treating. The sentiment is from the Chit Chat and I just cut off the pointy speech bubble part to make it non-directional and more like a sentiment.

The Halloween candy banner was perfect for my card since she is trick-or-treating! A couple of sprinkles to match her jacket/boots and a black rhinestone were all the other embellishments this card needed.

--------------------------

Copic Markers:

Skin: E04/E11/E21/E00/E000/R20
Freckles: E15
Hair: B24/B97/B39/B99
Yellows: Y11/Y13/Y15/Y17
Reds: R56/R39/R59
Blues: BG75/BG72/B52


Card Recipe for My Happy Hauntings Halloween Card:

Secret Girl Emma, Paper Nest Dolls
Paper Basics - Stamper's Select White Cardstock, Papertrey Ink
Cute Halloween 6” x 6” Designer Series Paper, Stampin’ Up!
Carnival Candy Chit Chat, Doodlebug Design Inc.
Boneyard Edgers Die, Frantic Stamper Inc.
Spiderweb Card Panel Die, Frantic Stamper Inc.
Spider Glitter Sticker, Jolee’s Boutique
Candy Banner Sticker, Jolee’s Boutique
Halloween Assortment Sprinkles, Doodlebug Design Inc.
Black Rhinestone Jewels, Stampin’ Up!
Glossy Accents, Ranger (Boots)
Clear Wink of Stella, Stampin’ Up! (Hair Barrett)
Black Stampin' Dimensionals, Stampin’ Up!
Basic Black, Basic White and Crushed Curry Card Stock, Stampin’ Up!

Finished card size: 5 ½” x 4 ¼”

Stamp Size: 4” Tall

--------------------------

Hope you like my Design Team Inspiration Card for Paper Nest Dolls!

Thank you for stopping by!

Hugs,
Laurie

Thursday, December 9, 2021

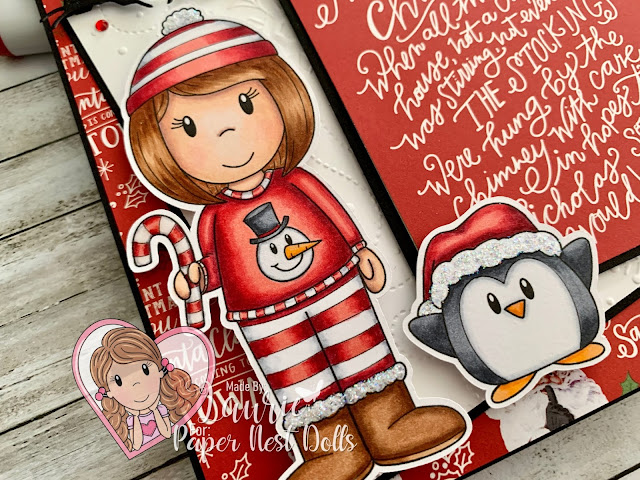
Christmas Pyjamas Card


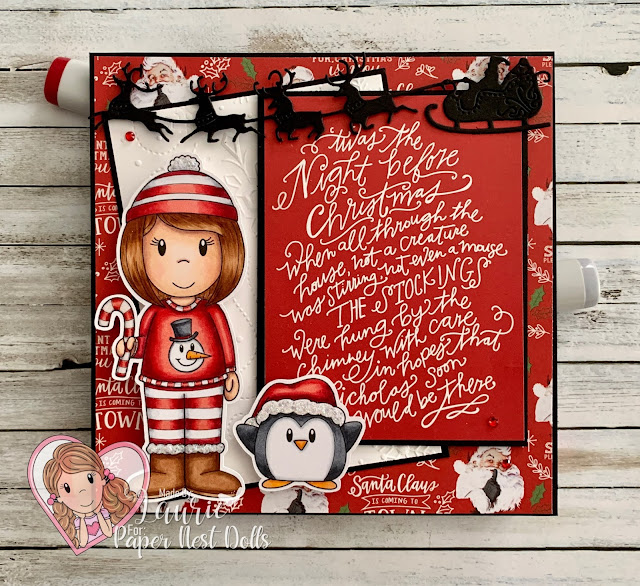
Hello Crafty Friends! It's Laurie here! I am sharing my Christmas Pyjamas Card as my Design Team Inspiration Card for Paper Nest Dolls using the digital stamp called Emma in Snowman Sweater

For my card, I decided that this cutie reminded me of the matching Christmas PJs that are so popular! So, I coloured her and her little friend with my Copic Markers in matching red and white. I love that you can have both cuties together or use them separately to suit your card! 

--------------------------

Copic Markers:

Skin: E000/00/21/11/04/R20
Hair: E33/E35/E37/E39
Reds: R39/R37/R35/R32
Leggings/Sweater Trim/Candy Cane: R37/R32/C3/0
Boots: E33/E35/E37/E39
Snowman: C7/C5/C4/R37/C3/0/YR04/Y38
Penguin Feathers: C7/C5/C4/C3/C0/0
Penguin Feet/Beaks: YR04/Y38/YR12


--------------------------

Card Recipe for My Christmas Pyjamas Card:

Emma in Snowman Sweater, Paper Nest Dolls
Paper Basics - Stamper's Select White Cardstock, Papertrey Ink
North Pole Trading Co. 6” x 6” Paper Pad, Photo Play
Santa's Sleigh and Reindeer Die Cut, Cheery Lynn Designs
Wintry 3D Embossing Folder, Stampin’ Up!
Red Rhinestone Basic Jewels, Stampin’ Up!
Stardust Stickles, Ranger (Hat/Boot Trim)
Glossy Accents, Ranger (Candy Cane)
Basic White and Basic White Card Stock, Stampin’ Up!

Finished card size: 5.5” x 5.5”

--------------------------

Hope you like my Design Team card using
Emma in Snowman Sweater by Paper Nest Dolls!

Thank you for stopping by!
Hugs,
Laurie


Thursday, November 19, 2020

My Gingerbread Fun Fold Card

My Gingerbread Fun Fold Card

Hello Crafty Friends! It's Laurie here sharing My Gingerbread Fun Fold Card for the Design Team of Paper Nest Dolls. I used a number of digital stamps to create my fun gingerbread card including Gingerbread House, Gingerbread Boy, Gingerbread Girl, Gingerbread Winter Boy, Tiny Emma with Cookie and Tiny Ellie with Candy Cane.

My Gingerbread Fun Fold Card Showing Layers

I had so much fun creating this wonderland of gingerbread. I had an idea that I wanted to create a centre-step card and planned to use my colouring from the recent 30 Day Coloring Challenge to build my card. I’m so happy with how it turned out!

The Steps of My Gingerbread Fun Fold Card

I created a ton of layers with the snow banks that all sparkle with Stardust Stickles and then layered my characters between them in the different folds. Of course, that is not all that sparkles! The windows of the house, Ellies’s candy cane and Emma’s peppermint candy bow all have glossy accents. I even added Clear Wink of Stella to the peppermint swirl on the house, the gum drops in front of the house, the Gingerbread Girl’s bow and hearts and the heart on Ellie’s dress! Can’t have a Christmas card without Christmas trees all dressed up for Christmas with stars and red Christmas lights! The Snowflake Splendor Designer Series Paper by Stampin Up! was perfect to create my snowy scene.

--------------------------

Copic Markers:


Tiny Ellie with Candy Cane
Skin: E000/00/21/11/04/R20
Hair: E99/YR23/YR24
Reds: R39/R29/R27/R24
Greens: G99/G94/G21
Candy Cane: R39/R27/R24/C1/0, Glossy Accents
Stardust Stickles on Pompom

Tiny Ellie with Candy Cane and Gingerbread Winter Boy

Gingerbread Winter Boy
Cookie: E35/E33/E31/E30/R20
Reds: R39/R29/R27/R24
Greens: G99/G94/G21
Stardust Stickles on Pompom

Tiny Emma with Cookie

Tiny Emma with Cookie
Skin: E000/00/21/11/04/R20
Hair: E37/E35/E33/E30
Reds: R39/R29/R27/R24
Greens: G99/G94/G21
Candy Bow: R39/R27/R24/C1/0/G99/G94/G2
Cookie: E30/E33/E35/R29/R20
Glossy Accents on Peppermint Swirl in Bow

Gingerbread Girl:
Cookie: E35/E33/E31/E30/R20
Reds: R39/R29/R27/R24
Clear Wink of Stella on Bow

Gingerbread Boy and Girl

Gingerbread Boy:
Cookie: E35/E33/E31/E30/R20
Reds: R39/R29/R27/R24
Greens: G99/G94/G21

Gingerbread House

Gingerbread House:
Cookie: E35/E33/E31
Reds: R39/R29/R27/R24
Greens: G99/G94/G21
Snow: BG11/BG10/0
Glossy Accents on Windows
Clear Wink of Stella on Gum Drops/Peppermint Swirl
Stardust Stickles on Snow

--------------------------

Card Recipe for My Gingerbread Fun Fold Card:


Majestic Mountain Dies, Stampin’ Up!
Freezin’ Friends Dies, Stampin Up!
Snowflake Splendor Designer Series Paper, Stampin Up!
Star Designer Elements, Stampin Up!
Red Rhinestone Basic Jewels, Stampin’ Up!
Stardust Stickles
Glossy Accents
Clear Wink of Stella
Thick Whisper White Card Stock, Stampin’ Up!
Finished card size: 6” x 4 ½”

My Gingerbread Fun Fold Card

--------------------------

Hope you like My Gingerbread Fun Fold Card

Thank you for stopping by!

Hugs,
Laurie


Thursday, September 17, 2020

That’s Amore Anniversary Card

That's Amore Anniversary Card

Hello Crafty Friends! It's Laurie here sharing my That’s Amore Card for the Design Team of Paper Nest Dolls. This sweet rubber stamp is called Italian Love. I coloured this cute couple to look like my Hubby and me since this card is for my Hubby and our 26th Wedding Anniversary which is today.

This card is my homage to when we first met and started dating in university. The first time I saw him, he was just back from a vacation in Florida. He was so tanned with his hair bleached from the sun. Hence why he is a little more tanned than me in my colouring. Lol! My hubby’s favourite dinner is spaghetti and meatballs. When we were dating, he would take me to Mother’s Pizza Parlour and Spaghetti House with their plastic red and white checked tablecloths for dinner. He would always order his spaghetti with a garlic bread with cheese. We never split it like the couple here, but that would have been so romantic!


--------------------------

Copic Markers:

Skin: E000/00/21/11/04/R20
Girl’s Hair: E30/E31/E33/E35/E37
Dress: R22/R24/R27/R29
Boy’s Hair: E57/E43/E53
Shirt: BG10/BG11/BG13
Meatballs: E31/E33/E35/E37
Spaghetti Noodles: E51/E53
Tomato Sauce: R22/R24/R27
Cutlery/Plate: C1/C3/C5
Table Top: E31/E33/E35

Close Up of That's Amore Anniversary Card

--------------------------

Card Recipe:

Italian Love, Paper Nest Dolls
Tuxedo Black Memento Ink Pad
Real Red Classic Ink Pad, Stampin’ Up!
Tim Holtz Vintage Photo Distress Ink Pad, Ranger
VersaMark Ink Pad
White Stampin’ Emboss Powder, Stampin’ Up!
More Amore Specialty Designer Series Paper, Stampin’ Up!
Buffalo Check Clear Mount Stamp Set, Stampin’ Up!
Meant to Be Cling Stamp Set, Stampin’ Up!
Be Mine Stitched Framelits Dies, Stampin’ Up!
Love Notes Framelits Dies, Stampin’ Up!
Expressions Thinlits Dies, Stampin’ Up!
Rhinestone Stickers, Dollorama
Trinket Hearts, Stampin’ Up!
Red/White Baker’s Twine
Clear Star Stickles
Stamping Sponges, Stampin' Up!
Real Red, Flirty Flamingo, Pool Party and
Whisper White Card Stock, Stampin’ Up!
Card Size: 5 ½” x 5 ½”

--------------------------

Hope you like my That’s Amore Anniversary Card using Italian Love by Paper Nest Dolls!

Thank you for stopping by!
Hugs,
Laurie


Wednesday, September 2, 2020

Avery in Rain Poncho

Hello crafty friends!  It's Amanda Fitterer here!  I'm just in love with this sweet Avery and her little duck friend!


I colored this scene with Copic markers.

Skin:  E00, E21, E11, E04, R21

Hair:  BV00, BV01, BV000, BV02, BV04

Duck:  YR21, YR15, Y02, Y15, Y17


Rain poncho:  BG32, BG11, BG10, Y02, Y15, Y17

Thank you so much for stopping by The Paper Nest Dolls blog and visiting my post!  Xoxo, Amanda

Thursday, August 27, 2020

Happy Hanukkah

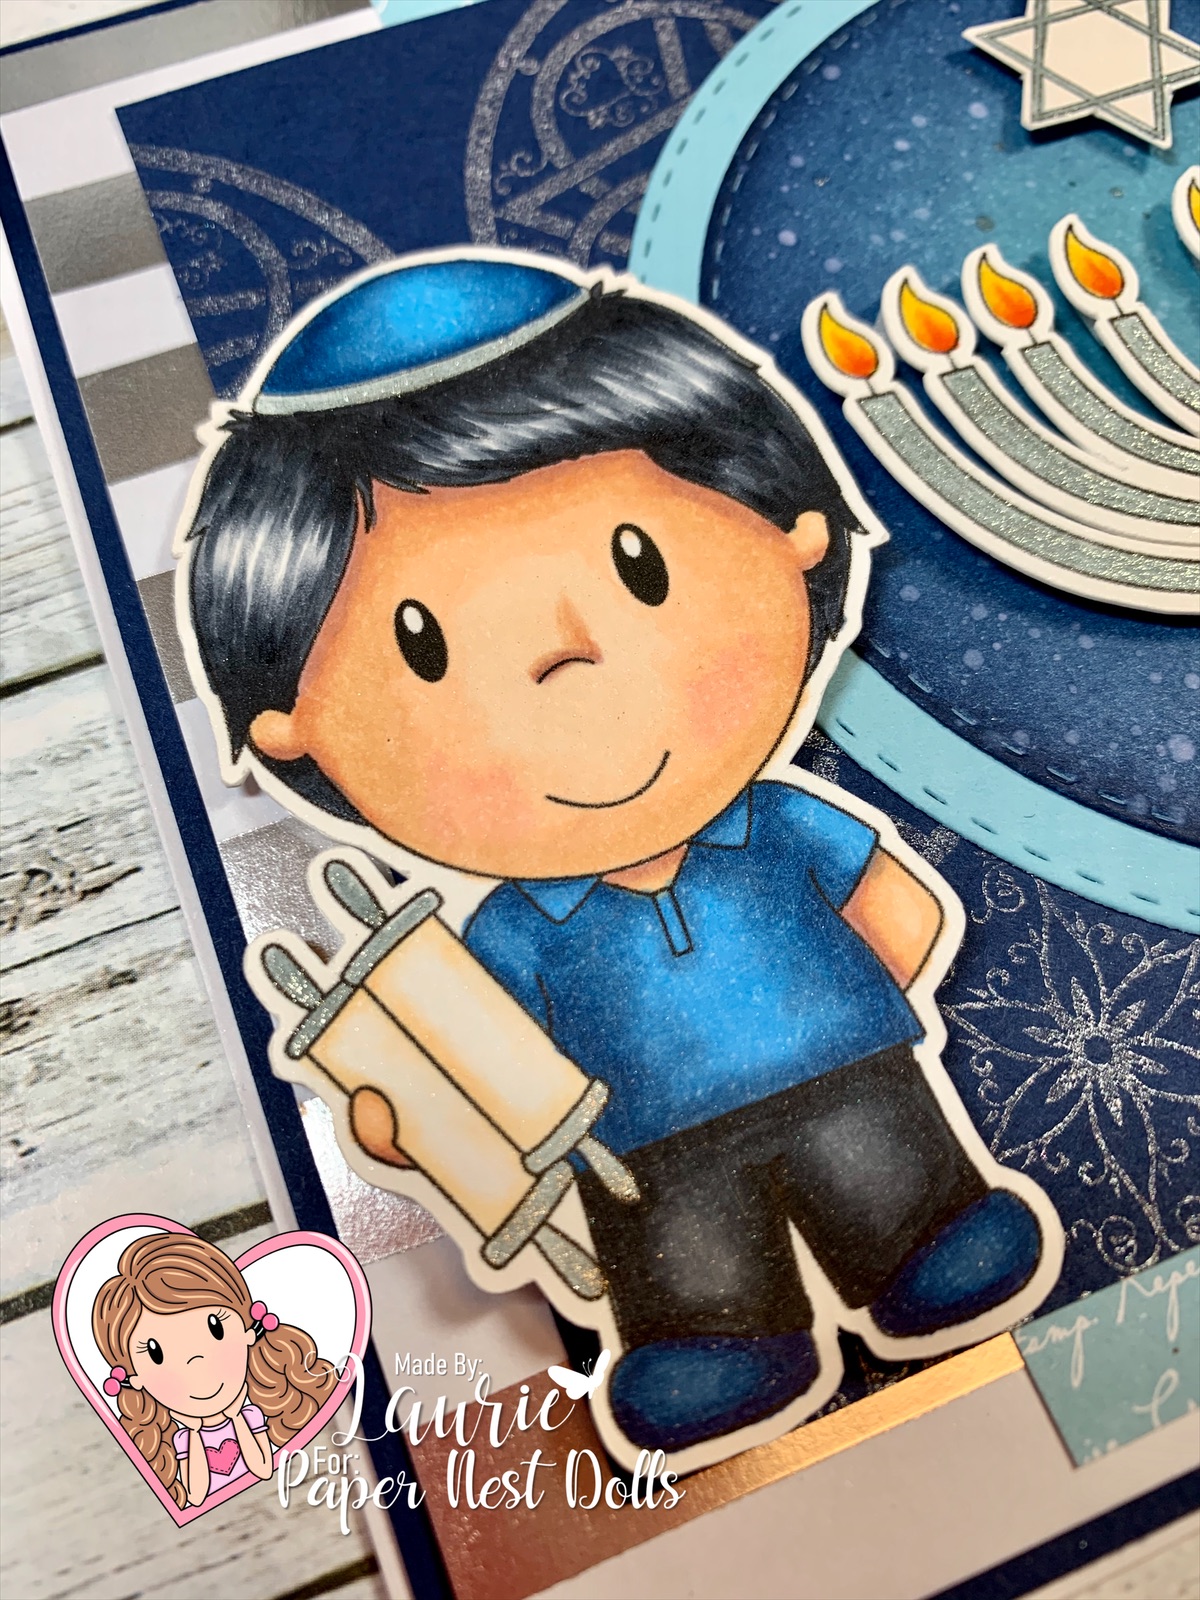
Hello Crafty Friends! It's Laurie here! Did you see the cute new release called Hanukkah Set? It comes with Mini Owen with Torah, Mini Emma with Challah, a menorah, a dreidel and the Star of David. I was so happy to see such cute Hanukkah images! They are so hard to find. We have friends who have two little boys that I send cards to every year. So, I knew that I wanted to colour up two Owens to represent them for my Happy Hanukkah Card. I can definitely see the younger brother wanting a Torah scroll just like his big brother’s one! Lol!

 Copic Markers:

Skin: E000/00/21/11/04/R20

Hair/Pants: C10/C7/C5/C4

Shirts/Kippah: B32/B34/B37

Shoes: B34/B37/B39

Scroll: E50/E51/0/Silver Gelly Roll Pen

Fire: Y15/Y19/YR04/YR09


Card Recipe: 

Paper Nest Dolls: Hanukkah Set Digital Stamp
Tuxedo Black Memento Ink Pad
Silvery Shimmer Pigment Ink, Delicata
Night of Navy Classic Stampin' Pad
Balmy Blue Classic Stampin' Pad
Feels Like Frost Specialty Designer Series Paper, Stampin’ Up!
Subtles 6” x 6’ Designer Series Paper, Stampin’ Up!
Jewish Celebrations Stamp Set, Stampin’ Up!
Value Pack Cards & Envelopes by Recollections, 5” x 6 ½”, Michaels
Silver Gelly Roll Pen
Silver Wink of Stella
Tim Holtz Distress Splatter Brush
Stamping Sponges, Stampin' Up!
Night of Navy Card Stock, Stampin’ Up!


Hope you like my Happy Hanukkah Card using the Hanukkah Set Digital Stamp!

Thank you for stopping by!


Hugs,

Laurie


Tuesday, August 25, 2020

Back to School with Ellie!

 Are you ready for back to school!?   Ellie is!  
Hi guys!  It's Amanda and today I'm sharing this super cute Back to School Ellie card!


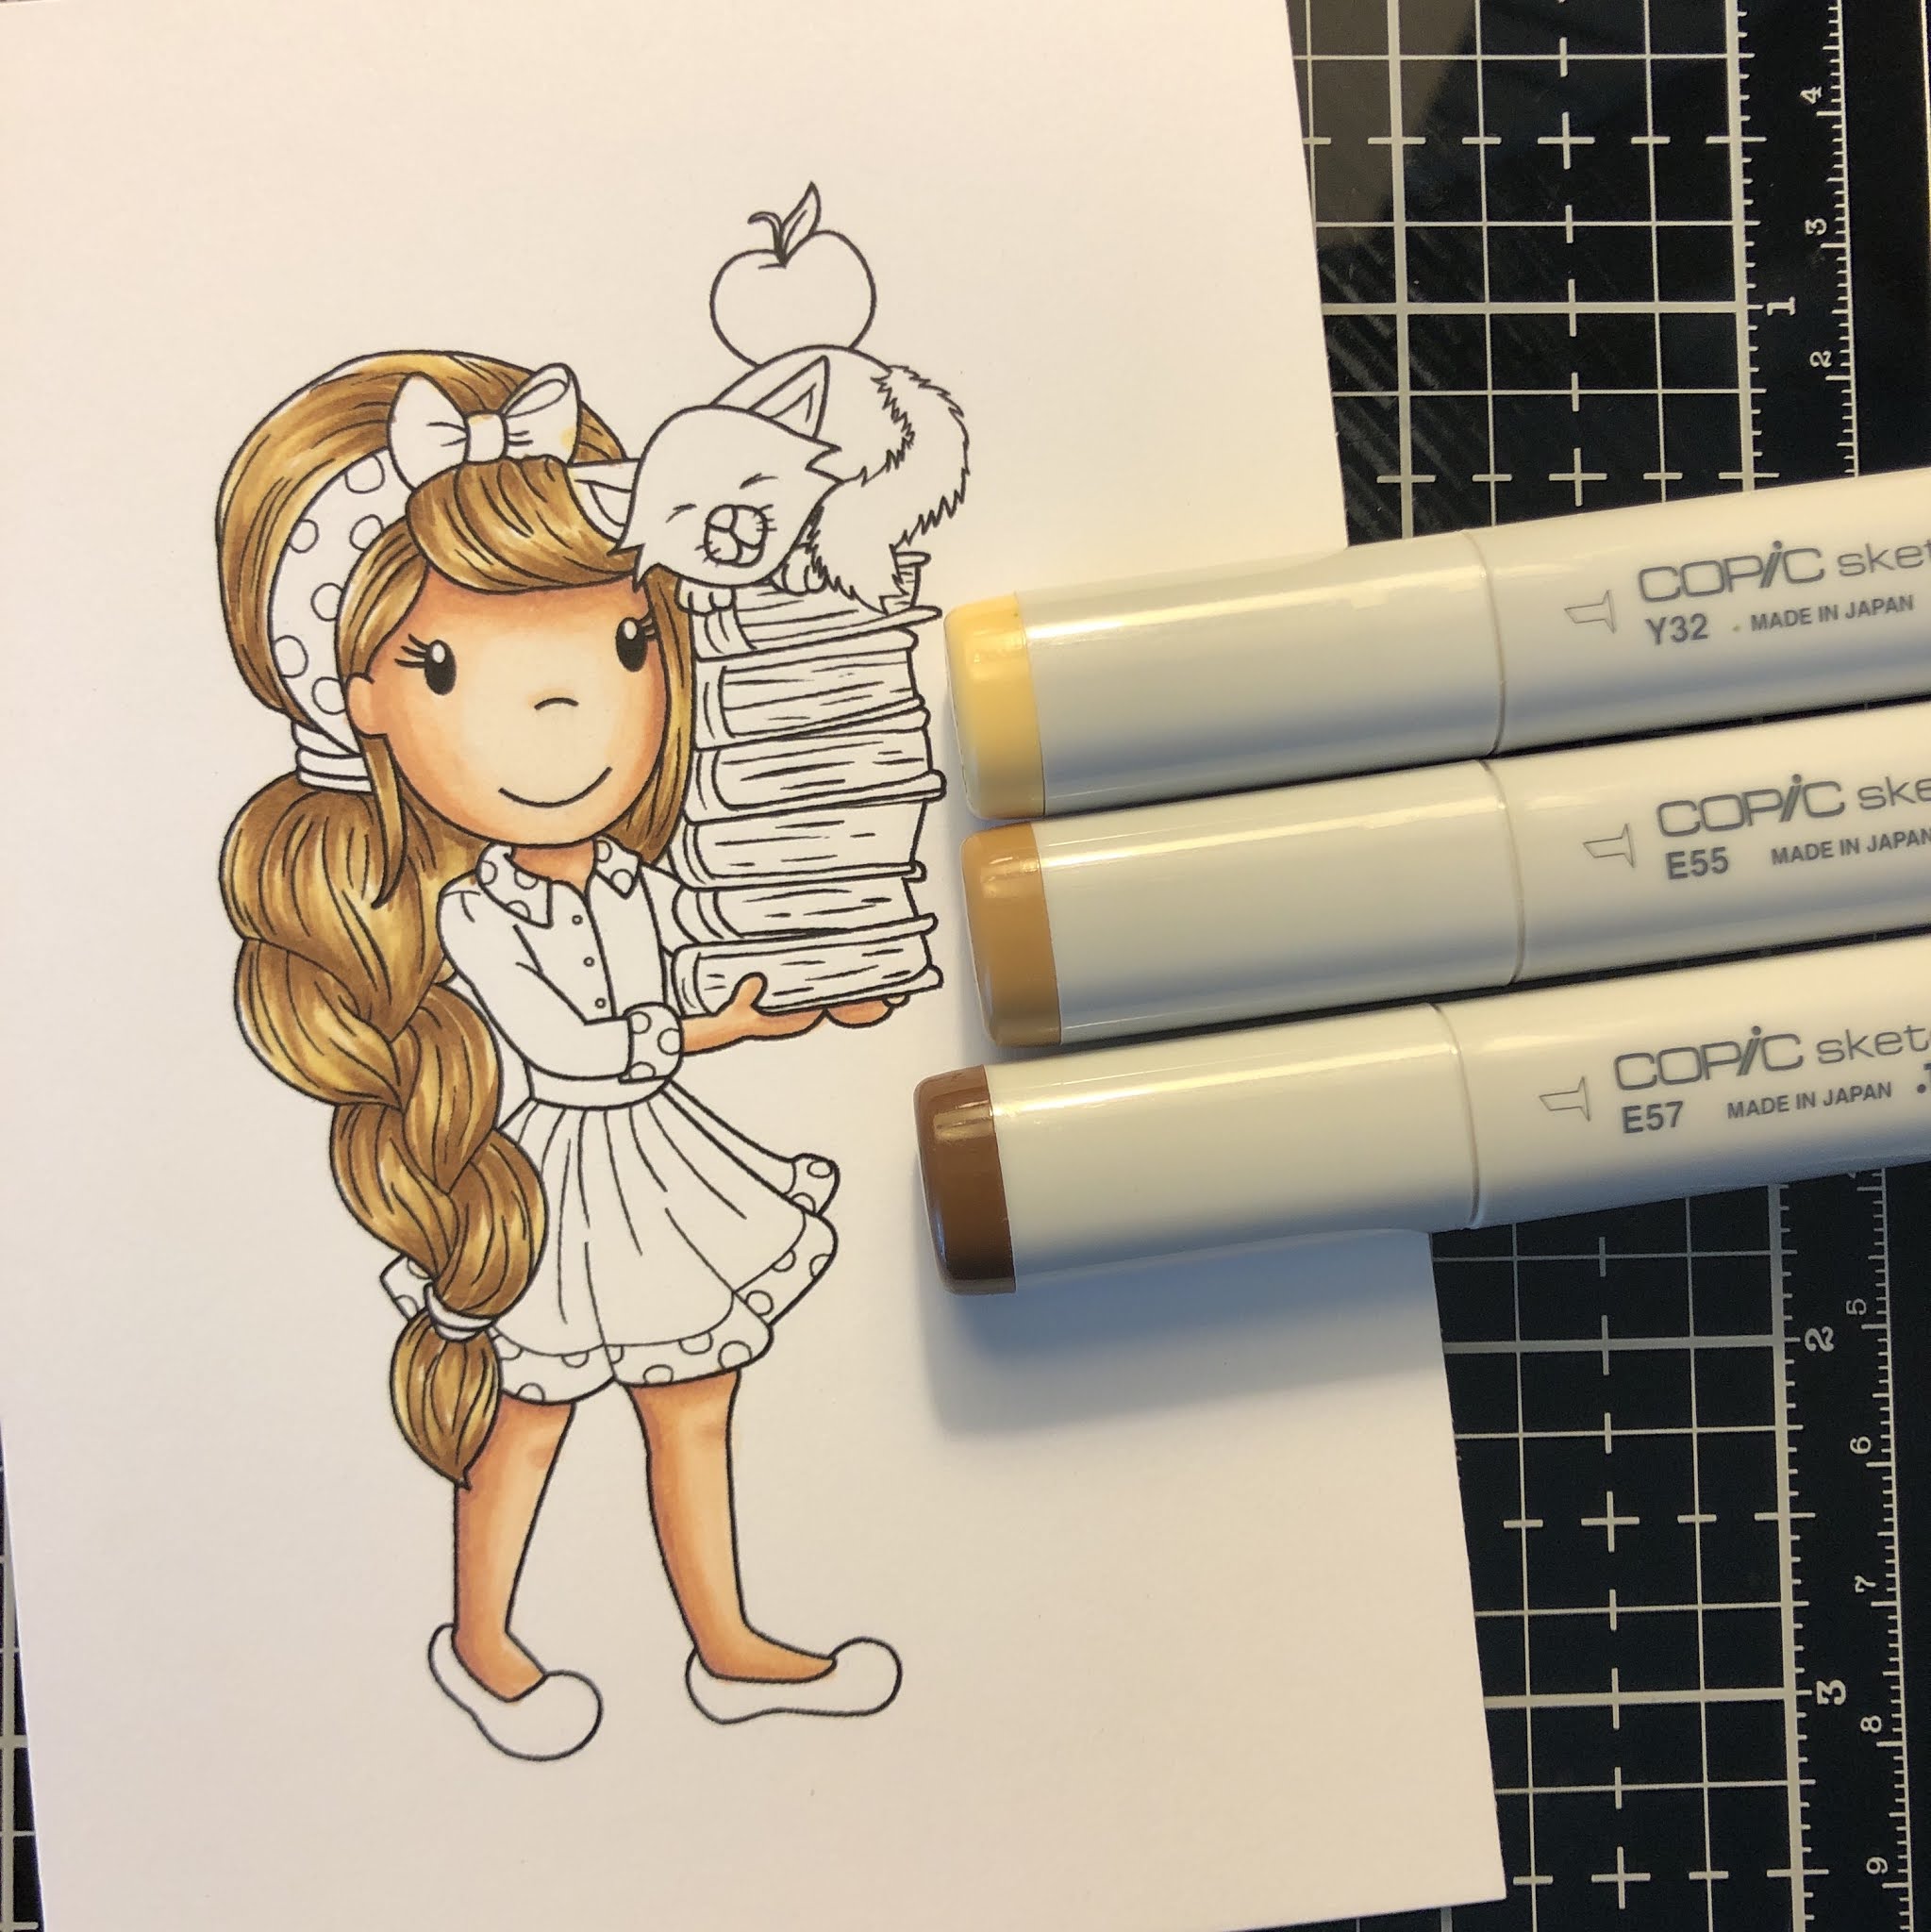
I colored Ellie with my Copic markers.
Skin:  E000, E00, E21, E11, E04


Hair color:  Y32, E55, E57


Apple and Books:  W3, W2, W00, R39, R37, R35, R22, YG67, YG63


Dress and accessories:  B0000, B00, B91, B93, B95, R39, R37, R35, R22


Cat and book covers:  E55, E53, E50, R20, R22, R35, R37, R39


I cut out the image with my Cutterbees scissors and then finished the card using patterned paper!
Thank you so much for stopping by!  Xoxo, Amanda


Tuesday, August 18, 2020

Dino Party Amara


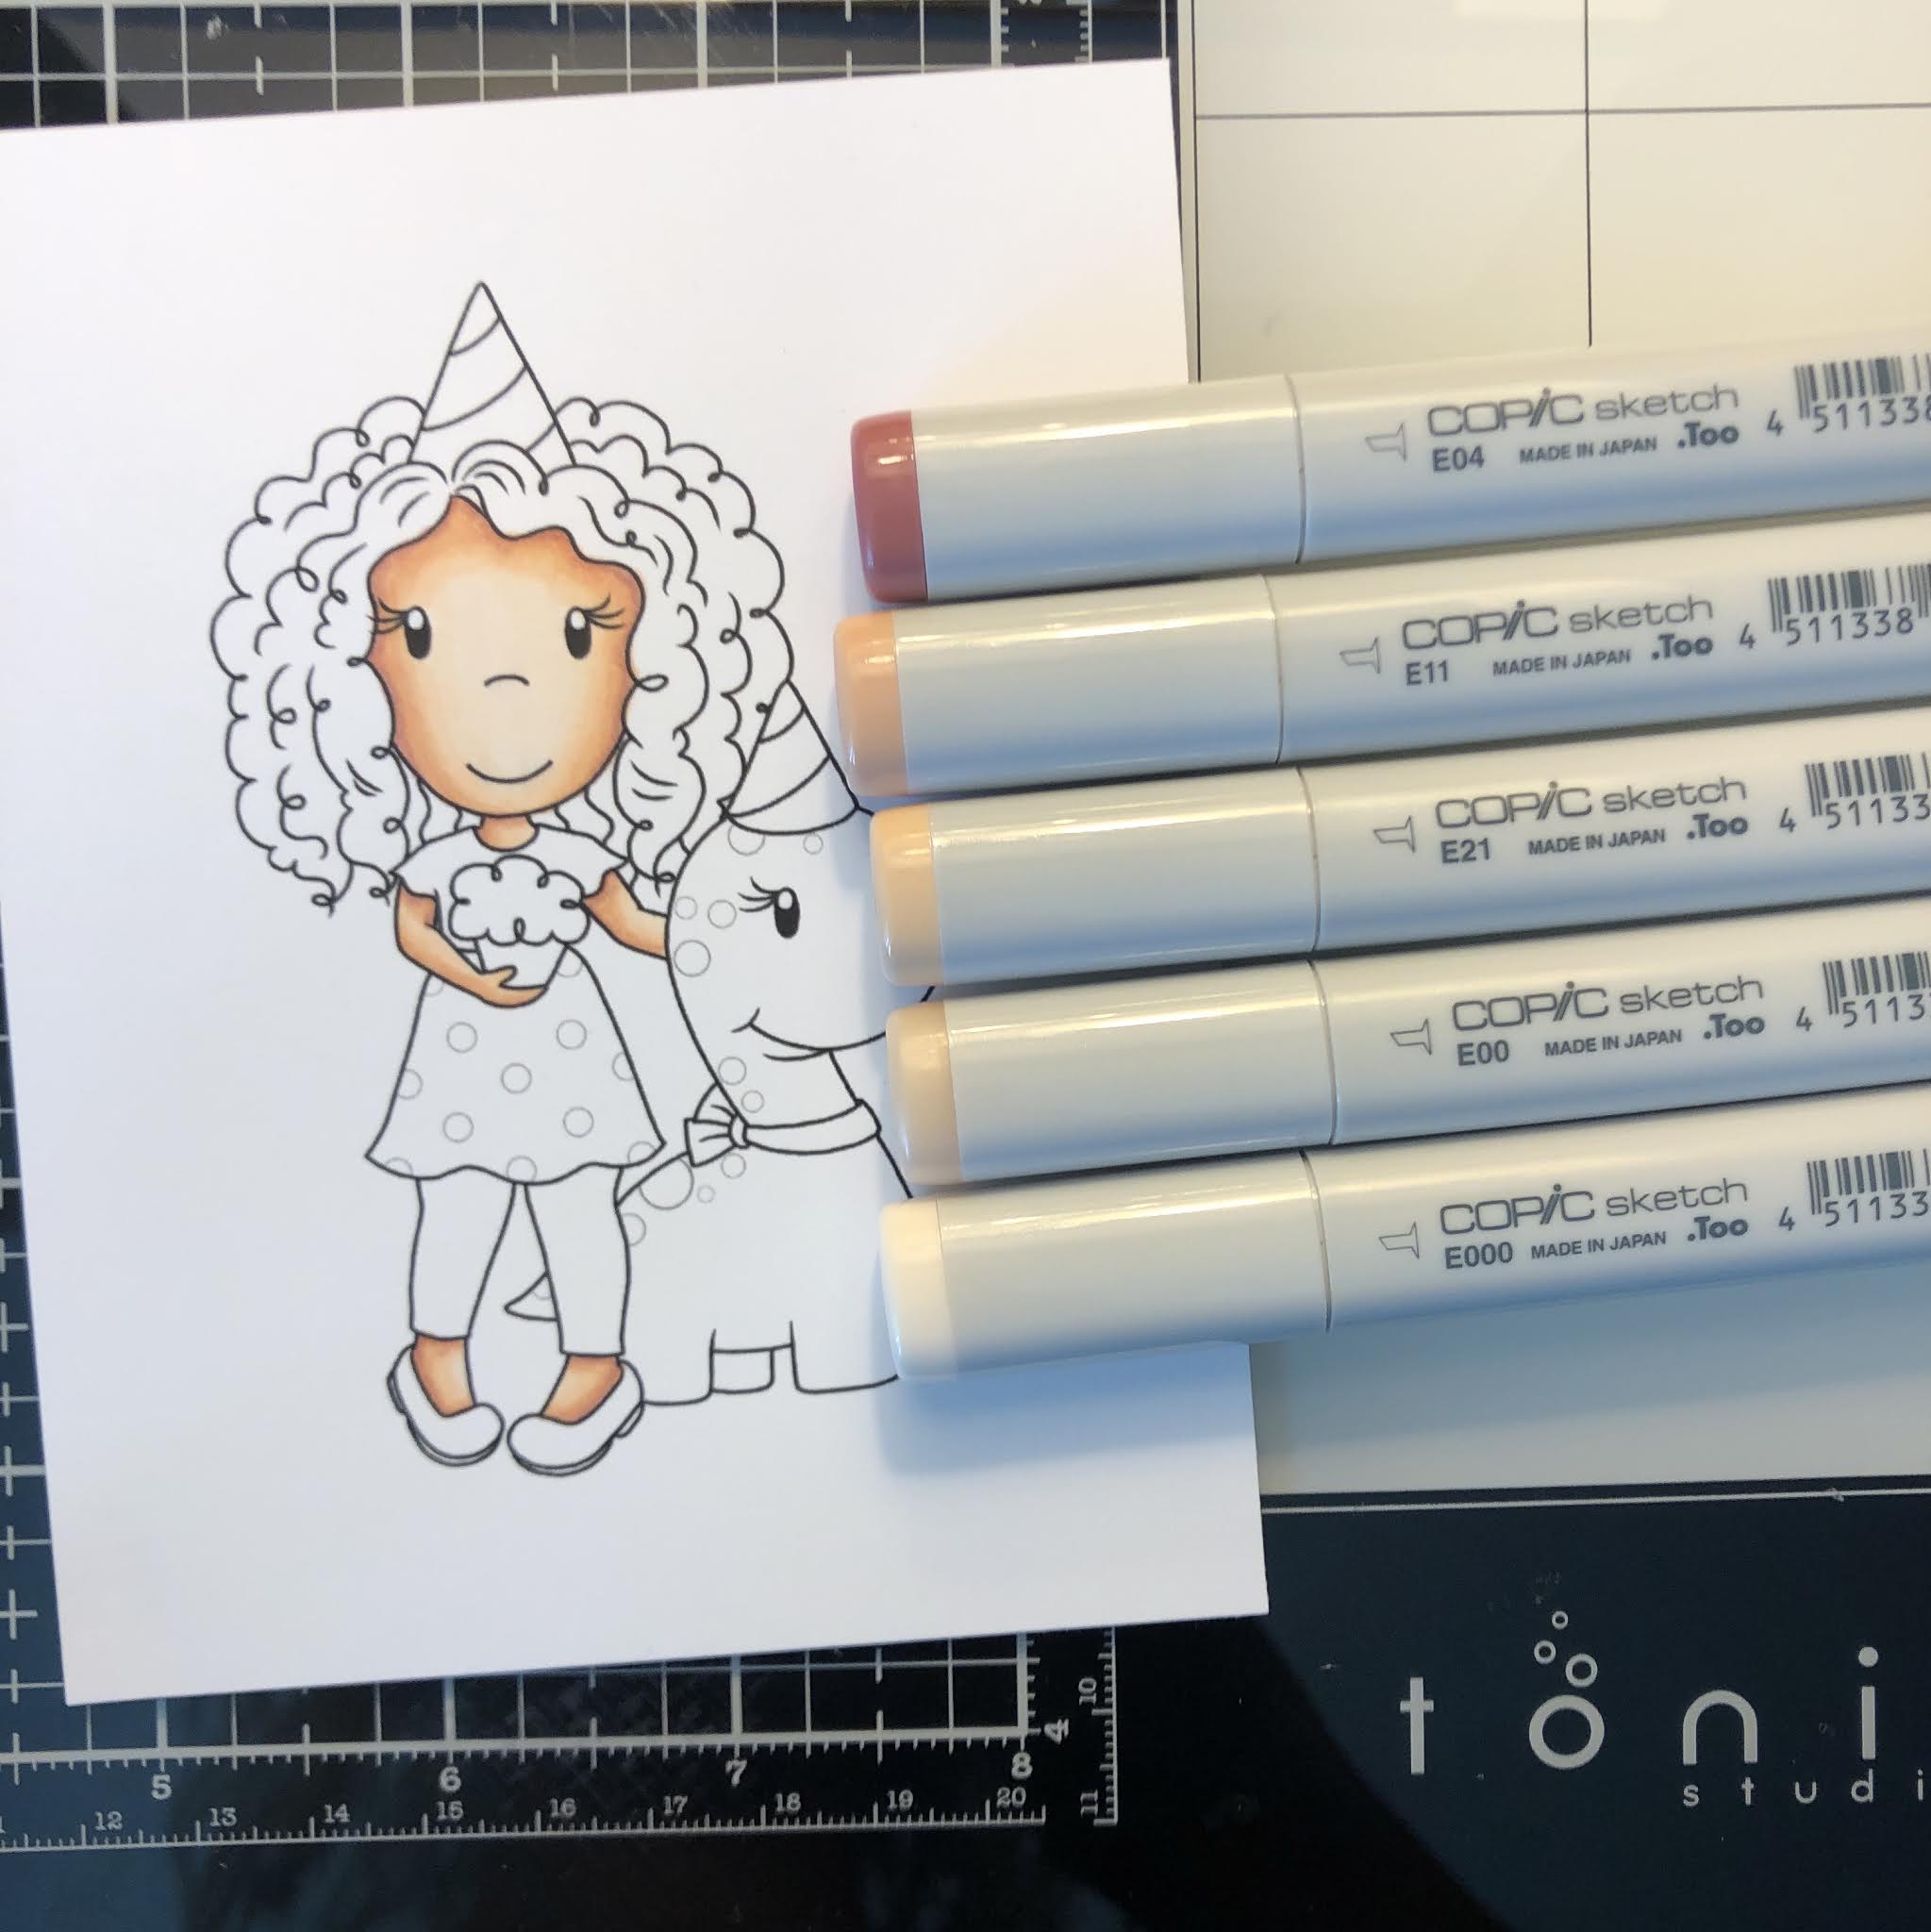
Hello friends!  It's Amanda here and today I'm sharing this fun birthday card using the Dino Party Amara digital stamp!


To color these little cuties in, I used my Copic markers.
Skin Color:  E04, E11, E21, E00, E000


Hair color:  E50, E23, E25, E27


Pinks and yellows:  Y00, Y04, Y08, R21, R43


Dino:  E30, E31, E34


I used some patterned paper, a Happy Birthday stamp, and some baker's twine to finish the card off!

Thank you so much for stopping by The Paper Nest Dolls blog!  Xoxo, Amanda


Thursday, August 13, 2020

Merry & Bright

Hello Crafty Friends! It's Laurie here! Do you ever create non-traditional coloured Christmas cards? I couldn’t resist colouring the sweet Holiday Gifts Avery Digital Stamp in non-traditional pinks and purples. Wouldn’t this stamp in these colours be a great winter birthday too!


For this card, I added lots of bling with the glimmer paper snowflakes and snow bank and a ton of rhinestones. I always thought you can never have too much bling for a Christmas card! The sentiment pieces from the Doodlebug Chit Chat were a perfect complement to the card and don’t you just love the wooden present accent.


--------------------------


 Copic Markers:


Skin: E000/00/21/11/04/R20

Hair: E430/E31/E33/E35/E37

Purples: V12/V15/V17/V09

Pinks: R81/R83/R85

Boots: C9/C7/C5/C4/C3

Yellows: Y11/Y13/Y17

Sled: E30/E31/E35

--------------------------


Card Recipe for Merry & Bright Card:


Paper Nest Dolls: Holiday Gifts Avery Digital Stamp

Sweet Sentiment Premium Coloring Paper

Tuxedo Black Memento Ink Pad

Mint Twist 6 ½” x 6 ½” Paper Pad, Kaisercraft

Frosty 6” x 6” Paper Pad, Pink & Main

Christmas Magic Chit Chat, Doodlebug Design Inc.

Sparkle Glimmer Paper, Stampin’ Up!

Finishing Accents Wood Shapes - Christmas, Darcie

Frosty Border Die, Memory Box

Beloved Snowflakes Die, Memory Box

Swirly Snowflakes Thinlits Dies, Stampin’ Up!

In The Woods Dies, Stampin’ Up!

Rhinestone Basic Jewels, Stampin’ Up!

Wink of Stella Clear Glitter Brush, Stampin’ Up!

Gorgeous Grape Card Stock, Stampin’ Up!


--------------------------


Thank you for stopping by!


Hope you like my Merry & Bright Card using Holiday Gifts Avery Digital Stamp!


Hugs,

Laurie

Friday, May 26, 2017

Troll Ellie

Hello friends!

Guest Designer Noelle here to share with you my last post! I used "Troll Ellie" for my final project. You'll still be able to see my work over on the Challenge Team though :) . I hope you like my project!


I colored the image with my copic markers and layered it on top of the fun papers from my stash. I popped up the paper using some 3D Foam Dots from my stash. The enamel dots and pop up flowers embellishments are also from my stash. 

Copic Color Combos;
Skin- E000, E00, E21, E11, E04 and R22 for blush.
Eyes- W9 and white Molotow paint pen
Hair- B01, B02, B04
Dress- YG11, YG03, YG06, YG17 and Y02, Y15, Y17, Y19
Bows- BV02, BV13, BV08
Flower- RV52, RV55, RV69 and Y11, Y15, Y17, E15, E18

Thank you for stopping by! I hope that you liked my project. Feel free to leave comments here or on the post over on my blog. Have a great weekend!


Friday, May 12, 2017

May Guest Designer: "Emma with Gift"

Hello everyone!
My name is Noelle and I'm the Guest Designer for May! I usually design for the Challenge Team, but Christine gave me the opportunity to design for the Creative Team this month! For this project, I used "Emma with Gift" . She is such a fun image and comes in both rubber and digi! Anyway, I hope that you like my card.


I colored the image with my copic markers as usual and used some dies from my stash. I added some Nuvo drops and inked the edges in "Vintage Photo" Distress Ink. 

Thank you for stopping by today! Feel free to leave some comments and you can check out my blog for more details on my project. Have a great weekend!


Sunday, August 30, 2015

Softball Ellie

Hi crafters!  Monica here sharing a card I made using Softball Ellie a new release from The Paper Nest Dolls.  This is a perfect stamp for all the young ladies who play softball..even baseball!
I used an embossing folder for the background and print a sentiment using my computer to go along with the image.  
She is colored with copics: E000. E00, E04, E11,
 Pants: B21, B23, B24, B26, Shirt:  R24, R29, Hair: E40, E41, E49


I hope everyone enjoyed my post and be sure to check out all the new images in the store.

Sunday, June 7, 2015

Ellie with Kittens

Hi crafters! Monica here sharing a card I made using a newer release called "Ellie with Kittens".  I made the card itself using a Spellbinder die Mystical Embrace .  Of course, the flowers are handmade but, the leaves are dies from Sweetstamps and inked with Clearsnap inks.


 Copics Used:
Face: E000, E00, E01, E04, E11
Hair: E15, E17, E18
Kittens: C00, C1, C3
Bow:  R35, R39

Thanks so much for stopping by and feel free to visit my blog here: Simply Monica

Wednesday, April 8, 2015

Love Strung Ellie

Hi everyone today I am sharing my first card for The Paper Nest Dolls Creative Team blog using Love Strung Ellie and she is colored with the folllowing copic markers:


 The flowers are handmade by me using some CTMH vanilla cardstock

 This is one of my favorites images desgined by Christine Young of the hundreds she has drawn.  She truly is an amazing artist and it has been a fun journey watching her grow to the artist she is today!
 So be sure to join us for the April 12th Facebook Release party it is going to be a lot of fun and there will be some amazing prizes being given away so I hope to see you there!!
copyright © 2013 the paper nest · graphics by erica belton · web design by red peach designs