Tuesday, May 31, 2022

Yabba Dabba Doo! Happy Father's Day to You!

Hi PND Fans! It's Betty here today.  Paper Nest Dolls released the cutest prehistoric family stamp set called Stone Age Family that was inspired by one of my favorite childhood cartoons! This set comes with eight adorable stamps and it comes in both digital and red rubber stamps. It's time to start making some Father's Day cards and this stamp set is perfect for them. So fun to create cards, scrapbook pages, decorations, and more! 

I made this large slimline card that I can showcase several of the stamps with a cute, but simple scene. This slimline card measures 4"W x 9"H. I printed the stamps in the following sizes:
  • House: 2-1/2"H
  • Dinosaur: 2-3/4"H
  • Girl: 2-1/2"H
  • Boy: 2-1/2"H
After printing the stamps, I colored them with Copic markers then fussy cute them out.

Copic markers used:
House: W6, W4, W3, W2, W1
Window: T3
Door: B97, B95, B93, B91
Plants: G99, G94, YG63

Dinosaur:
Purple: V17, V15, V12
Muzzle: V15, V12, V01
Black: C9, C7, C5, C3
Blue: B97, B95, B93
Yellow: Y38, Y35
White: W4, W2, W0, 0


Girl:
Skin: E04, E11, E21, E00, E50
Cheeks: E93
Hair: E18, E08, YR18, YR14
Blue: B97, B95, B93
Green: G28, G24, G21
Black: C9
White: W4, W2, 0

Boy:
Skin: E13, E11, E21, E00, E50
Cheeks: E93
Hair: C3, C1, C00
Brown: E79, E77, E74
Bone (White): W3, 0
Yellow: YR27, YR24, YR21


The background is created by using stencils. I used a cloud stencil from Stamp Anniething and Distress Oxide in in Tumbled Glass to create the sky. I masked off the walkway and used Distress Ink in Pumice Stone to create the dirt. I used a cobblestone stencil from Stamp Anniething and the Pumice Stone ink to create the walkway. 

I used a Wonky Stitched Slimline Die from Scrappy Boy Stamps to cut out the card front. I created the sentiment on my computer, printed it, trimmed it, then added a black cardstock mat and adhered it to the card. To finish the card, I adhered the card front onto the slimline card base. 


These stamps are so fun to color! I hope you give this card a try! Thank you for visiting today and I hope you have a wonderful and creative day! 

Friday, May 20, 2022

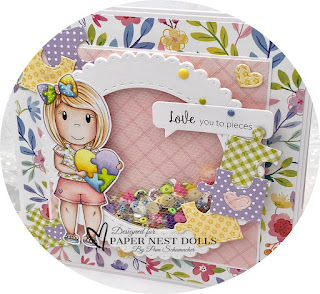
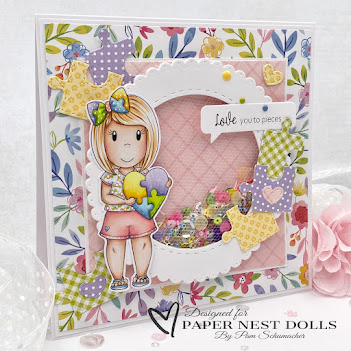
Love you to pieces

Hello everyone!

Pam here with you today.

Is there such a thing as loving someone too much?...nope...never!

This little sweetie is sharing all of her love in the form of a puzzle. This adorable image from The Paper Nest Dolls is called 'Ava with Heart Puzzle'. She was originally drawn for Autism Awareness, but she can also be used for lots of other occasions.


I printed this little cutie at a height of 3.4" on X-Press It Blending Card and colored her with the following markers.

~Copics~
Skin: E04, E11, E21, E00, E000, E0000, R20, R30, R00
Hair: E55, E53, E51, YR21
Pinks: BV23, RV23, RV21, RV11, R00, R000
Blues: B95, B93, B91, BG000
Greens: YG17, YG03, YG01
Yellows: YR23, Y15, Y11, Y00
Purples: BV04, BV02, BV01, BV00, BV000
White Gel Pen


The shaker part is made with tulle netting as I find it easier to photograph, and it also gives the card a little bit softer feel. I have to say I had fun going through my stash of shaker bits choosing colors that are in the background paper. It's good to go through those sometimes just to remember what you have...lol!!


As always, you can find an abundance of gorgeous inspiration here.

Thank you so much for visiting with me today!

Crafty Hugs ~ Pam

You can also follow me on Instagram or my facebook page!

Thursday, May 19, 2022

My Welcome Spring! Card

My Welcome Spring! Card

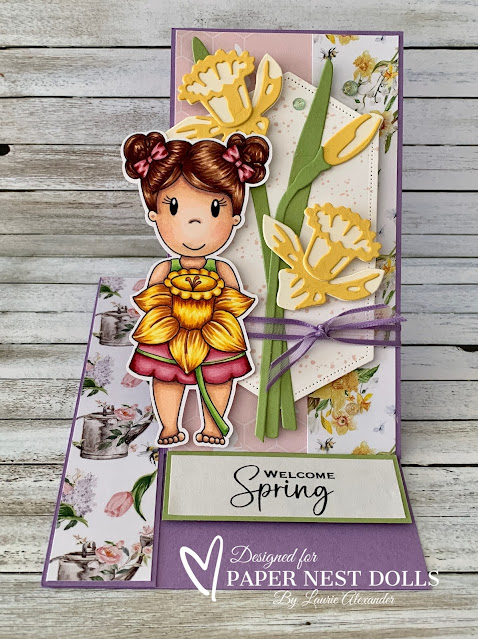
Hello Crafty Friends! It's Laurie here! I was so excited to present My Welcome Spring! Card at the Paper Nest Dolls Spring Coloring Retreat (Online) recently using Lulu with Daffodil!

The Details of My Card

For my card, I thought a fun fold card would be something different than a regular card. So, I created a side easel card base! I love how it folds up to display part of the card front!

We had a lot of fun colouring Lulu with our Copic markers at the Retreat. The attendees learned how to add texture to the daffodil to make it pop!

The beautiful papers from the Paper Boutique were perfect for the theme since they had daffodil and tulips on them!

I couldn’t resist using the Daffodil Dies from Stampin’ Up! in the background  to set off Lulu!


If you haven’t been to a Paper Nest Dolls Retreat, you are missing out! You learn so much from other designers (even I learn things!) and there is always fun and games going on, not to mention the swag bags!

--------------------------

Copic Markers

Skin: E04/E11/E21/E00/E000/R20
Hair: E29/E27/E25/E23/E21
Pinks: R89/R85/R83/R81
Greens: YG17/YG13/YG03
Daffodil: Y02/Y15/Y17/E15
Stamen: YR18/YR14

Card Displaying Side Easel

--------------------------

Card Recipe for My Welcome Spring!

Lulu with Daffodil, Paper Nest Dolls
Paper Basics - Stamper's Select White Cardstock, Papertrey Ink
Spring Whispers 8” x 8” Paper Pad, The Paper Boutique
Daffodil Dies, Stampin’ Up!
Daffodil Daydream Stamp Set, Stampin’ Up!
Genial Gems, Stampin’ Up!
Tattered Rose Distress Ink, Ranger Ink
Stitched Nested Label Dies, Stampin’ Up!
Highland Heather Ribbon, Stampin’ Up!
Adhesive Sheets, Stampin Up!
Liquid Glue
Highland Heather, Pear Pizzazz, Daffodil Delight,
Very Vanilla and Basic White Card Stock, Stampin’ Up!

Finished card size: 5 ½” x 4 ¼”

--------------------------

Hope you like my Presentation Card using
Lulu with Daffodil by Paper Nest Dolls!

Thank you for stopping by!

Hugs,
Laurie


Sunday, May 15, 2022

Sunday Sundaes!

Hi Crafty Friends,
I have a SWEET little Paper Nest Doll called Lulu with Sundae for you this SUNDAY! It went from being 60 degrees F to 90 degrees F in Chicago this week so I agree with Lulu, this calls for a SUNDAE. One of my favorite memories of summer is getting sundaes with my niece and nephew (see below).

Make Crafty Friends Q & A:
Q: What is your favorite sundae topping?
A: Me? Rainbow sprinkles!!!


Supplies:
Paper Nest Dolls Lulu with Sundae

Friday, May 13, 2022

Have a ROARING Good Time on Your Birthday!

Hello PND Fans! It's Betty here. I am so loving the Paper Nest Dolls release called the Decade Dolls Collection. Previously, I made projects with Hippie Ellie and Disco Amara. Today, I am sharing a card I made with Flapper Girl Emma. It's hard to chose a favorite, since I love them all, but I really had fun coloring and making this glitzy card. She just makes the perfect birthday card, but of course, you can change the sentiment for another occasion. These stamps come in digital and in red rubber. I used the digital version so that I can make the stamp the size I needed.


To make this A2 size card, I printed the stamp 3-3/4" tall, colored it with Copic markers, then fussy cut her out. 

Copic markers used:
Skin: E04, E11, E00, E50
Hair: E59, E57, E55, E53
Cheeks: E93
Red: R39, R37, R35, R32


I used a white gel pen to create the sparkles and a silver gel pen to create the swirl on her headband.

The back panel is created using a stencil from a pack I got from Amazon and white pigment ink from Stampin' Up. I used a blending brush to ink this stencil onto black cardstock.


To create the silver stenciled background, I used a stencil from the pack I got from Amazon and Ranger Transparent Gloss Texture Paste with silver glitter mixed in. I cut the corners of this panel using a Corner Edger Die from Stamp Anniething then adhered it to the back panel.

I cut out three feathers from red glitter cardstock using Leaf Dies from Stamp Anniething. I created the sentiment on my computer, printed it, trimmed it to size, and added a black cardstock mat. I adhered the feathers under the sentiment. I adhered Flapper Girl Emma using double-sided adhesive foam tape. 
I adhered this card front on a top folding A2 white card base. To finish the card, I added a few sparkly rhinestones I had in my stash. 

Such a fun card to make! I hope you give this one a try! 


Thank you for stopping by today. Have a creative day! ~Betty~

Tuesday, May 10, 2022

Stone Age Family Card


Hello Crafty Friends! It’s Laurie here! I am sharing my Stone Age Family Card as my Design Team Inspiration Card for Paper Nest Dolls using the new digital Stone Age Family Set. This bundle comes with eight stamps in either digital or rubber stamps.

The Details of My Card


For my card, I wanted to fit the whole family onto one card. So, I decided to create a Tri-Fold card where a continual scene unfolds on the front of the card, but when folded down, it becomes an A2 card.

I created a sidewalk for my characters to stand on by using a stencil, ink, and a blending brush. Once that was done, I used one of the Large Slimline Dies to create my straight lines and then cut the pieces down accordingly. Some hills and grass in different greens gave interest behind the characters. A couple of palm trees added to my scene.


————————–

Copic Markers:


Stone Age Dad
Skin: E04/E11/E21/E00/E000
Hair: C9/C7/C6
Outfit: YR00/YR18/YR16/YR14/YR12/C7
Tie: BG18/BG05

Stone Age Girl
Skin: E04/E11/E21/E00/E000/R20
Hair: YR00/YR18/YR16/YR14/YR12
Top: G28/YG25/YG23/YG11/C7
Pants: BG18/BG05/BG02
Bone: E40/E41/E42/0

Stone Age Mom
Skin: E04/E11/E21/E00/E000/R20
Hair: YR00/YR18/YR16/YR14/YR12
Dress/Pearls: C3/C1/C00/0


Stone Age Dad 2
Skin: E04/E11/E21/E00/E000
Hair: Y000/Y19/Y17/Y15/Y13
Outfit: E79/E77/E74/E71/E70

Stone Age Mom 2
Skin: E04/E11/E21/E00/E000/R20
Hair: T10/T8/T6/T4
Dress: BG10/BG18/BG15/BG13/BG11
Necklace: C1/C7


Stone Age Boy
Skin: E04/E11/E21/E00/E000
Hair: W3/W1/W0
Outfit: YR18/YR16/YR14/YR12/C7
Club: E79/E77/E74/E71
Bone: E40/E41/E42

Stone Age Pet
Skin: RV66/RV55/RV63/C7
Paws/Hair: C9/C7/C6
Bone: E43/E42/E41/0
Muzzle: RV63/RV52/RV10
Collar: BG18/BG05/BG02
Tag: Y38/Y35/Y32

Stone Age House
Stone: C3/C1/C0/0
Door: B00/B02/B04
Windows: Y38/Y35/Y32
Doorknob: C7/C1
Grass: G28/YG25/YG11


Card Recipe for My Design Team Card


Stone Age Family Set, Paper Nest Dolls
Paper Basics – Stamper’s Select White Cardstock, Papertrey Ink
I {Heart} Summer 6” x 6” Paper Pad, Simple Stories
Slimline Stitched Hillside Borders Dies, Lawn Fawn
Large Slimline with Sliders Dies, Lawn Fawn
Palms Dies, Stampin’ Up!
Rocky Road Stencil, Kraftin’ Kimmie Stamps
Gray Granite Classic Stampin’ Pad, Stampin’ Up!
Blending Brushes, Stampin’ Up!
Gray Granite, Old Olive, Pear Pizzaz
and Soft Suede Card Stock, Stampin’ Up!

Finished card size: 5 ½” x 4 ¼”


————————–

Hope you like my Design Team Inspiration Card using
Stone Age Family Set by Paper Nest Dolls!

Thank you for stopping by!

Hugs,
Laurie

Sunday, May 8, 2022

Flower Pot Avery by Noelene

  Happy Mother's Day everyone!    

Noelene here today to share some Mother's Day inspiration. Today I am sharing a Mother's Day card I made using a pretty image from the Paper Nest Dolls called Flower Pot Avery.


After I coloured my image I layered my card with pretty paper & added die cuts. I then embellished with flowers & lace.


Copic Markers:
Hair: E21, E25, E27, E29
Skin: E0000, E000, E00, E11, R20
Clothes & Shoes: B91, B93, B95, Y21, Y23, Y26
 Pot: E13, E15, E18, G40, G43


Flower Pot Avery can be found in rubber here & in digital format here.

Hope you are all having a wonderful day with all your loved ones!

Thanks for stopping by!

Hugs

Noelene x

Decades Collection: Poodle Skirt Emma


Hi Crafty Friends,
I love the DECADES Collection from Paper Nest Dolls. It is a series of dolls that features the 50s, 60s, 70s, 80s, 90s etc. Today I am sharing the 50s girl, called Poodle Skirt Emma. I created an argyle background for her and made her more "modern" with the goth 50s look.

Make Crafty Friends Q & A:
Q: What is your favorite decade to dress up like?
A: Me? The 80s!


Supplies:
Paper Nest Dolls Poodle Skirt Emma
Lawn Fawn Zig Zag Rectangle Stackables Dies
Poppy Stamps Basics Oval Die
Karen Burniston Alphabet Dies

Don't forget to subscribe, follow, and comment on my blog AND Instagram @MadeByMeghanK for your chance to win my May Prize

Thursday, May 5, 2022

A Groovy Road Trip Card

A Groovy Road Trip Card

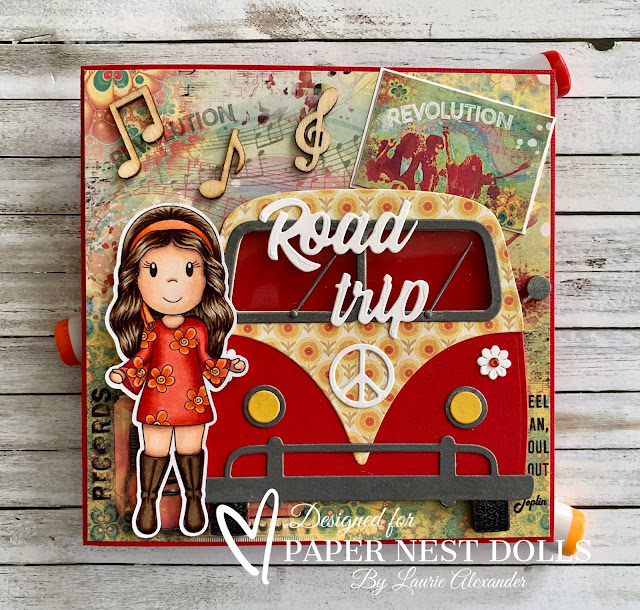
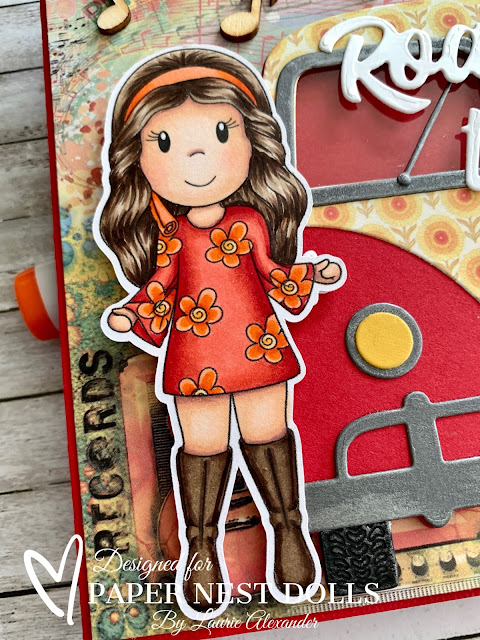
Hello Crafty Friends! It's Laurie here! I am sharing A Groovy Road Trip Card as my Design Team Inspiration Card for Paper Nest Dolls using Decade Collection Flower Power EllieThere are ten dolls in the Decade Collection that come in both rubber and digital stamps. You can find all the digital versions here.


Decade Doll Collection by Paper Nest Dolls

The Details of My Card

For my card, I coloured Ellie with my Copic markers to match my Seventies paper and her retro bus! This paper was perfect for my card with the musical revolution icons since Ellie has her dancing boots on and is off to Woodstock!

Of course, if Ellie is having a road trip, she needs a retro bus. This Retro Bus Kit comes with dies to build a mini booklet in the shape of a retro bus, but I decided to use it for my card. So, I just trimmed the three ring holes off the back piece. I had a ton of fun decorating my bus with the matching paper, flowers, peace symbol, windshield wipers, Road Trip die and so on. I even used a piece of a window sheet for the windows. For the metal parts, I brushed on some iron wax to give them a metal look.

The finishing touches were some wooden musical notes to match my theme a couple of rhinestone coloured to match my card.

--------------------------

Copic Markers

Skin: E04/E11/E21/E00/E000/R20
Hair: E49/E47/E44/E43/E42
Dress: R29/R27/R24/R22
Flowers: YR09/YR07/YR02/Y38/Y32
Boots: E49/E47/E44
Rhinestones: YR09 (on Bus)

Close Up of Flower Power Ellie

--------------------------

Card Recipe for A Groovy Road Trip Card

Paper Basics - Stamper's Select White Cardstock, Papertrey Ink
Seventies 6” x 6” Paper Pad, Ciao Bella
Window Sheet, Stampin’ Up!
1928: Retro Bus Dies, Elizabeth Craft Designs
Art Alchemy-Metallique Wax-Brushed Iron, Prima Marketing
Laser-Cut Wood Shapes, Craft Medley
Rhinestone Basic Jewels, Stampin’ Up!
Real Red, Crushed Curry, Basic Gray, Basic Black
and Basic White Card Stock, Stampin’ Up!

Finished card size: 5 ¾” x 5 ¾”

--------------------------

To view my other card in this Collection, please click here.


Hope you like my Design Team Inspiration Card using

Thank you for stopping by!

Hugs,
Laurie


Tuesday, May 3, 2022

The Big Day

Hello crafty friends!

Pam here with you today.  

Don't these two make the sweetest couple? Many moons ago I married the love of my life (39 years) ...and of course our wedding was pink and white..lol!

This sweet image from The Paper Nest Dolls is called 'The Big Day'.


I printed these adorable newlyweds on X-Press It Blending Card and colored them with the following markers.

~Copics~
Skin: E04, E11, E21, E00, E000, E0000, R20, R30, R00
Hair: E55, E53, E51, E31, YR21
Greens: YG17, YG03, YG01
Pinks: RV14, RV13, RV11, R000
Grays: W5, W3, W2, W1, W0, W00


 My card base is 5.25" x 5.25", with layers built on top of that. The top two layers were adhered together and were then attached to the bottom layers with double sided foam tape. The gorgeous flowers are from I Am Roses.

As always, you can find an abundance of gorgeous inspiration here.

Thank you so much for visiting with me today!

Crafty Hugs ~ Pam

You can also follow me on Instagram or my facebook page!


copyright © 2013 the paper nest · graphics by erica belton · web design by red peach designs