Showing posts with label Christmas Card. Show all posts

Monday, December 18, 2023

My Cup of Cheer Card


Hello Crafty Friends! It's Laurie here! I am sharing My Cup of Cheer Card as my Design Team Inspiration Card for Paper Nest Dolls using the digital stamp called Emma in Reindeer PJ's. Isn't she adorable!

The Details of My Cup of Cheer Card

I had so much fun colouring Emma in her cute PJs with my Copic markers to match my non-traditional paper choice! For my card, I thought the Christmas cookie paper would be perfect since cookies and hot chocolate are a great combination, especially gingerbread! Yum! The pretty plaid pattern paper really brought out the non-traditional colours of my card.

Isn’t that die cut mug just the cutest! For the mug, I knew I wanted to use the snowflake tag and found that the die just fit it. To add some dimension to my mug, I blended some Pool Party ink along the edges. I also blended some Pink Pirouette Ink along the edges of the heart. I thought it would be fun to add whipped cream and a candy cane just like Emma’s. The spoon was die cut from some metallic paper that I had. Of course, if you have hot chocolate, you need marshmallows! Lol!

Since there was a lot going on the card already, I went with a simple die cut sentiment with a few red rhinestones to match my candy cane.

Finally, I used Glossy Accents on Emma’s candy cane, Stardust Stickles on the reindeers’ noses and Wink of Stella on Emma’s and the mug’s whipped cream.

--------------------------

Copic Markers:

Skin: E000/E00/E21/E11/E04/R20
Hair: E37/E35/E33/E31
Pinks: R85/R83/R81
Browns: E37/E35/E33/E31
Blues: BG75/BG72/BG70
Headband: E30/E31/R85/R83/R81
Reindeers: E37/E35/E33/E31/E30/R85/R81
Whipped Cream: BG000/BG0000
Candy Cane: R27/C1/0

--------------------------

Card Recipe for My Cup of Cheer Card:

Emma in Reindeer PJ's, Paper Nest Dolls
Paper Basics - Stamper's Select White Cardstock, Papertrey Ink
Sugar Plum Wishes 12” x 12” Paper, Paige Evans 
Hug in a Mug Honey Cuts, Honey Bee Stamps
Hug in a Mug Stamp Set, Honey Bee Stamps
Mugs & Kisses Honey Cuts, Honey Bee Stamps
VersaFine, Tsukineko
Pool Party Ink, Stampin’ Up!
Pink Pirouette Ink, Stampin’ Up!
Blending Brushes, Stampin’ Up!
Galvanized Metallic Paper, Stampin’ Up!
Red Rhinestone Basic Jewels, Stampin’ Up!
Stardust Stickles, Ranger
Clear Wink of Stella, Stampin’ Up!
Glossy Accents, Ranger
Basic White, Real Red, and Pink Pirouette Card Stock, Stampin’ Up!

Finished card size: 4 ¼” x 5 ½”

--------------------------

Hope you like my Design Team card using
Emma in Reindeer PJ's by Paper Nest Dolls!

Thank you for stopping by!

Hugs,
Laurie

Wednesday, December 6, 2023

Yeti for the Holidays?


Hello Crafty Friends! It's Laurie here! I am sharing my Yeti for the Holidays? as my Design Team Inspiration Card for Paper Nest Dolls using Yeti Father and Son. I just love these cuties. There is a Yeti Mom and Baby that you could add to this card for the whole family! Lol!

The Details of My Yeti for the Holidays?

I had a lot of fun colouring these two with my Copic markers! I decided to create a fur texture with individual strokes in the shadows and left the highlights white. The tree was also coloured with individual strokes to create texture. The Father Yeti’s tie pulled together my colour scheme of red and green.

For my card, I wanted to use the Whimsy paper with these cuties. This paper is perfect for those wintery scenes! In fact, I used it for another card that I made a few years ago and will post it at the end.

So, I created a slimline card using the Dotted Slimline Dies by Studio Katia. I used all three dies that came in the set to create my card. I thought it would be fun having the yetis stepping out of the wintery scene with their Christmas tree.

To complete my wintery scene and to add interest, I used a Stitched Hillside Die to add an extra layer to the scene. I made sure that my “snowbank” did not cover up the snow-covered trees on the background.

Next, I typed and printed my sentiment out on my computer. There are so many great sentiments out there that it was hard to pick one! Lol! The sentiment was die cut out with another stitched die.

For embellishments, I used some wooden snowflakes that I had in my stash for that rustic look and a scattering of red rhinestones to add sparkle.

--------------------------

Copic Markers

Fur: W3/W1/W0/0
Faces: E43/E42/E41/E40/RV00/0
Horns/Nails/Tree Trunk: E44/E43/E42/E41
Reds: R29/R27/R24/R22
Greens: G29/YG63/YG03

--------------------------

Card Recipe for My Yeti for the Holidays?

Yeti Father and Son, Paper Nest Dolls
Paper Basics - Stamper's Select White Cardstock, Papertrey Ink
Frozen Slimline Designer Paper Pack, Whimsy Stamps
Dotted Slimline Dies, Studio Katia
Slimline Stitched Hillside Border Dies, Lawn Fawn
Stylish Shapes Dies, Stampin’ Up!
Wooden Snowflake Embellishments, Stampin’ Up!
Red Rhinestone Jewels, Stampin’ Up!
Garden Green and Real Red Card Stock, Stampin’ Up!

Finished card size: 8 ½” x 3 ½”

Stamp Size: 3”

--------------------------

My Merry Penguins Card

For more information on my other card, please click here.

Hope you like my Yeti for the Holidays? Card using
Yeti Father and Son by Paper Nest Dolls!

Thank you for stopping by!

Hugs,
Laurie

Monday, November 20, 2023

Celebrate the Season Card


Hello Crafty Friends! It’s Laurie here! I am sharing my Celebrate the Season Card as my Design Team Inspiration Card for Paper Nest Dolls using the digital stamp called Emma in Christmas Sweater. 

Details of My Celebrate the Season Card

For my card, I decided to create a mini slimline card using the Pink Fresh scallop die. What is so nice about this die is that it cuts two scallop rectangles at once. I used both scallop rectangles with one in pink and one in red to match my colour scheme.

I love Mintay Papers, and the Merry Little Christmas paper is gorgeous! So, I decided to use it for my colour scheme of red and pink with white accents. I coloured Emma with my Copic markers to match my colour scheme. Don’t you just love her snowman sweater!

For the sentiment cluster, I used a silver snowflake to add some sparkle, a fussy cut candy cane from the Mintay paper and a die cut sentiment.

Next, I used Glossy Accents on the candy cane and Stardust Stickles on the trim of the hats and boots. The only thing left was to add a few red rhinestones for a bit more sparkle.

————————–

Copic Markers:


Skin: E000/E00/E21/E11/E04/R20
Hair: E37/E35/E33/E31
Reds: R29/R27/R24/R22
Pinks: R85/R83/R81
Whites: C3/C1/0
Snowman: C6/C3/C1/R27/C3/C1/0/YR18/YR15


————————–

Card Recipe for My Celebrate the Season Card:


Emma in Christmas Sweater, Paper Nest Dolls
Paper Basics – Stamper’s Select White Cardstock, Papertrey Ink
Merry Little Christmas 6” x 6” Paper Pad, Mintay Papers
Essentials Mini Slimline Stitched Scallop Rectangle Dies, Pink Fresh Studio
Simple Stripes – Christmas Stamp, Taylored Expressions
Simple Stripes Die, Taylored Expressions
VersaFine, Tsukineko
Red Rhinestone Basic Jewels, Stampin’ Up!
Silver Snowflake, From My Stash
Stardust Stickles, Ranger (Hat/Boot Trim)
Glossy Accents, Ranger (Candy Cane)
Paper Snips, Stampin’ Up!
Basic White, Real Red, and Pink Pirouette Card Stock, Stampin’ Up!

Finished card size: 3 ¼” 6 ¼”

————————–

Hope you like my Design Team card using
Emma in Christmas Sweater by Paper Nest Dolls!

Thank you for stopping by!

Hugs,
Laurie

Friday, July 28, 2023

My Sliding Santa Card


Hello Crafty Friends! It’s Laurie here! I am sharing My Sliding Santa Card for Christmas in July and as my Design Team Inspiration Card for Paper Nest Dolls using the Vacation Santa Set. There are 7 stamps, which include Surfer Santa, Ice-cream Santa, Santa with Reindeer Floatie, Santa & Mrs. Claus, Palm Tree and Flamingo & Gifts, that come in both rubber and digital stamps. I made a card with Ice-cream Santa from this set as well and will include a link to it at the end of this post.

The Details of My Card


For my card, I decided to create fun interactive slider card using Santa with Reindeer Floatie. I had so much fun colouring this cutie with my Copic markers! I added some white Gelly Roll Pen to his floatie and Rudolph’s nose to give them a shine.

Next, I wanted to see the different layers of the papers behind him. So, I used two different slimline die sets. I picked a water-like paper for the slider piece as if he is going down a river twirling around like at one of those amusement parks. Lol! I kept the cut-out piece from the slider die and glued it through the hole onto the layer below it so that you couldn’t see the orange layer below. This added to my pool like feel.


I used some slider discs to create my slider, but in the past, I have also used pennies. I made sure that my dimensionals were round so that I could get him spinning around.

I decorated my card using some Christmas Chit Chat pieces. I popped up the sentiment ones making sure that my Santa would not get caught on them. A couple of matching glitter dots were added to add some sparkle.

————————–

Copic Markers


Skin: E15/E13/E11/E00/E000
Beard: C3/C1/C0
Reds: R29/R27/R24/R22
Greens: YG67/YG63/YG03
Reindeer: E35/E33/E31/E30/E31/E53/E51/E50/R29/R27/R24
Coconut Drink: R85/R83/R81/C3/C1/0/E33/E31/E30/E53/E51/E50


————————–

Card Recipe for My Sliding Santa Card


Vacation Santa Set, Paper Nest Dolls
Paper Basics – Stamper’s Select White Cardstock, Papertrey Ink
Beach Party 12” x 12” Paper Pad, Carta Bella
Christmas Magic Chit Chat, Doodlebug Design Inc.
Small Slimline with Lift Flaps Dies, Lawn Fawn
Large Slimline with Slider Dies, Lawn Fawn
On the Right Track Discs, Taylored Expressions
Glitter Enamel Dots, Stampin’ Up!
White Gelly Roll Pen, Sakura
Pop-Dot Adhesives, Forever in Time
Granny Apple Green Card Stock, Stampin’ Up!

Finished card size: 5 ½” x 3 ½”

Stamp Size: 3”

————————–

Hope you like my Design Team Inspiration Card using
Vacation Santa Set by Paper Nest Dolls!

Thank you for stopping by!

Hugs,
Laurie

Tuesday, July 25, 2023

Santa on Vacation Card 


Hello Crafty Friends! It's Laurie here! I am sharing my Santa on Vacation Card for Christmas in July and as my Design Team Inspiration Card for Paper Nest Dolls using Vacation Santa Set. There are 7 stamps, which include Surfer Santa, Ice-cream Santa, Santa with Reindeer Floatie, Santa & Mrs. Claus, Palm tree and Flamingo & Gifts, that come in both rubber and digital stamps.

The Details of My Card

For my card, I decided to create a summer beach scene with Santa enjoying his ice cream! I coloured Santa and the palm tree with my Copic Markers. I love that he has a candy cane in his ice cream! Lol! I added Glossy Accents to his glasses and the light bulbs on the palm tree. For the palm tree, I used Clear Star Gelly Roll Pen to make the star sparkle and Silver Gelly Roll Pen on the wires for the lights.

Next, onto the scene building! The sky was created with watercolor paper and blending two blue Distress Oxide Inks onto it with my blending brush. Then, I used my splatter brush to splatter water to create some texture. Once that was done, I die cut some sand dunes and embossed them to give them the texture of sand. Finally, the sun and cloud were added to finish off my scene.

For the sentiment, I wanted just “Merry and Bright” even though the sentiment was “May Your Days be Merry and Bright”. So, I used Scotch Tape (you could also use a post-it note) to mask off the text that I didn’t want. Remember to remove the tape before you stamp though! Once the sentiment was stamped, I heat embossed it in white and die cut it out.

My beachy scene was added to a piece of Make A Splash paper that had palm trees in a bright greens and blue sky to mirror my scene.

The only embellishments added were some red rhinestones scattered around my focal point.

--------------------------

Copic Markers

Santa
Skin: E15/E13/E11/E00/E000
Beard: C3/C1/C0
Reds: R29/R27/R24/R22
Greens: YG67/YG63/YG03
Ice Cream Cone: E35/E33/E31
Ice Cream: R85/R83/R81/E35/E33/E31/E53/E51/E50


Palm Tree
Trunk/Coconuts
: E35/E33/E31/E30
Leaves: YG67/YG63/YG03
Wire: C3/C1/C0
Red Light Bulbs: R29/R27/R24
Green Lights Bulbs: YG67/YG63/YG03
Blue Lights Bulbs: B28/B24/B32
Yellow Lights Bulbs/Star: Y38/Y35/Y32


Card Recipe for My Santa on Vacation Card

Vacation Santa Set, Paper Nest Dolls
Paper Basics - Stamper's Select White Cardstock, Papertrey Ink
Make a Splash 6” x 6” Paper Pad, Bo Bunny
Watercolor Paper, Stampin’ Up!
Stitched Circle Layering Dies, Memory Box
Slimline Stitched Hillside Border Dies, Lawn Fawn
Spring Showers Dies, Lawn Fawn
Stylish Shapes Dies, Stampin’ Up!
Subtle Textured Embossing Folder, Stampin’ Up!
Simple Strips – Christmas, Taylored Expressions
Versamark Ink Pad, Stampin’ Up!
White Embossing Powder, Stampin Up!
Heat Tool, Stampin’ Up!
Salty Ocean Distress Oxide Ink, Ranger
Tumbled Glass Distress Oxide Ink, Ranger
Blending Brush, Stampin’ Up!
Tim Holtz Splatter Brush, Ranger
Glossy Accents, Ranger
Clear Star Gelly Roll Pen, Sakura
Silver Gelly Roll Pen, Sakura
Red Rhinestone Jewels, Stampin’ Up!
Scotch Tape

Real Red, Crumb Cake, Crushed Curry and Basic White Card Stock, Stampin’ Up!

Finished card size: 5 ½” x 4 ¼”

Stamp Size: 3”

--------------------------

Hope you like my Design Team Inspiration Card using
Vacation Santa Set by Paper Nest Dolls!

Thank you for stopping by!

Hugs,
Laurie

Thursday, July 20, 2023

Letters to Santa by Noelene

Hello Crafty Friends, Noelene back today with some D.T. inspiration for the Paper Nest Dolls. 

This month I have been sharing some Christmas in July inpiration on my blog & today I have kept the Christmas theme going by created a Christmas card using the beautiful PND image called Letters to North Pole.


It was a fairly simple card to make. Again I created layers starting with a 5x7 base. For my colouring I shaded my background after masking my image. I then used some Frantage to create some dimensional snowflakes to my card. 


Copics:
Clothes Penguin & Shoes: C0, C1, C2, C3, C4, C5, C7, YR14, YR16
Hair & Letterbox Post: E40, E43, E44, E47, E49
Skin: E0000, E000, E00, E11, E13, R20
Letterbox & Hat: R21, R22, R24, R27
Snow: B000, B00


Letters to North Pole is available in rubber here & digital stamp here. 


Supplies:
Sentiment: Computer Generated
Ink: Distress Ink "Broken China"
Colouring Medium: Copics
Paper: Doodlebug Design - Let it Snow
Accessories: Spellbinders 5x7 Matting Basics A & B,  Fran-tage Chunky White.


Thanks for stopping by!

Hugs

Noelene x


Saturday, December 24, 2022

We Believe in Santa


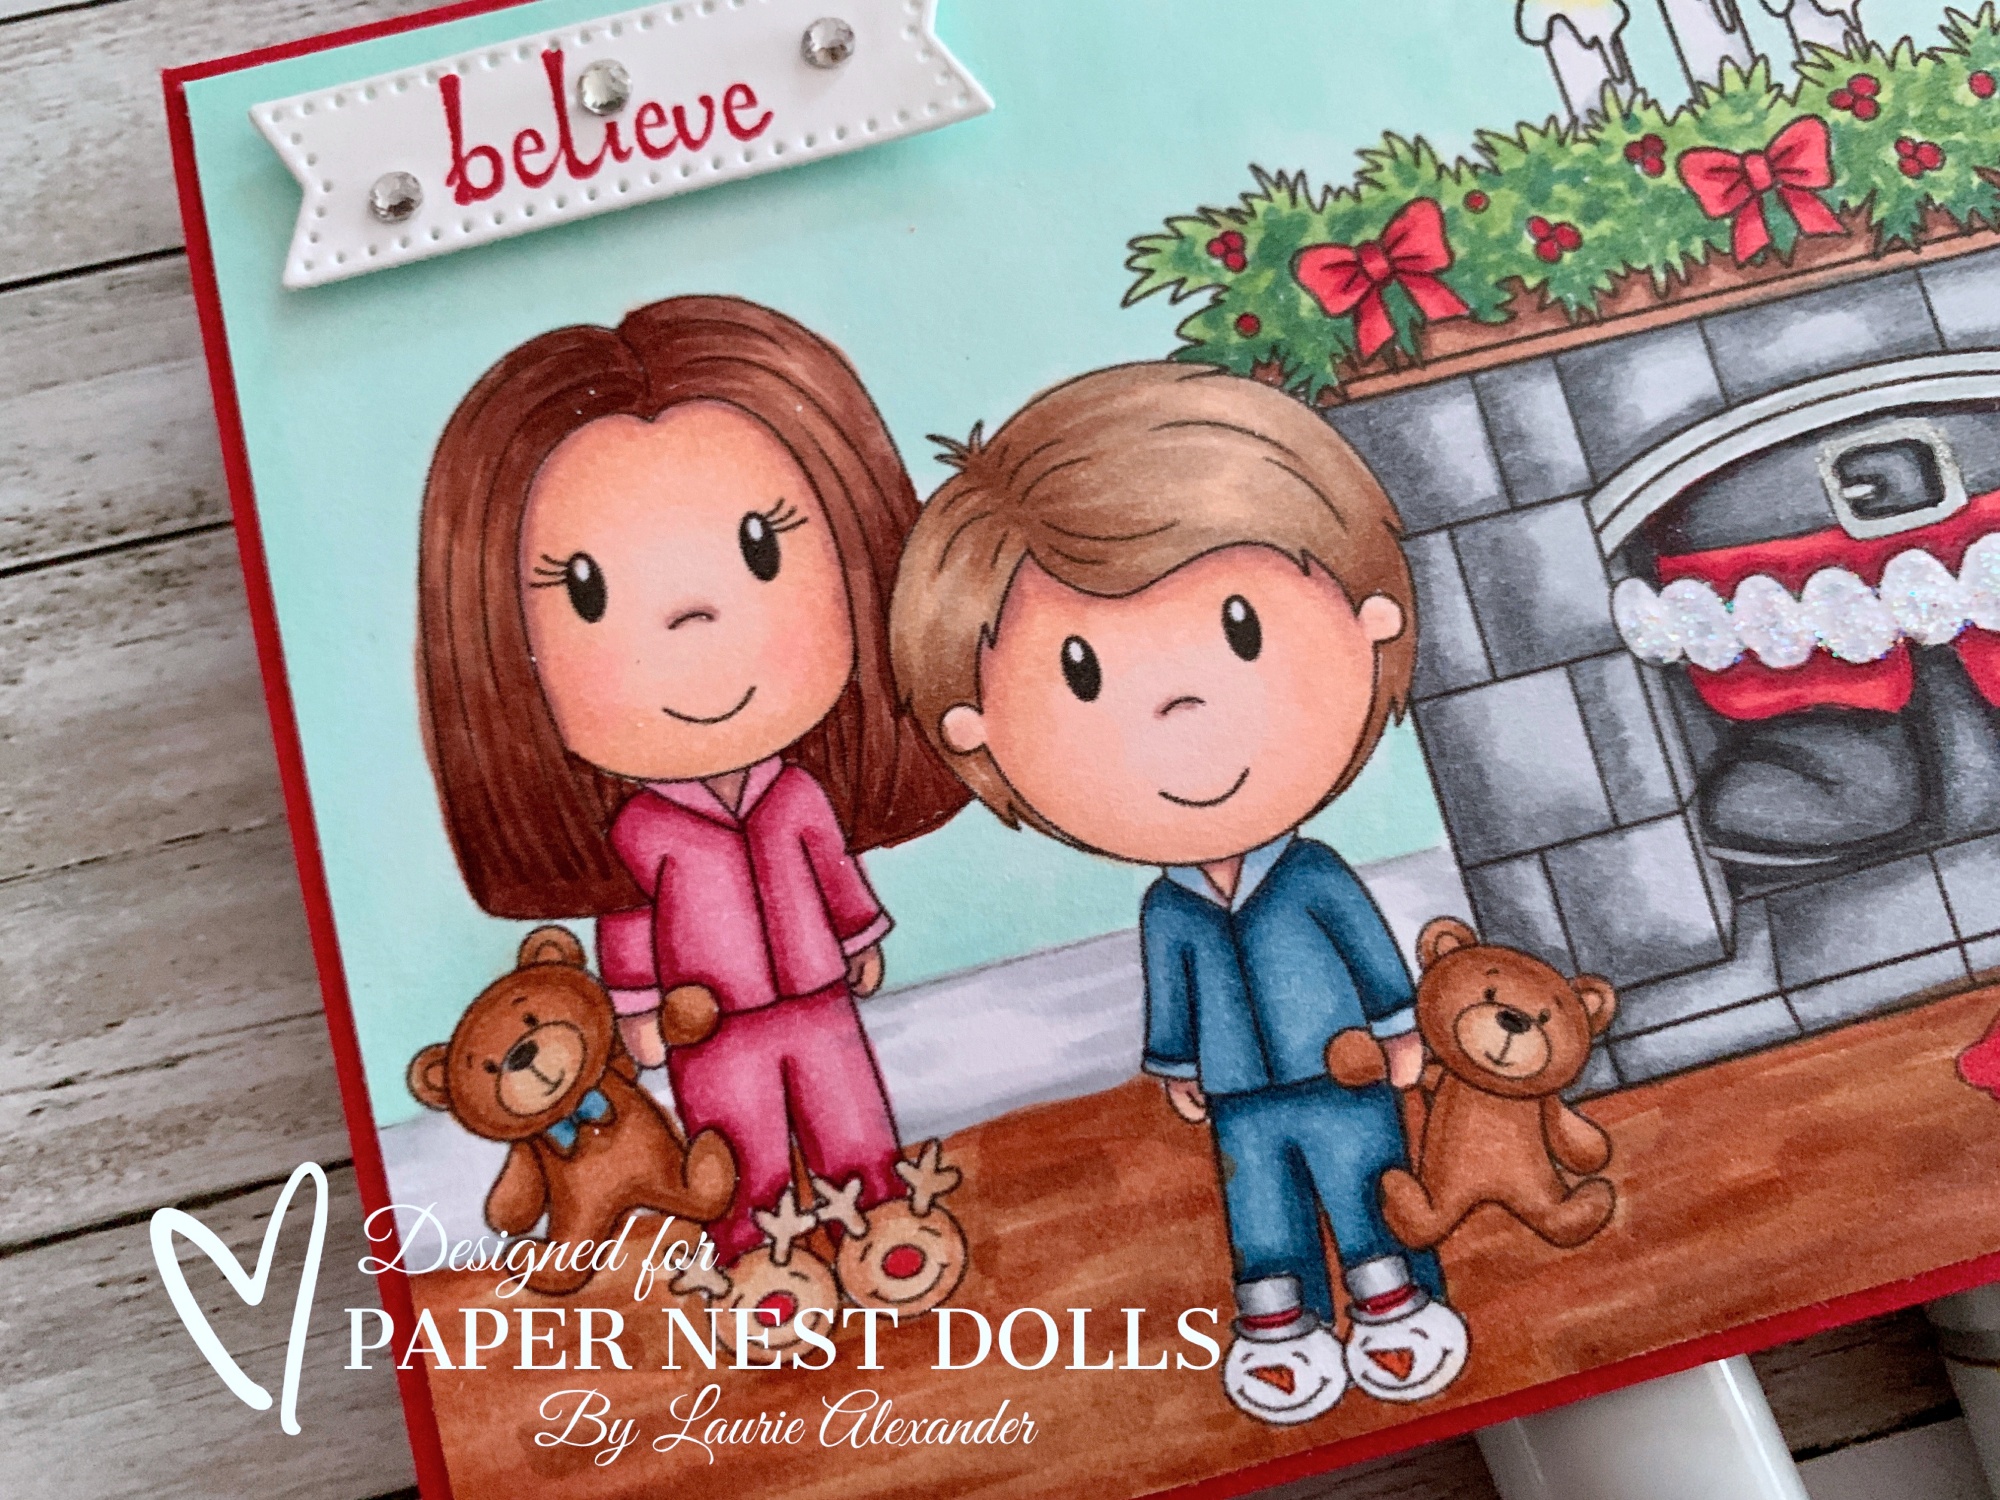
Hello Crafty Friends! Merry Christmas! It's Laurie here! I am sharing my We Believe in Santa as my Design Team Inspiration Card for Paper Nest Dolls using Christmas Eve Bundle. This Bundle includes 11 Digital Stamps to make the perfect Christmas Eve scene, or fantastic Christmas Cards. I used 7 of them on this card!

The Details of My Card

For my card, I wanted to create a clean and simple Christmas Eve scene and what better way than with a mini slimline card! I used Word to scale and place all my characters where I wanted them and printed it out. Once that was done, I coloured them with my Copic markers. The only thing add was a sentiment that I die cut and popped up with a few rhinestones.

I also added some stickles to Santa’s trim and the Christmas Tree star, as well as, glossy accents to the ornaments and candle flames.

--------------------------

Copic Markers:

Girl
Skin: E000/E00/E21/E11/E04/R20
Hair: E29/E27/E25/E23
PJs: R89/R85/R83/R81
Slippers: E33/E31/R27/E42
Teddy: E37/E35/E33/E31/B97/B95/Black Gelly Pen


Boy
Skin: E000/E00/E21/E11/E04/R20
Hair: E57/E55/E43/E53
PJs: B99/B97/B95/B93/B91
Slippers: C6/C4/C2/C1/YR18/R27
Teddy: E37/E35/E33/E31/Black Gelly Pen

Fireplace
Bricks: C9/C6/C4/C2
Reds: R29/R27/R24
Greens: G28/YG17/YG03
Mantel: E27/E23
Candles: C3/0/Y38/Y15/Y11/YR18


Santa
Reds: R89/R29/R24
Blacks: C9/C6/C4
White Trim: C3/C1/Stickles

Dog
Dog: E29/E27/E25/E23
Pillow: R59/R29/R27/R24
Nose: Black Gelly Pen


Christmas Tree
Reds: R29/R27/R24
Greens: G28/YG17/YG03
Blues: B97/B93/B91
Pinks: R89/R83/R81
Yellows: Y38/Y15/Y11
Tree Trunk: E27/E23
Star: Y17/Y15/Y11/Stickles
Popcorn: Y11/0
Tree Base: C6/C4/C2

Christmas Presents
Red: R29/R27/R24/G28/YG17/YG03
Blue: B97/B95/B91/Y17/Y15/Y11
Pink: R89/R83/R81/G28/YG17/YG03
Yellow: Y17/Y15/Y11/B97/B95/B91

Room
Floor: E39/E35/E31
Walls: G000/G00
Baseboards: C3/C1

--------------------------

Card Recipe for My We Believe in Santa:

Christmas Eve Bundle, Paper Nest Dolls
Paper Basics - Stamper's Select White Cardstock, Papertrey Ink
Stylish Shapes Dies, Stampin’ Up!
Itty Bitty Christmas, Stampin’ Up!
Rhinestone Basic Jewels, Stampin’ Up!
Black Gelly Roll Pen, Sakura
Glossy Accents, Ranger
Star Dust Stickles, Ranger
Basic White and Real Red Card Stock, Stampin’ Up!

Finished card size: 6 ½” x 3 ½”

--------------------------

Hope you like my Design Team card for Paper Nest Dolls!

Thank you for stopping by!

Hugs,
Laurie


Tuesday, December 20, 2022

Candy Cane Wishes Card 


Hello Crafty Friends! It's Laurie here! I am sharing my Candy Cane Wishes Card as my Design Team Inspiration Card for Paper Nest Dolls using the cute Tiny Elf Ellie. 

The Details of My Card

For my card, I coloured Ellie with my Copic markers in traditional Christmas colours. She went perfectly with the Sweetest Christmas DSP by Stampin’ Up!, plus its theme was candy canes! Couldn’t get better than that!

The diagonal striped Real Red die cut piece allowed the DSP to show through. So, I matched the openings in the die cut to the DSP stripes which added to my candy cane striped theme. Even the die cut candy canes behind the sentiment were from the DSP.

The sentiment “Candy Cane Wishes and Mistletoe Kisses” summed up my card perfectly! I threaded some Garden Green ribbon through the die cuts holes in the sentiment piece. A flat jingle bell trinket tied with white Baker’s Twine mirrored her bell on her hat. I kept the tails of the twine long so that I could make them swirl on the card.

Some Red Rhinestones and Glossy Accents on the Candy Cane added some nice sparkle to the card.

--------------------------

Copic Markers:

Skin: E000/E00/E21/E11/E04/R20
Hair: E29/E27/E25/E23
Reds: R39/R29/R24/R24
Greens: G99/G94/G21
Jingle Bell/Buckle: Y26/Y23/Y21/Glossy Accents
Belt: C6/C4/C3
Candy Cane: R39/R37/R31/C3/C1/0/Glossy Accents


--------------------------

Card Recipe for My Candy Cane Wishes Card:

Tiny Elf Ellie, Paper Nest Dolls
Paper Basics - Stamper's Select White Cardstock, Papertrey Ink
Sweetest Christmas Designer Series Paper, Stampin’ Up!
Sweet Candy Canes Bundle, Stampin’ Up!
Real Red & Garden Green Ribbon Combo Pack, Stampin’ Up!
Flat Jingle Bell Trinkets, Stampin’ Up!
Baker's Twine Essentials Pack, Stampin’ Up!
Red Rhinestone Basic Jewels, Stampin’ Up!
Glossy Accents, Ranger
Basic White and Real Red Card Stock, Stampin’ Up!

Finished card size: 5 ½” x 4 ¼”

Stamp Size: 4” Tall

--------------------------

Hope you like my Design Team card for Paper Nest Dolls!
Thank you for stopping by!

Hugs,
Laurie

Monday, July 25, 2022

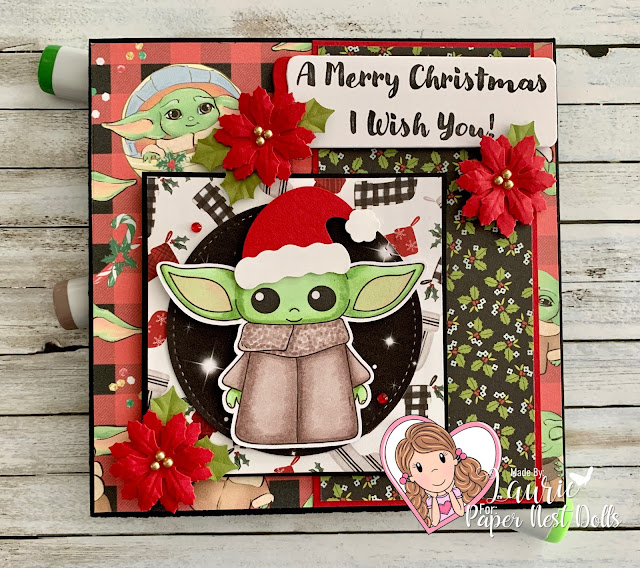
My Rebel Christmas Card


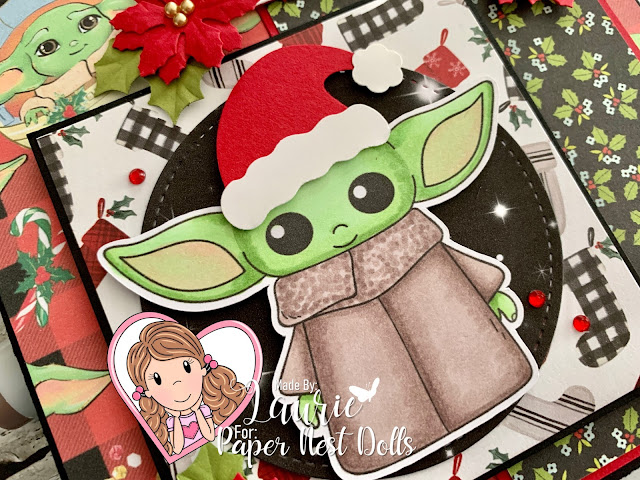
Hello Crafty Friends! It's Laurie here! I am sharing my Rebel Christmas Card using Rebel Baby by Paper Nest Dolls for my Design Team Inspiration Card. It is never too early to start your Christmas cards and anyone who knows me, knows I love this little cutie patootie!

My Rebel Baby was already coloured from when I practiced for my presentation at the Wizards and Rebels Weekend for Paper Nest Dolls back in August (here is a link to that card). He has been sitting on my desk waiting to be put on a card and I thought a Christmas card would be fun!

--------------------------

Copic Markers:

Rebel Baby
Skin: YG11/YG13/YG17/R20
Robes: E70/E71/E74


--------------------------

Card Recipe for My Rebel Christmas Card:

Rebel Baby, Paper Nest Dolls
Paper Basics - Stamper's Select White Cardstock, Papertrey Ink
Sentiment, Printed out on Computer
Star Wars Digital Paper, ArtStudio
Farmhouse Christmas 6” x 6” Paper Pad, Carta Bella
Make It Merry 6” x 8” Paper Pad, Simple Stories
Stitched Layering Circle Dies, Memory Box
Jolly Hat Builder Punch, Stampin’ Up!
Floral Punch Poinsettia, Nellie’s Choice
Metallic Pearls, Stampin’ Up!
Red Rhinestone Basic Jewels, Stampin’ Up!
Basic Black, Real Red, Old Olive
and Basic White Card Stock, Stampin’ Up!

Finished card sizes: 5.5” x 5.5”

--------------------------

Hope you like my Design Team card using
Rebel Baby by Paper Nest Dolls!

Thank you for stopping by!
Hugs,
Laurie


Thursday, December 23, 2021

Christmas Means More by Laurie

Christmas Means More Card

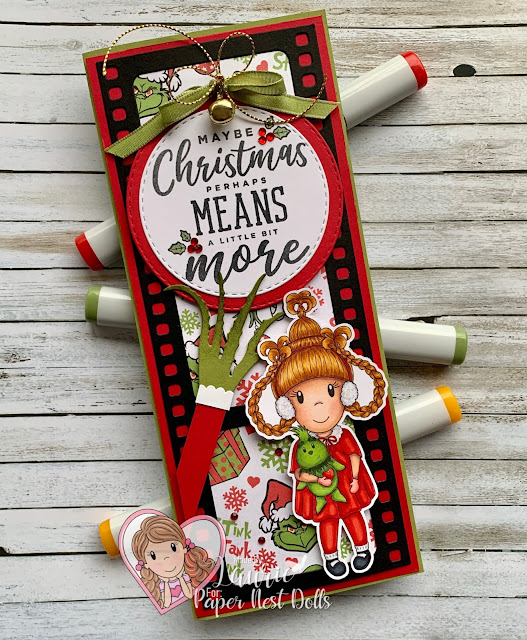
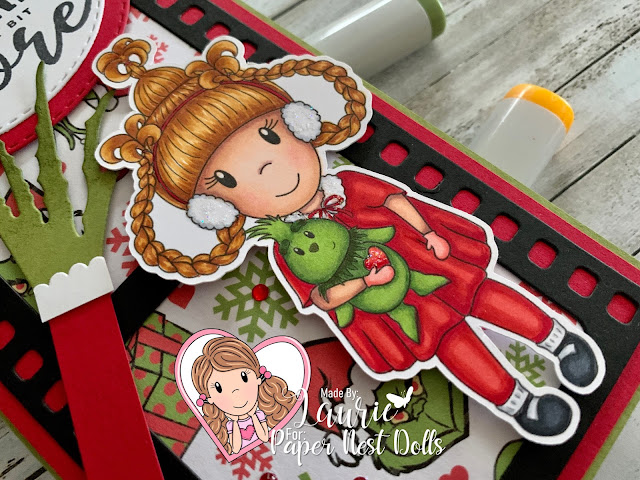
Hello Crafty Friends! It's Laurie here! I am sharing my slimline Christmas Means More as my Design Team Inspiration Card for Paper Nest Dolls using the digital stamp called Avery with Christmas Plushie. 

When I saw this cutie, I knew that I had to make a card for her! My hubby and I watch The Grinch Who Stole Christmas every year for Christmas. My hubby cheers for the Grinch to win and I cheer for Cindy Lou Who! You would never guess who wins! Lol!

--------------------------

Copic Markers:

Skin: E000/00/21/11/04/R20
Hair: E99/YR24/YR23
Reds: R29/R27/R24/R22
Shoes: C9/C7/C5
Mitts: R22/R20
Plushie: G99/YG67/YG63/R29/R24/R22

--------------------------

Card Recipe for Christmas Means More:

Paper Basics - Stamper's Select White Cardstock, Papertrey Ink
Grinch Seamless Pattern, Bestie Pattern 
Slimline Film Strip Die, Whimsy Stamps
Stitched Layering Dies, From my Stash
Potted Succulents Dies, Stampin’ Up!
Layering Circles Dies, Stampin’ Up!
Christmas Means More Stamp Set, Stampin’ Up!
Tuxedo Black Memento Ink Pad, Stampin’ Up!
Old Olive Classic Stampin' Pad, Stampin’ Up!
Blending Brushes, Stampin’ Up!
Old Olive Ribbon, Stampin’ Up!
Gold Simply Elegant Trim, Stampin’ Up!
Gold Jingle Bell, From my Stash
Red Rhinestone Basic Jewels, Stampin’ Up!
Stardust Stickles, Ranger
Old Olive, Real Red, Basic Black and Basic White Card Stock, Stampin’ Up!

Finished card size: 8.5” x 3.5”

--------------------------

Hope you like my Design Team card using
Avery with Christmas Plushie by Paper Nest Dolls!

Thank you for stopping by!

Hugs,
Laurie


Thursday, December 17, 2020

Jingle All the Way

Santa Ellie with Gift


Hello Crafty Friends! It's Laurie here sharing my Jingle All the Way Card for the Design Team of Paper Nest Dolls. I used the updated Santa Ellie with Gift which is only $1 right now! Make sure you get yours at such a great deal!!

I coloured Ellie with my Copic Markers in Santa red and white colours. Isn’t she just the cutest in her Santa outfit! I knew that I wanted to create a shaker card and use some Christmas foil accents. There have been some awesome shaker cards by the PND Design Team, and I was inspired by them to give it a try! Since the Jingle All the Way die cut had bells, I used mini bells from the dollar store for the shaker part. I had to double up my adhesive strips to give the bells enough room to jingle when you shook the card. To tie in those bells, I die cut some larger bells in the red and green foil and then tied 3 bells with linen thread.

--------------------------

Copic Markers: 

Skin: E000/00/21/11/04/R20
Hair: E37/E35/E33/E31
Reds: R39/R37/E35/E32
Greens: G99/G94/G21
Boots: C7/C5/C3
Whites: BG10/BG000/0/Stardust Stickles

Close Up of Santa Ellie with Gift

--------------------------

Card Recipe for My Jingle All the Way Card:

Santa Ellie with Gift, Paper Nest Dolls
Sweet Sentiment Premium Coloring Paper
Jingle All the Way Frame, Taylored Expressions
Sounds of the Seasons Dies, Stampin’ Up!
Holly Flourish Die, Cheery Lynn Designs
Red & Green Foil Sheets, Stampin Up!
Window Sheet, Stampin’ Up!
A Robin’s Christmas Paper Pack, Wild Rose Studios
Crafts Noel Card Making Kit, Dollarama (Bells)
Clear Wink of Stella
Stardust Stickles
Glossy Accents
Linen Thread, Stampin’ Up!
Foam Adhesive Strips, Stampin’ Up!
Real Red and Garden Green Card Stock, Stampin’ Up!
Finished card size: 5½” x 5 ½”

--------------------------

Hope you like my Jingle All the Way Card using Santa Ellie with Gift by Paper Nest Dolls!

Thank you for stopping by!

Hugs,
Laurie


Sunday, December 6, 2020

Toys for Tiny Tots Card

Hello Crafty Friends! It's Laurie here sharing my Toys for Tiny Tots Card for the Design Team of Paper Nest Dolls. I used the super cute Ellie in a Box from the New December Release.

Toys for Tiny Tots Card

--------------------------

Copic Markers: 


Skin: E000/00/21/11/04/R20
Hair: E29/E27/E25/E23/E21
Reds: R39/R29/R27/R24
Greens: G99/G94/G21
Star: Y13/Y15/Y17/Gold Gelly Roll Pen

Close Up of Toys for Tiny Tots Card

--------------------------

Card Recipe for My Toys for Tiny Tots Card:


Ellie in a Box, Paper Nest Dolls
Nestabilities Die - Floral Ovals, Spellbinders
Sizzix Oval Collection Framelits Dies, Stampin’ Up!
Baby Toy Dies, From my stash
Santa’s Workshop Specialty Designer Series Paper, Stampin Up!
Christmas Around the World Designer Series Paper, Stampin Up!
Value Pack Cards & Envelopes by Recollections, 5” x 6 ½”, Michaels
Victorian Christmas Fibers, Busy Box Blends
Red Rhinestone Basic Jewels, Stampin’ Up!
Holiday Rhinestone Basic Jewels, Stampin’ Up!
Clear Wink of Stella
Gold Gelly Roll Pen
Black Gelly Roll Pen
Big Shot Embossing Mat
Stamping Sponges, Stampin’ Up!
Misty Moonlight, Crushed Curry, Crumb Cake, Pool Party
and Soft Suede Classic Stampin' Pads, Stampin’ Up!
Misty Moonlight, Crushed Curry, Crumb Cake, Pool Party and Soft Suede,
Real Red and Garden Green Card Stock, Stampin’ Up!
Finished card size: 5” x 6 ½”

--------------------------

Hope you like my Toys for Tiny Tots Card using Ellie in a Box by Paper Nest Dolls!

Thank you for stopping by!

Hugs,
Laurie


copyright © 2013 the paper nest · graphics by erica belton · web design by red peach designs