Thursday, October 29, 2020

Happy Halloween! Avery with Jack-o-Lantern

Hello there!  It's Amanda Fitterer here and today I'm sharing a Halloween card!  I used the Avery with Jack-o-Lantern digital stamp and printed her on 80lb Neenah Solar White cardstock.  


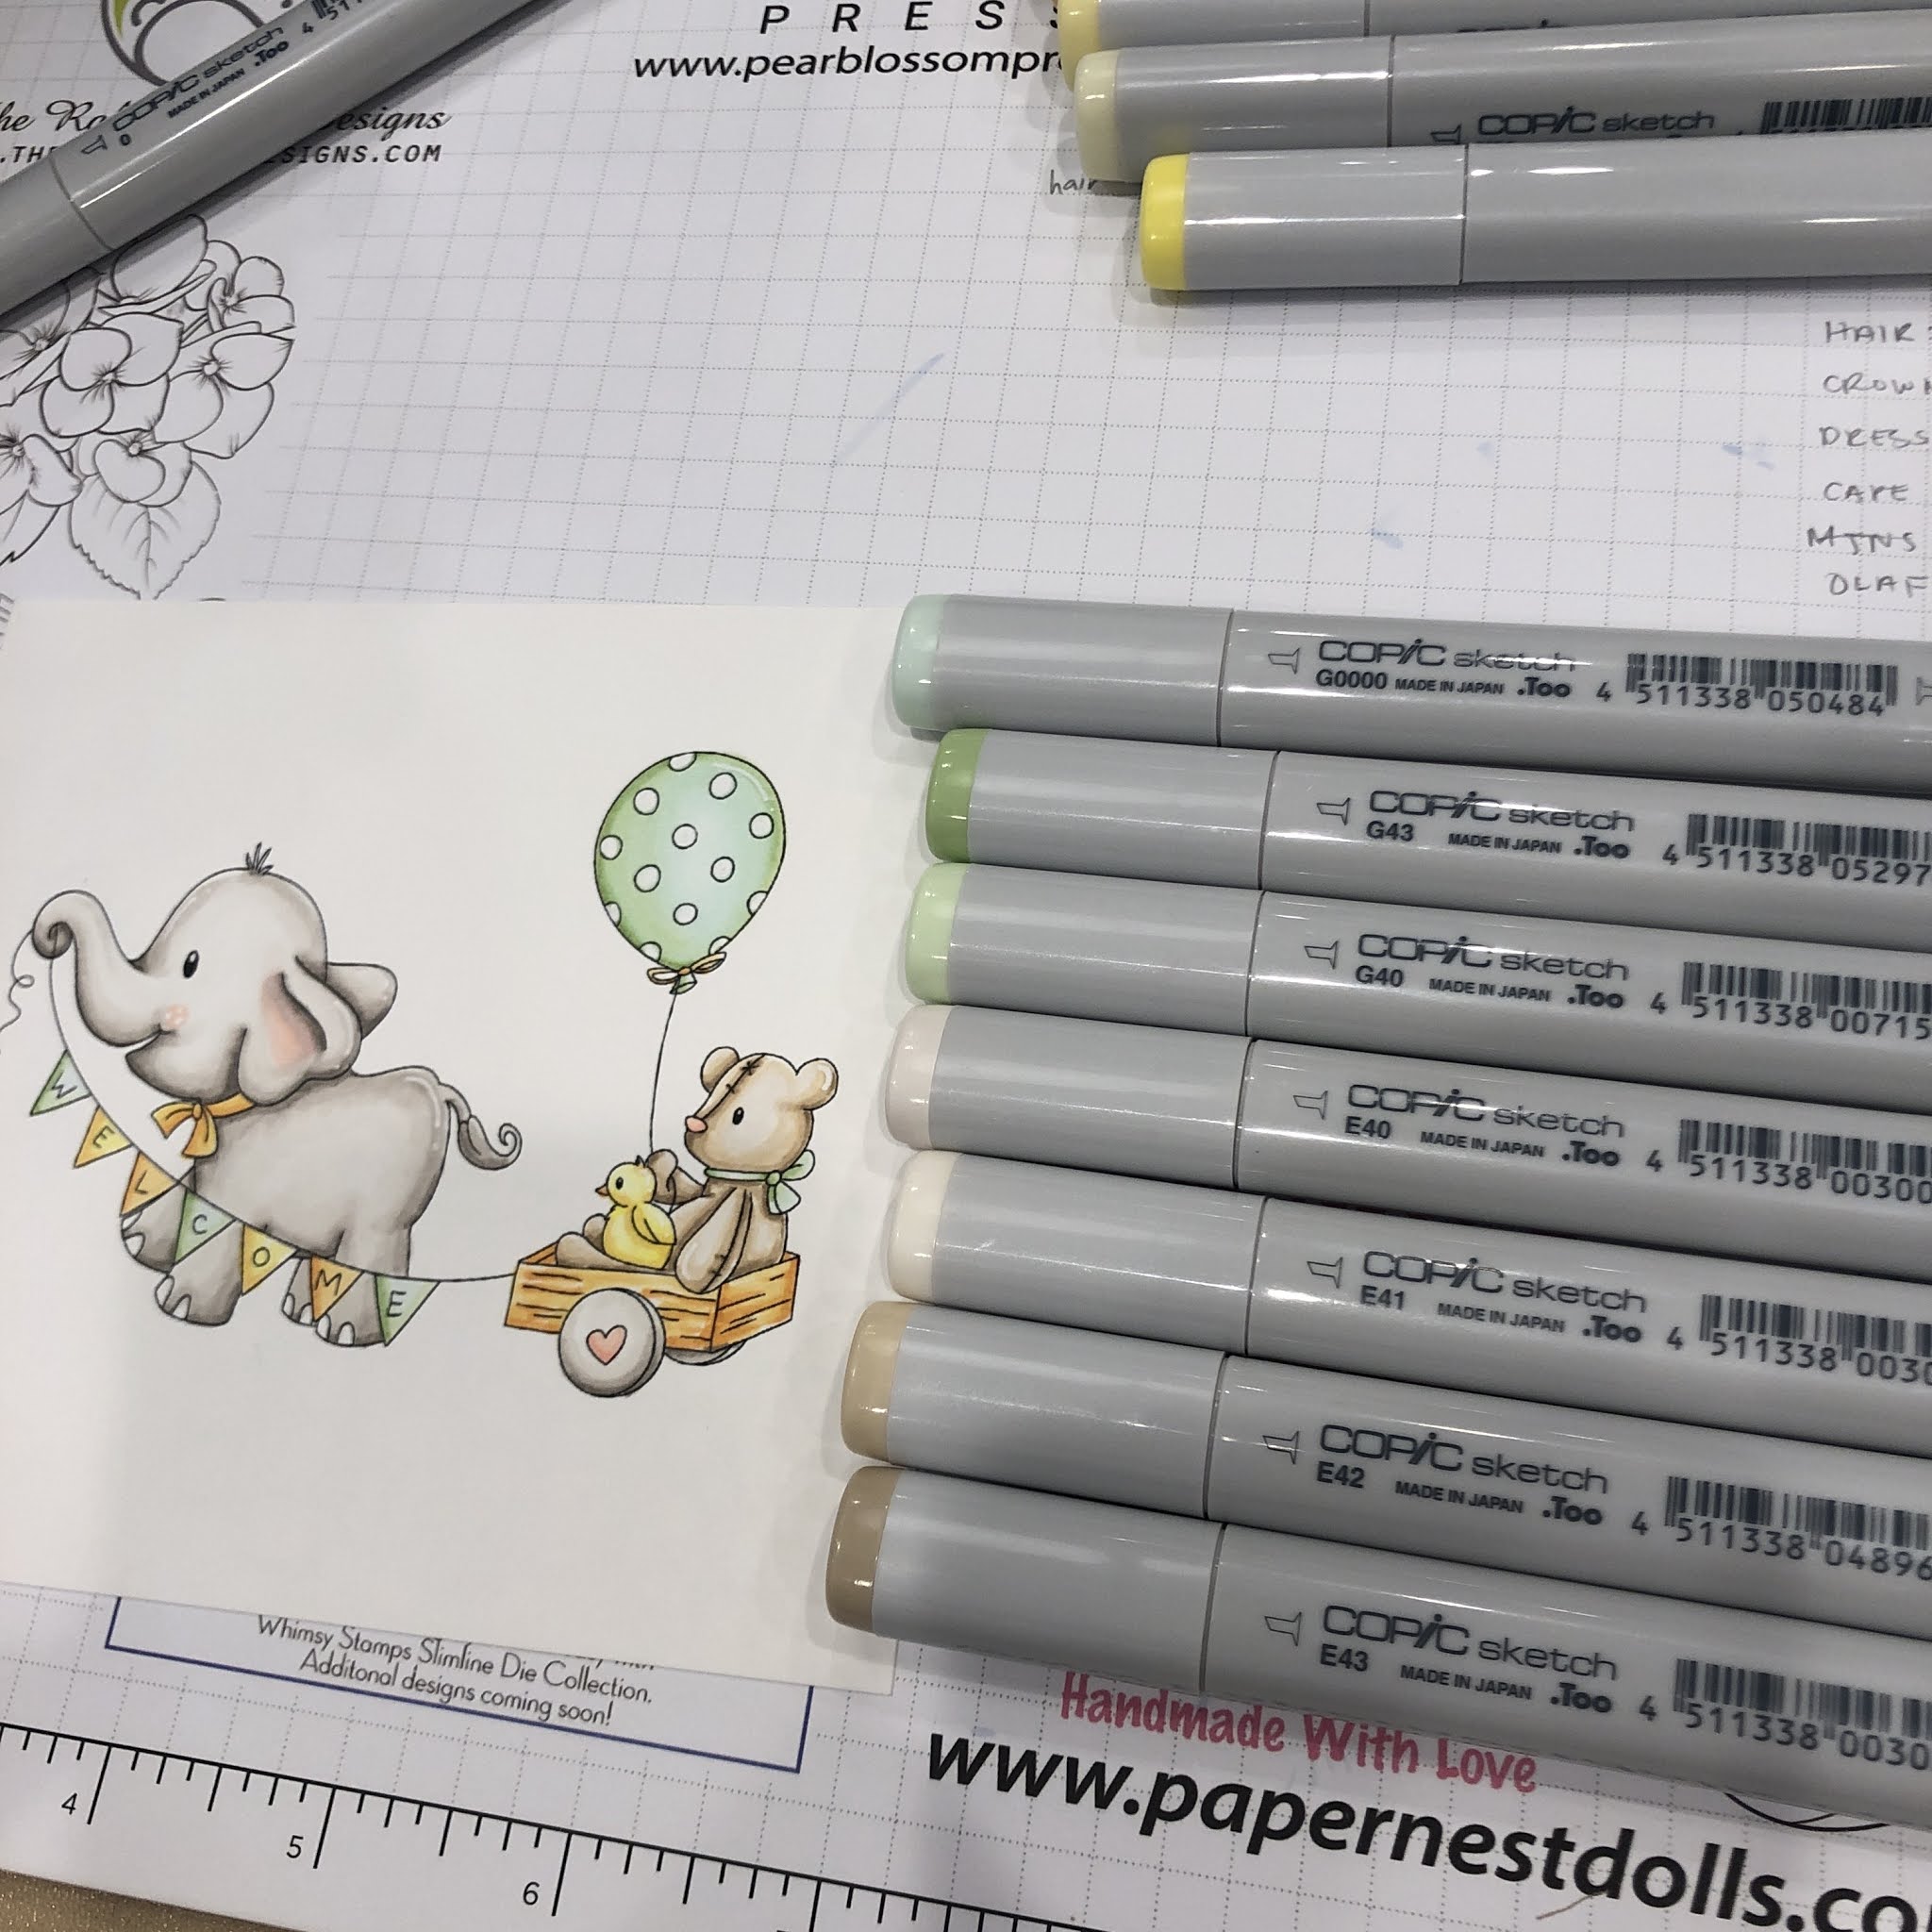
I colored this sweet Avery with Copic markers.
Skin:  E000, E00, E21, E11, E04, R20
Hair:  E55, E53, E50, YR30, Y23
Dress:  B91, B93, B95, B97


Bow and Socks:  V17, V15, V13
Shirt:  YG00, YG21, YG25, YG17
Jack-o-Lantern:  Y13, YR12, YR14, YR16, YR27, E29, E57, E23


Boots:  E23, E25, E27


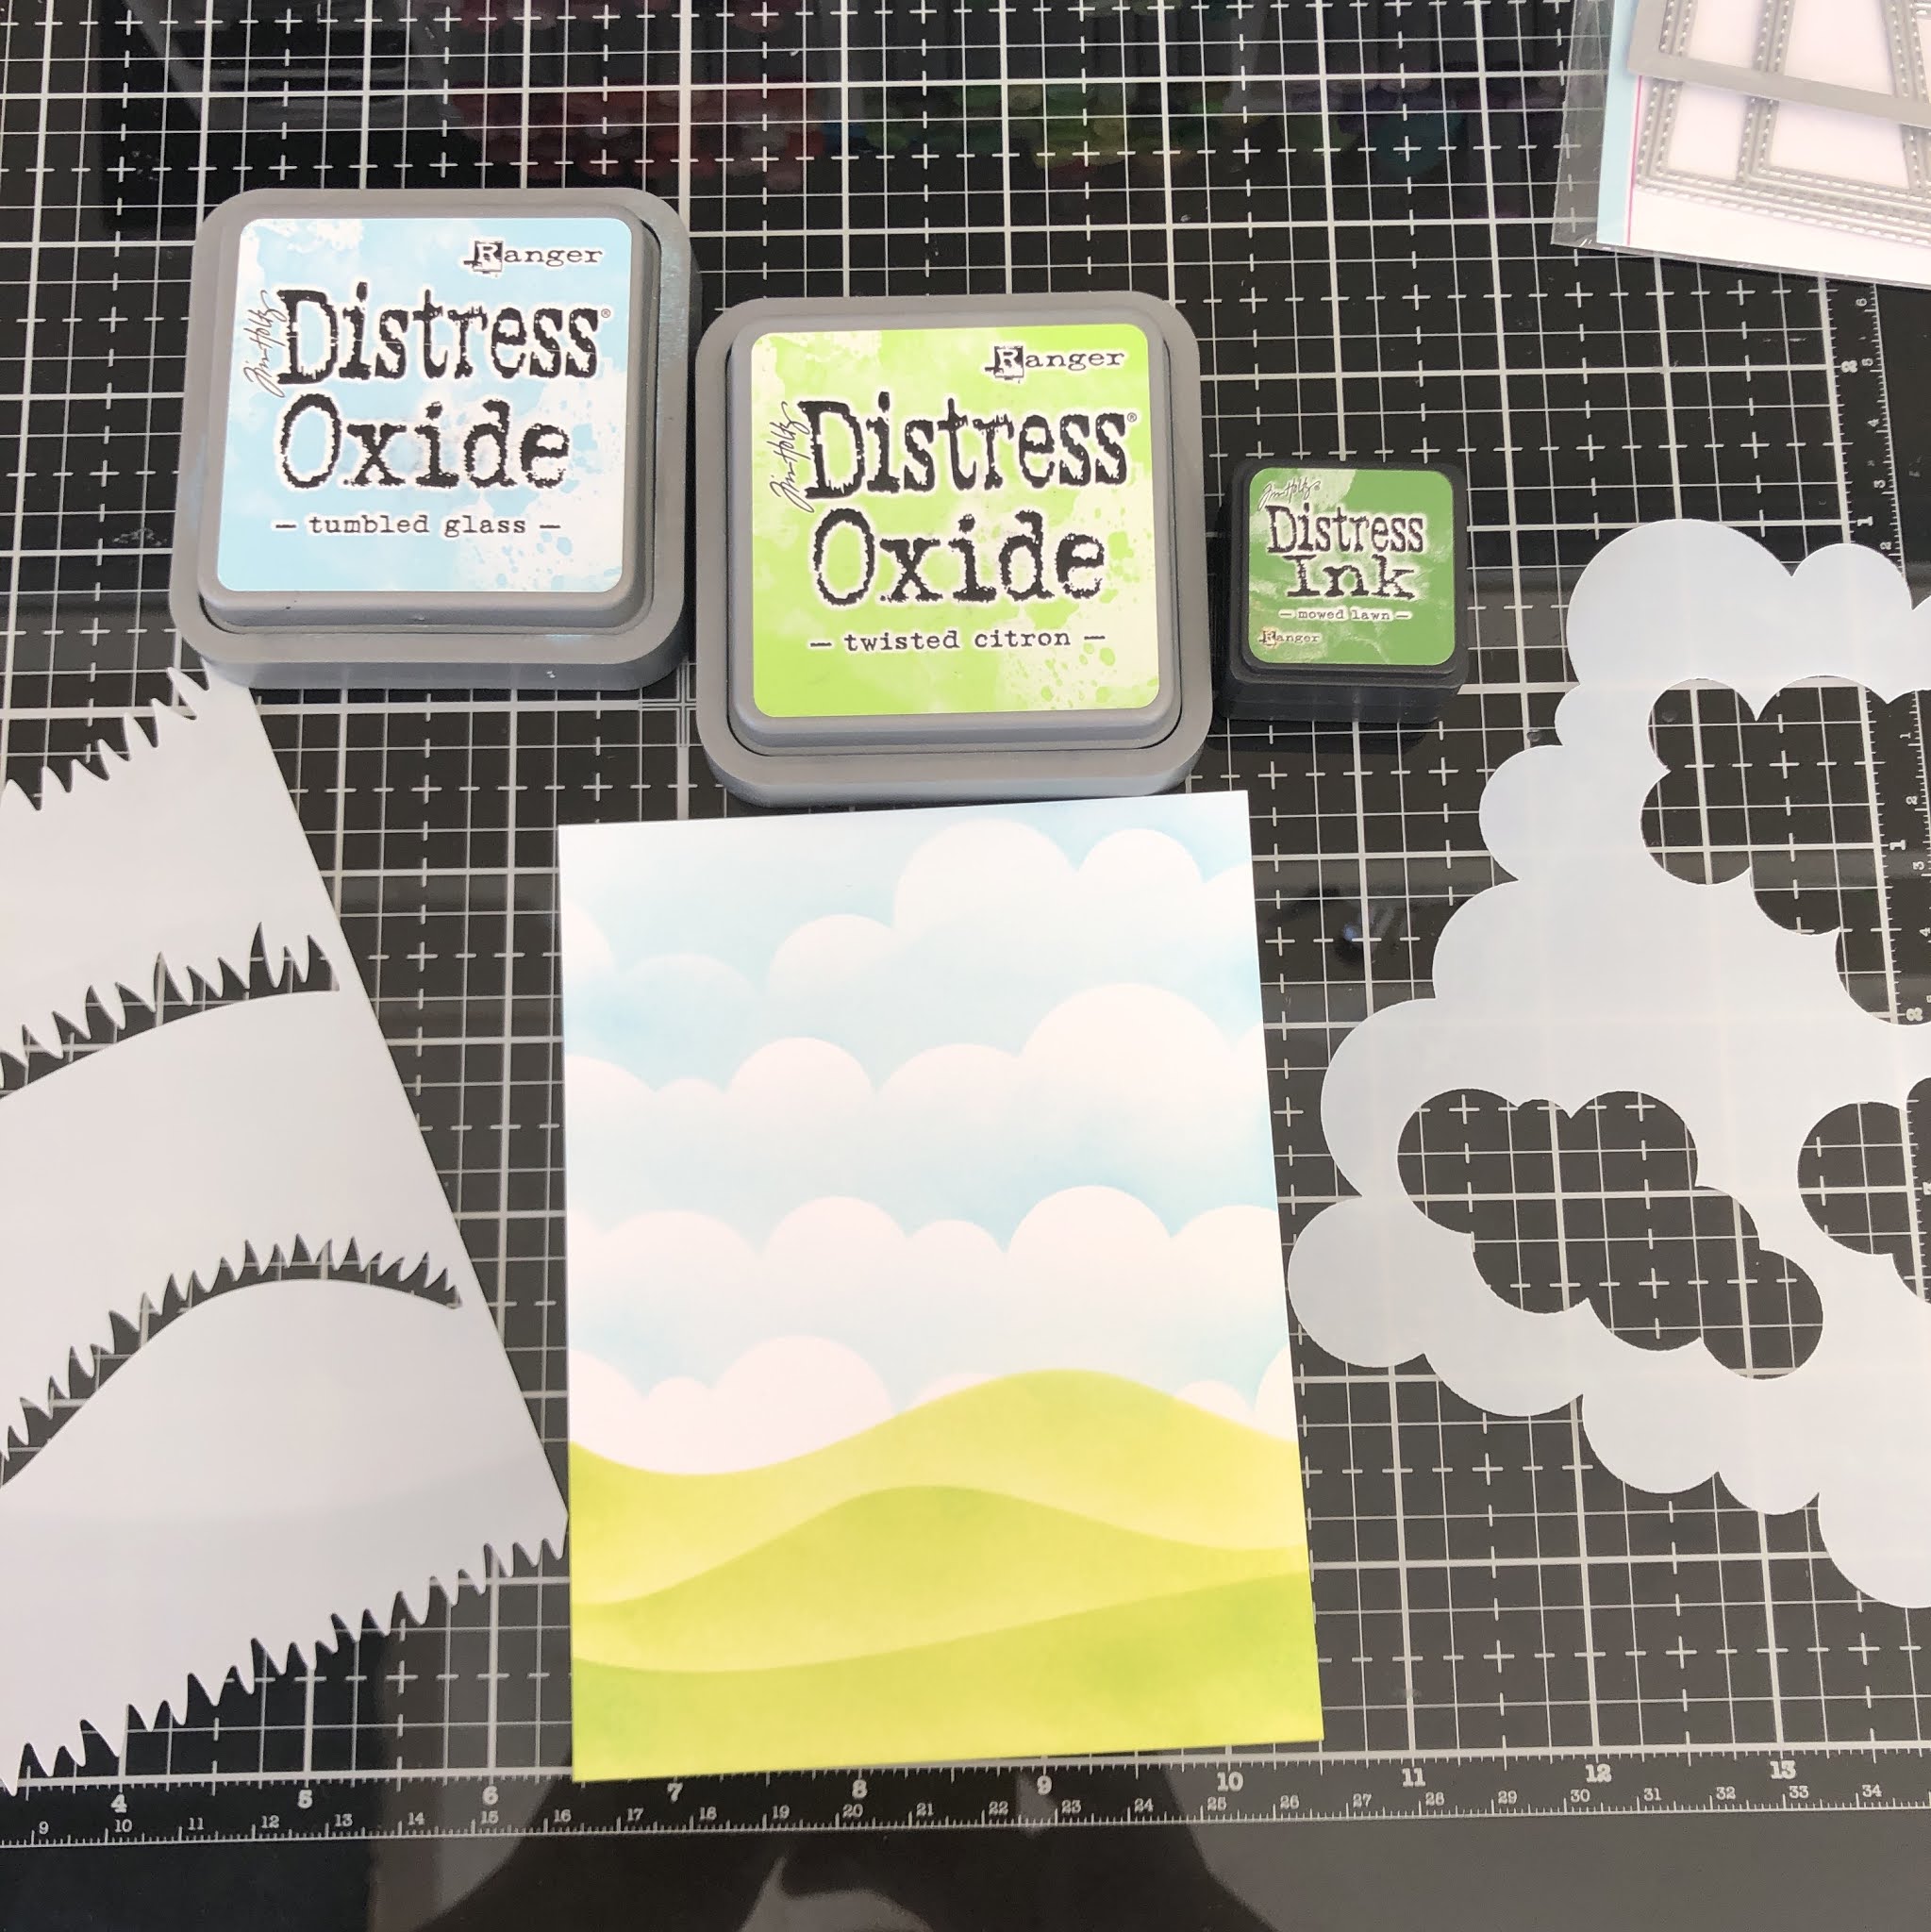
For the background, I used Simon Says Stamp Clouds for Days Stencil and Heffy Doodle Green Fields Stencil.  I also used Heffy Doodle's Grassy Lass Dies.  The sky is Tumbled Glass Distress Oxide and the hills and grass are a blend of Mowed Lawn and Twisted Citron.


Using 3D foam squares and strips, I adhered my sentiment, grass, and Avery to the front of the card.  I also used some patterned paper and colored cardstock to create multiple layers for my card base.  I cut out some orange hearts from one of the pieces of patterned paper and adhered them to the card using 3D foam squares.


Thank you so much for stopping by the Paper Nest Dolls blog!  I hope you enjoyed my post and feel crafty inspiration!  Xoxo, Amanda


Tuesday, October 27, 2020

Halloween Sign by Noelene

 Hi all,

Noelene here with you today to share with you my latest D.T. inspiration. 


With the current situation around the world at the moment things may be a little different this year with Halloween & how you go about Trick or Treating, but that does not mean you have to miss out on all the fun. 


So for my inspiration today I wanted to share with you an easy project I made for Halloween. I filled an acetate box with some yummy lemon & orange Skittles. I then decorated with some fun Halloween themed paper & ribbon. I finished off with a tag I made using the spook-tac-ular image from Paper Nest Dolls called Halloween Sign


There you have it a simple Halloween treat gift!

Halloween sign is available in rubber here & in digi format here.

Thanks for stopping by!

Hugs

Noelene x


Monday, October 26, 2020

Avery with Jack-O-Lantern by Céline

Hi
Céline here to share a fall card even if the image is more Halloween. I used Avery With Jack-O-Lantern and made a shaker with.

Copics used : 
Skin :  E13, 11, 21, 00, 000, R21, 20
Hair : YR23, Y26, YR31
Clothes : BG13, 23, 34, 32, E37, 35, 33
Jack-O-Lantern : E19, YR18, 16, 14, YG97, 95

Thanks for stopping by.
Hugs
Céline

Saturday, October 24, 2020

Avery in Oz

Hi Crafty Friends,
I was inspired to create this cute card using Paper Nest Dolls Avery in Oz stamp because when I was in 5th grade my twin sister was Dorothy in our school play and I was the tin man. I'm going to send her this card because she thinks she is the BEST singer since she sang Somewhere Over the Rainbow.

Make Crafty Friends Q & A:
Q: Were you ever in a school play?
A: Me? Yes. I was in Snow White ( I was Sleepy) and Wizard of Oz (I was Tinman)


Don't forget to subscribe, follow, and comment on my blog for your chance to win my October Prize (see right panel) and for more giveaways and inspiration follow me on Instagram @MadeByMeghanK

Supplies:
Paper Nest Dolls Avery in Oz
Hello Bluebird Rainbow Scene Die
Kat Scrappiness Cityscape Slimline Die


Thursday, October 22, 2020

A Goth Family Portrait


Hello Crafty Friends! It's Laurie here sharing my Goth Family Portrait for the Design Team of Paper Nest Dolls. This card incorporates 4 different digital stamps that include Goth Dad, Goth Mom, Goth Boy and Goth Girl from the October New Release to create my family portrait!

A Goth Family Portrait

When I was little, I loved to watch the Addams Family in B&W on TV. I was so excited when I saw this month’s release! I decided to colour the family in the colours from the Addams Family movies. So, I gave them very pale skin, but with dark clothing using only T Copic Markers to achieve the effect. I love the pop of colour with the rose and the alligator. I thought they would want to have their portrait taken in front of some of their ancestors that are hung on the wall. Being a Halloween card, you have to have spider webs with spiders in the corners. I hope you like my take on my family portrait!

Close Up of A Goth Family Portrait


--------------------------

Copic Markers:

Goth Dad
Skin: E50/E51/E53
Hair: T9/T7/T5/T3
Suit: T9/T7/T5 (dark stripes), T5/T3/T1 (light stripes)
Tie: T9/T7/T5/T4
Shirt: T2/0
Shoes: T9/T7/T5

Goth Mom
Skin: E50/E51/E53/R20
Hair: T9/T7/T5/T4/T3
Dress: T9/T7/T5/T3
Rose: R39/R37/R35/R32/G21/G94/G99

Goth Boy
Skin: E50/E51/E53
Hair: E57/E43/E53/E50
Shirt: T9/T7/T5 (dark stripes), T2/T1/0 (light stripes)
Pants/Socks/Shoes: T9/T7/T5
Alligator: YG03/YG17/YG67
Leash: E57/E43

Goth Girl
Skin: E50/E51/E53/R20
Hair: T9/T7/T5/T3
Dress: T5/T4/T3/T2/T1/0
Shoes: T9/T7/T5
Socks: T9/T7/T5 (dark stripes), T2/T1/0 (light stripes)
Doll: Same colours as Girl

--------------------------

Card Recipe for Goth Family Portrait:

Goth Dad, Goth Mom, Goth Boy, Goth Girls, Paper Nest Dolls
Cauldron Framelits Dies, Stampin’ Up!
Pinewood Planks 3D Embossing Folder, Stampin Up!
Magic in this Night Designer Series Paper, Stampin Up!
Monster Bash Designer Series Paper, Stampin Up!
Spider Trinkets, Stampin’ Up!
Basic Black Card Stock, Stampin’ Up!

--------------------------

Hope you like my Goth Family Portrait
using The Goth Digital Stamps by Paper Nest Dolls!

Thank you for stopping by!

Hugs,
Laurie


Tuesday, October 20, 2020

Avery with Jack-O-Lantern by Noelene

 Hi all, Noelene here with you today to share another card for my D.T inspiration.
Today I am sharing a card using one of the new images from the newest Halloween stamps from Paper Nest Dolls.


This adorable image is called Avery with Jack-O-Lantern. I coloured her with Copics then made this pretty card using matching Halloween coloured papers.


This image is also great to use for any occasion, not just at Halloween. As you can see from the sentiment I made it for a friend.


Avery with Jack-O-Lantern is available in digi stamp here.

Thanks for stopping by!

Hugs

Noelene x

Monday, October 19, 2020

Frankie By Céline

Hi
Céline here to share an Halloween card. I used Frankie and made a shaker with.


Copics used : 
Skin : YG11, G40, 20
Hair : 100, C8, 6, BV04
Clothes : 100, C8, 6, 5, V09, 06, 17, 15, RV06, 19, 17, BG57, 45, 53, E53, 51, 50

Thanks for stopping by.
Hugs
Céline

Sunday, October 18, 2020

Let's Make a Fall Card with Ellie!

Hello PND Fans! It's Betty here with a cute Fall card. It's been another hot week in the 90s here in the Sacramento, California area, but the weather forecast says cooler days are coming. We need the cooler weather for the trees to change colors. I love the beautiful fall colors, just like the colors in this card I made with Paper Nest Dolls' Ellie with Scarecrow stamp. Isn't she just the cutest? This stamp comes in red rubber and in digital


This card is easy to make and you can use any fall colors and patterned paper you have in your stash. All you need are some leaves die cuts and the fence die cut, which is optional. Let's get started!

Supplies:
  • Paper Nest Dolls stamp (links above): I used the digital stamp and printed the image at 3-1/2" tall.
  • Color your stamp using the medium of choice. I used Copic markers (colors are listed below)
  • Distress ink or Distress Oxide - Tumbled Glass
  • Ink Blending Tool
  • Brown cardstock to mat the colored image (2-7/8" x 4-3/8") 
  • White base cardstock: 12" x 6" folded in half
  • Patterned paper, fall design: 5-3/4" x 5-3/4"
  • White cardstock for layering: 4-1/2" x 4-1/2"
  • Solid or tone-on-tone patterned paper for layering (I used orange with dots): 4-3/8" x 4-3/8"
  • Yellow, green and orange cardstock for leaves
  • Leaves die
  • Fall sentiment: I used Microsoft Word and printed the sentiment at 1-1/2" x 3/4" and used my paper trimmer to cut it out at 2-7/8" x 1"
  • Brown cardstock for matting the sentiment at 2" x 1-1/8"
  • Optional item: fence die cut. I used a die from Gina Marie Designs and used a cardstock that had a wood-like pattern.
  • Your favorite adhesive
Copic markers used:

Ellie:
  • Hair: E39, YR24, YR23, YR20
  • Skin: E04, E11, E21, E00, E000
  • Cheeks: R20
  • Orange: YR27, YR16, YR14M YR12M YR00
  • Green: YG17, YG13, YG03, YR21
  • Gray (Boots): T5, T3, T1
Scarecrow:
  • Face: E43, E42, E41, E40
  • Orange: YR27, YR16, YR14M YR12M YR00
  • Gray: T5, T3, T1
  • Center of sunflower & pole: E43, E42, E41, E40
  • Yellow: Y17, Y15, Y11
Instructions:
  • Stamp or print your image onto white cardstock
  • After coloring your stamp, ink the sky using the Distress/Oxide ink with a blending tool. 
  • Using a paper trimmer or rectangular die, cut out your stamp at 2-3/4" x 4-1/4".
  • Stamp or print your sentiment and cut to the size listed in the supplies list
  • Using a paper trimmer, cut all the cardstock listed in the supplies list
  • Die cut all your dies listed in the supplies list
  • Layer and glue all the pieces together as shown below

Thank you for stopping by and I hope you give this cute fall card a try. If you have any questions or comments, please leave them below. ~Betty~


Saturday, October 17, 2020

Cara Mia by Noelene

 Hi all, Noelene back again today to share some D.T inspiration.
Today I am using 2 adorably gooky & spooky images for the new Halloween collection released today. Inspired by the Addams Family movie. I am using Goth Mom & Goth Dad.


I have created a distressed romantic card today. This card is not just a Halloween card, but could be used as a non traditional Valentines Day card or a card for a couple who love all things Gothic. I love these images because they are so versatile.


I decided to do monotone colouring in Copics with my image using the C markers. With the exception of the rose which I coloured in red to stand out.


Goth Mom is available in store here & Goth Dad is available in store here. Make sure you check out Goth Boy & Goth Girl which are now in the store as well. 

I hope you enjoyed my card today! 

Thanks for stopping by!

Hugs

Noelene x

Thursday, October 15, 2020

Welcome Wagon

Hello all my crafty friends!  It's Amanda Fitterer sharing with you on the Paper Nest Dolls blog today!  I hope your week is going well so far!  It's almost Friday!  Hang in there!  :)

Today, I'm excited to share this adorable and sweet baby card with you!  I used the Welcome Wagon digital stamp to create it!


I printed the digital image on 80lb. Neenah Solar White Cardstock and then colored with Copic markers.  Here are the markers I used:Greens:  G0000, G40, G43
Bear:  E40, E41, E42, E43


Pinks:  R01, R30, R20, R21
Elephant:  W00, W0, W1, W2, W4


Yellows:  Y00. Y11, Y04
Yellow/Orange:  Y21, YR31, YR12, Y32


I fussy cut my image out using scissors and then mounted it on a beautiful patterned paper that looks like a child's book.


A perfect "Welcome Baby" card, don't you think!?  
Thank you so much for stopping by the Paper Nest Dolls blog!  See you again soon!  Xoxo, Amanda

Friday, October 9, 2020

Arabian Princess

Hi Crafty Friends,
Have you decided what you are going to be for Halloween yet? If not, I have an idea... how about a PRINCESS! I'm showing off Arabian Princess from Paper Nest Dolls on this glittery sunshine scene.

Make Crafty Friends Q & A:
Q: What is your favorite Disney Princess?
A: Me? I like the Little Mermaid


Don't forget to subscribe, follow, and comment on my blog for your chance to win my October Prize (see right panel) and for more giveaways and inspiration follow me on Instagram @MadeByMeghanK

Supplies:
Paper Nest Dolls Arabian Princess
Hello Bluebird Sunshine Scene Die
Sequins

Thursday, October 8, 2020

Trick or Treat Card with Witch Avery

Hello PND Fans! It's Betty here with another fun card! Halloween is just 23 days away and still plenty of time to make this cute Halloween card using Witch Avery with Bat digital stamp! I love how this stamp is perfect for a slimline card. It's a fun and easy card to make.


Supplies:
Copic markers used:
  • Hair: E44, E43, E42, E41
  • Skin: E04, E11, E21, E00, E000
  • Cheeks: R20
  • Orange: YR18, YR15, YR02, YR00
  • Purple: V17, V15, V12
  • Green: YG25, YG23, YG21
  • Gray shoes: T5, T3, T1
  • White: C1, blender
  • Brown: E18, E15, E13, E11
  • Yellow: YR27, YR23, YR20
Instructions:
  • Print the digital stamp 4-1/2'" tall. Cut the image out using a 3-1/4" x 4-3/4" die or paper trimmer.
  • Print the digital sentiment 2" x 2". Cut out the sentiment 2-1/4" x 2-1/4".
  • Print and cut the bats
  • Color the stamp with your favorite coloring medium.
  • Cut the black cardstock 3-3/8" x 4-7/8" and adhere your colored stamp on top. 
  • Cut a piece of black cardstock 2-3/8" x 2-3/8". Adhere the sentiment on top.
  • Cut the patterned paper 3-3/4" x 8-3/8" and adhere to the base cardstock.
  • Adhere the sentiment and the colored stamp onto the patterned paper.
  • Adhere the bats.

Thank you for stopping by. If you have any questions or comments, please leave them below.
~Betty~

Wednesday, October 7, 2020

NEW Paper Nest Dolls Stamp Club!!

2 options ....Rubber & Digital 

Rubber is $25 a year , no monthly fees. Comes with 1 Exclusive stamp... girl or boy, you choose ( card below shows girl option! ) 
You will get special offers during the year... have the ability to purchase exclusive images NOT offered to public. There will be events just for membes, special shopping days, discounts , etc. .

The Digital Club is exactly the same, but its $20 a year and all stamps will be digital. 

If you want to join just email me at papernestdolls@gmail.com with subject line Stamp Club, and let me know if you want Rubber or Digital


Add caption

Thursday, October 1, 2020

Spooky Double Z-Fold Halloween Card

Hello Crafty Friends! It's Laurie here sharing my Spooky Double Z-Fold Halloween Card for the Design Team of Paper Nest Dolls. I had so much fun colouring with my Copic Markers these cuties from the Spooky House Set (7 Stamps). This set comes with 7 stamps including 6 characters and a haunted house. I used the digital stamps, but this set also comes in rubber and can be found in the store here

Spooky Z-Fold Halloween Card

I had a ton of fun creating this spooky double z-fold card for our trick-or-treaters who are out roaming around! Do they dare go to the eerily spooky house on the hill??? The pirate and the ghost are headed that way!

Spooky Z-Fold Halloween Card Flat

To create my spooky night sky, I used a technique called the Copic Galaxy Background. For the galaxy stars, I used my Tim Holtz Distress Splatter Brush. I also used a White Gelly Roll Pen and the Colorless Blender, to make my some of my stars appear brighter/closer.

Galaxy Sky

Next I used Tim Holtz Squeezed Lemonade, Carved Pumpkin and Ripe Persimmon Distress Ink Pads with a Round Blending Tool to create my glowing moon on a stitched circle die. I used the Splatter Brush again to splatter water onto the moon to give a bit of texture once it was dry.

I love the Spooky House that comes with this set! I had fun colouring it, especially those glowing windows and doorway! In addition to colouring them, I use a paint brush and painted a thin layer of Apple Sour Nuvo Glow Drops. I wanted the details of the broken panes of glass and the spider to still be seen, but when you turn out the lights, the windows and door glow spookily.

Glowing Windows and Doors

--------------------------

Copic Markers:

Devil
Skin: E000/00/21/11/04/R20
Hair: E18/E15/E13/E11
Red Bits: R39/R37/R35/C3
Black Bits: C9/C7/C6/C4

Witch
Skin: E000/00/21/11/04/R20
Hair/Broom: E30/E33/E35/E37
Dress: V12/V15/V17
Hat/Boots: C9/C7/C6/C4

Close Up of Devil and Witch

Pirate
Skin: E000/00/21/11/04/R20
Hat: C9/C7/C6/Y17/Y19/Y28
Bandana: R39/R37/R35/C3
Shirt: B21/B23/B26/C3/C1/C0/0
Pants: E15/E18/E18
Boots: C9/C7/C6

Ghost
Skin: E000/00/21/11/04/R20
Sheet:B000/BV00/B0000/0
Pinks: RV17/RV14/RV13/RV21
Shoes: C7/C6/C4
Pumpkin: YR02/YR04/R05/R08/YR27

Close Up of Pirate and Ghost

Vampire
Skin: E000/00/21/11/04/R20
Hair: E28/E53/E43
Shirt: C3/C1/C0/0
Vest: R39/R37/R35/C3
Pants/Shoes: C9/C7/C6/C4/C3
Eyeball: R39/R00/R000/Y17/Y00

Spooky House
House: C3/C2/C1/C00
Wood/Roof: E18/E17/E13
Windows: YG00/YG03/YG06/YG09
Chimney: C6/C3/C2
Ghost: B000/BV00/B0000/0E31/E33/E35/E37

Galaxy Sky
B79/B69/FB2/BG32/100/0/Colorless Blender Refill

Close Up of Vampire and Spooky House

--------------------------

Card Recipe for
Spooky Double Z-Fold Halloween Card:

Spooky House Set (7 Stamps), Paper Nest Dolls
Tim Holtz Squeezed Lemonade Distress Ink Pad, Ranger
Tim Holtz Carved Pumpkin Distress Ink Pad, Ranger
Tim Holtz Ripe Persimmon Distress Ink Pad, Ranger
Slimline Stitched Hillside Boarders Dies, Lawn Fawn
Picket Fence Die-namics, My Favorite Things
Flat-Bottom Clouds Die-namics, My Favorite Things
4” Stitched Circle Die, Memory Box
Spooky Bats Punch, Stampin’ Up!
Haunted House Die-Namics, My Favorite Things
KP Halloween Icon Die-cut Cardstock, K & Company
KP Halloween Layered Accents, K & Company
Black Glitter Paper, Stampin’ Up!
Apple Sour, Nuvo Glow Drops
Small Paint Bruch
Black Gelly Roll Pen
Silver Gelly Roll Pen
White Gelly Roll Pen
Tim Holtz Distress Splatter Brush
Tim Holtz Mini Round Blending Tool
Basic Black, Mossy Meadow, Basic Gray and
Whisper White Card Stock, Stampin’ Up!
Card Size: 5 ½” x 5 ½”
Digital Characters Size: 2 ½” Tall
Digital House Size: 4” x 3 ¼”

Spooky Double Z-Fold Halloween Card Folded Down

--------------------------

Hope you like my Spooky Double Z-Fold Halloween Card
using Spooky House Set (7 Stamps) by Paper Nest Dolls!

Thank you for stopping by!

Hugs,
Laurie


copyright © 2013 the paper nest · graphics by erica belton · web design by red peach designs