Wednesday, September 29, 2021

Warrior Princess by Noelene

 Hi all, Noelene back to share some inspiration using a brand new stamp from the Paper Nest Dolls.


A little while back you may remember the beautiful Princess Collection, well Christine has added a new princess called Warrior Princess.


Isn't she just beautiful!!!


Copic Markers:
Hair: N3, N5, N7, N9
Skin: E0000, E000, E00, E11, R20
Clothes: R24, R27, R29, G0000, G000, G41, G45, B23, B24, B28, Y0000, Y000, Y02, Y04, Y06, 
Dragon: R20, R24, R29, C5, E11,
Cricket: BV0000, BV13
Dog: E81, E84, E87


Warrior Princess can be found in rubber here & in digital format here.

Thanks for stopping by!

Hugs

Noelene x


Tuesday, September 28, 2021

Happy Birthday Dahling!

Hello PND Fans! It's Betty here. Inspired by the most loved puppy movie, The 101 Dalmatians, Paper Nest Dolls has created this adorable stamp called Puppy Villain. This stamp is one of the four stamps from their Villain Collection and it comes in red rubber and digital formats. I thought it would be fun to put her on a birthday card, but you can use it for other occasions. Check out their other stamps in the amazing Villain Collection!


I created a 6x6 square card and used the digital version so that I can make her large (4 inches tall) so that the fur details can be seen on her coat. I used a combination of Copic markers and Prismacolor pencils to color this stamp. 


Copic Markers Used
Hair (Black): T9, T7, T5, T3; Hair (White): T3, T1, T0
Skin: E04, E11, E21, E00, E000
Dress: T9, T5, T2, T2
Purse: T5, T3, T1, T0
Earrings, Shoes & Cigarette Holder: R29, R22
Puppy: T5, T3, T1

Prismacolor Pencils Used
Fur Coat: PC1065, PC1063, PC1060, PC938
Supplies used:
  • Patterned cardstock is from Echo Park, Magic and Wonder
  • Dalmatian clipart is from clipart-library.com
  • Heart dies from Cricut Cuttlebug
  • Stitched rectangle die from Gina Marie Designs
  • I typed my own sentiment in Microsoft Word and printed it out.

This is a fun and easy card to make. I love using patterned paper from a paper pad since the colors are always coordinated. I hope you give this card a try!


Thank you for taking the time to stop by! Have a wonderful and creative week. ~Betty ~

Friday, September 24, 2021

Pumpkin Patch

    Hello my crafty friends!!

It's Candace here today on the Paper Nest Dolls blog!!

Today I'm showcasing the newest digital stamp Pumpkin Patch.  

You can pick it up HERE!

This image is perfect to create a Fall scene card.

Thanks for stopping by and have a great day!

Thursday, September 23, 2021

My Steampunk Anniversary Card

Hello Crafty Friends! It's Laurie here sharing My Steampunk Anniversary Card using Goth Dad and Goth Mom by Paper Nest Dolls for my Design Team Inspiration Card.

I gave this fun card to my Hubby for our wedding anniversary this year. He loves anything steampunk and the Addams Family. So, I decided to add a steampunk vibe to my card with gears, a chain, a monocle, the Word Band, and my monochromatic colour scheme.

My Card Details

For my card, I decided that I wanted to colour the two images in black and white just like in the old TV series, but with a pop of red for the rose. I carried that colour scheme over with my paper choices and embellishments. The My Mind’s Eye paper was so perfect that I decided to make my card 6” x 6” and only cut off 1/8” for the card base. I lightly sponged the Brushed Iron wax to my die cut corner gears to give them added dimension and placed them underneath Goth Dad. To mirror them, I place Cherry Cobbler die cut roses on the opposite corner underneath Goth Mom. A black doily helps set off my focal point of the coloured stamps from the background.

Close Up of My Design Team Card

For embellishments, I used a Tim Holtz Monocle and Word Band that mirror the Brushed Iron Wax in colour. I picked up the Ball Bead Chain from my local hardware store. The Cherry Cobbler Ribbon and Red Rhinestone, tie in my pop of red colour.

My Envelope Details


Since I went with a 6” x 6” card, I need to create a custom envelope and my Envelope Punch Board came to the rescue.

Front of my Envelope

I used some Stampin’ Up Designer Series Paper that carried the monochrome theme over from the card. I used a sponge dauber to dab Cherry Cobbler Ink to the roses on the paper to tie in my pops of red. Some black lace fiber blend tied my envelope together with a matching gear tag.

Inside of my Envelope with my Card

--------------------------

Copic Markers:


Goth Mom
Skin: W0/W1/W3/W5
Hair: T9/T7/T5/T4/T3
Dress: T9/T7/T5/T3
Rose: R39/R37/R35/R32/G21/G94/G99

Close Up of Goth Mom

Goth Dad
Skin: W0/W1/W3/W5
Hair: T9/T7/T5/T3
Suit: T9/T7/T5 (dark stripes), T5/T3/T1 (light stripes)
Tie: T9/T7/T5/T4
Shirt: T2/0
Shoes: T9/T7/T5

Close Up of Goth Dad

--------------------------

Card Recipe for My Steampunk Anniversary Card:


Goth DadGoth Mom, Paper Nest Dolls
Paper Basics - Stamper's Select White Cardstock, Papertrey Ink
Lost & Found – Union Square Paper Pad, My Mind’s Eye
Mon Amour Collection 8” x 8” Paper Pad, Graphic 45
Timeless Elegance Designer Series Paper, Stampin Up!
Rose Bloom Metal Die, Paper Rose
Industrial Chic - Corner Die, Sue Wilson, Creative Expressions
Industrial Chic – Frame & Tag Die, Sue Wilson, Creative Expressions
Art Alchemy-Metallique Wax - Brushed Iron, Prima Marketing
Gift It, Christmas Black Paper Doily, Recollections, Michael’s Arts & Crafts
Moonlight Mistress, Busy Box Blends
Monocles, Idea-ology, Tim Holtz
30” Ball Bead Chain with Connector Clasp, Local Hardware Store
Word Bands, Idea-ology, Tim Holtz
Cherry Cobbler Seam Binding Ribbon, Stampin’ Up!
Floral Romance Seals, Stampin’ Up!
Painted Love Gold Vinyl Stickers, Stampin’ Up!
Envelope Punch Board
Red Rhinestones Basic Jewels, Stampin’ Up!
Cherry Cobbler Ink, Stampin’ Up!
Sponge Daubers, Stampin’ Up!
Cherry Cobbler and Basic Black Card Stock, Stampin’ Up!

Finished card size: 6” x 6”

--------------------------

Hope you like My Steampunk Anniversary Card
using Goth Dad and Goth Mom by Paper Nest Dolls

Thank you for stopping by!

Hugs,
Laurie


Saturday, September 18, 2021

Villain Collection: Sea Villain

Hi Crafty Friends,
It's my second Villain Collection post using the Paper Nest Dolls Villains! If you missed my Puppy Villain post head HERE! Today, I have the Sea Witch Villain, she comes with her eel pals too.

Make Crafty Friends Q & A:
Q: Which Disney Villain scared you the most when you were young?
A: Me? The Sleeping Beauty Villain Maleficent


Supplies:
Paper Nest Dolls Sea Villain
Kat Scrappiness Zig Zag Rectangle Dies
Raindrop Gems

 Don't forget to subscribe, follow, and comment on my blog for your chance to win my September Prize  and for more giveaways and inspiration follow me on Instagram @MadeByMeghanK


Friday, September 17, 2021

Fall Emma

 Hello my crafty friends!!

It's Candace here today on the Paper Nest Dolls blog!!

Today I'm showcasing the newest digital stamp Fall Emma.  

You can pick her up here!

This image just screams Fall!! I love all the Fall papers and die cuts and they came together to make this cute Fall card.


Thanks for stopping by and have a great day!

Saturday, September 11, 2021

Villain Collection: Puppy Villain


Hi Crafty Friends,
This month I will be featuring the Paper Nest Dolls Villain Collection! Today, I am sharing Puppy Villain but I have to say she looks much cuter than the movie version. 

Make Crafty Friends Q & A:
Q: Do you have a favorite Disney Villain?
A: Me? I would have to say the Parrot from Aladdin


Don't forget to subscribe, follow, and comment on my blog for your chance to win my September Prize and for more giveaways and inspiration follow me on Instagram @MadeByMeghanK

Supplies:
Paper Nest Dolls Puppy Villain
Kat Scrappiness Zig Zag Rectangle Dies

Thursday, September 9, 2021

My Pumkin’ Spice Card

My Design Team Card

Hello Crafty Friends! It's Laurie here! I am sharing My Pumkin’ Spice Card as my Design Team Inspiration Card for Paper Nest Dolls using the new release Fall Emma. I love this time of year with the cooler weather and the turning of the leaves!

I coloured Emma with my Copic Markers in Autumnal colours with rich oranges and greens. I love her little latte cup and, of course, it needed to be a Pumkin’ Spiced Latte. Not pumpkin, but pumkin’ since that is the way I say it! Lol!

--------------------------

Copic Markers:


Skin: E04/E11/E21/E00/E000/R20
Hair: E49/E47/E44/E43/E42
Coat: YG93/YG95/YG97/YG99/E47/E44
Bow/Collar/Tights: E07/YR04/YR16/YR12
Boots: E49/E47/E44/E43
Pumpkin: YR21/YR12/YR16/YR04/E07/E13/E18/E19
Pumkin’ Latte: E18/E13 (Cup)
E08/YR04/YR12 (Heart)
C3/C0/0 (Lid)
Leaves: E13/E18/E19/YG99/YG97/YG95/E07/YR04/YR16/YR12/Y17/YR24/YR27

Close Up of My Design Team Card

--------------------------

Card Recipe for My Pumkin’ Spice Card:


Fall Emma, Paper Nest Dolls
Paper Basics - Stamper's Select White Cardstock, Papertrey Ink
Happy Fall 6” x 6” Paper Pad, Echo Park Paper Co.
Hello Autumn 6” x 6” Paper Pad, Carte Bella Paper Co.
Hello Autumn Frames and Tags, Carte Bella Paper Co.
In Good Taste Design Series Paper, Stampin’ Up!
Picket Fence Die-namics, My Favorite Things
Seasonal Layers Thinlits, Stampin’ Up!
Coffee Cups Framelits Dies, Stampin’ Up!
Patterned Pumpkins Thinlits, Stampin’ Up!
Holiday Rhinestones Basic Jewels, Stampin’ Up!
Leaf Tags, Craft Smart, Michaels’ Arts & Crafts
Mossy Meadow, Pumpkin Pie, Cajun Craze,
Crumb Cake and Basic White Card Stock, Stampin’ Up!

Finished card size: 5.5” x 5.5”

--------------------------

Hope you like my Design Team card using
Fall Emma by Paper Nest Dolls!

Thank you for stopping by!

Hugs,
Laurie


Tuesday, September 7, 2021

Happy Fall with Avery & New Release Pumpkin Patch

Hi Paper Nest Dolls Fans! Betty here today. Are you all ready for fall? I know I'm ready for the cooler weather! Although I love the longer days in the summer, I enjoy the cold nights and mornings in the fall. I'm also getting my fall cards ready now so I can get them in the mail early! Here's one I made using two digital stamps from Paper Nest Dolls. The first stamp is a new release for September called Pumpkin Patch and the second stamp is an older stamp called Avery with Jack-o-Lantern


I used digital stamps for both, so I printed them out on white cardstock and then colored them with Copic markers.


Copic Markers Used

Pumpkin Patch Image:
Bird: B06, B04, B01, B00
Bird's beak and feet: YR18, YR15, YR12
Pumpkins: E09, YR09, YR04, Y38
Stems: E37, E35, E33, E31
Wood sign: E37, E35, E33, E31
Letters on wood sign: YR04, Y38
Watering can: C7, C5, C3, C1
Leaves: Y02, YG03, Y38, R35
Grass and leaves on flowers: YG67, YG17, YG03
Blue flowers: B06, B04, B01

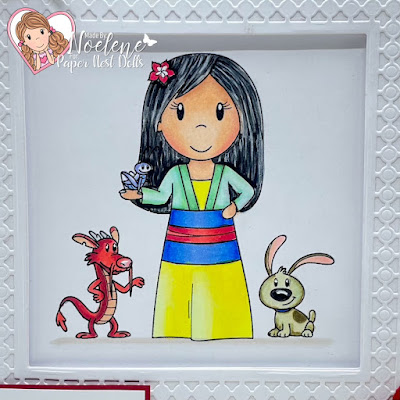
Avery with Jack-O-Lantern Image:
Skin: E13, E11, E21, E00, E000
Cheeks: R20
Hair: E13, E34, E11,YR20
Jack-O-Lantern: E09, YR09, YR04, Y38
Dress, bow, socks: B06, B04, B01, B00
Blouse: C5, C3, C00

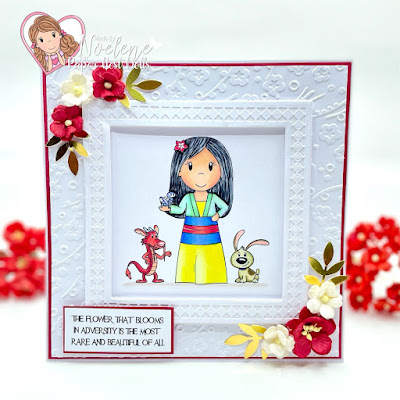
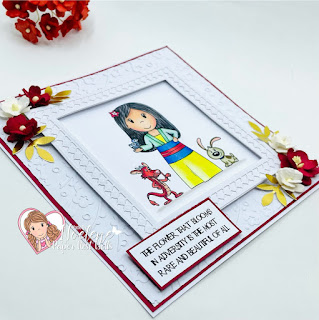
After coloring the images, I used a rectangle in and out die from Gina Marie Designs to cut out the Pumpkin Patch and I fussy cut Avery. I cut a piece of brown cardstock to mat the Pumpkin Patch image. I cut out a plaid mat for my A6 size card base. The patterned paper is from Authentique. 


I created the sentiment on my computer and used my paper trimmer to cut it out. I also added a brown cardstock mat for it and then adhered it to the card front and the card was finished. 


Thank you for visiting today and I hope you give this card a try. Easy and fun to color! Have a wonderful day and a creative week! ~Betty~
copyright © 2013 the paper nest · graphics by erica belton · web design by red peach designs