Showing posts with label Betty Lim-Silvernail. Show all posts

Tuesday, April 25, 2023

Ellie with Flowers Mother's Day Card

Hello PND Fans! Betty here today. I am still working on my stash of Mother's Day cards. I just love making them with digital stamps. This card is made with the adorable Ellie with Flowers stamp from Paper Nest Dolls. If you're not into digital stamps, this also comes in red rubber


I printed the stamp at 3" high and let the width default. I made sure there was enough white space so that I could use an oval die to cut it out to fit an A6-sized card.


I colored the stamp with Copic markers in the following colors:

Skin: E13, E11, E21, E00, E000
Cheeks: E95
Hair: E25, E13, E34, E11,YR20, Y00
Purple: V06, V04, V01
Yellow: YR16, YR15, YR12
Green: G17, YG17, YG03
Blue: B18, B91
White: N3, N1, 0


After coloring the stamp, I cut it out using a stitched oval die from Gina Marie Designs then colored the sky using Distress Ink in Faded Jeans. Then I matted it with lavender cardstock that I cut out with a scalloped oval die from Gina Marie Designs. 

I used a flower embossing folder from my stash to put behind the lavender cardstock then adhered it onto the A6 card base.

To finish the card, I printed the Happy Mother's Day sentiment on my computer and trimmed it to fit the card and adhered it to the top of the card. 


Such a fun, easy, and cute card to make for Mother's Day. I hope you give this one a try!

Have a wonderful and creative day! 


Saturday, April 15, 2023

Wishing You a Happy Mother's Day Card

Hello PND Fans! It's Betty here on the blog. It's just one month away until Mother's Day, so it's time to start making your cards. My card is using an older Paper Nest Dolls digital stamp called "Make a Wish," which I thought was the perfect stamp for Mother's Day. Of course you can use this adorable stamp for just about any occasion, such as birthday, get well, friendship and more.


I printed the digital stamp 3" tall and let the width default. This is the perfect size for an A2 card. I colored the stamp with Copic markers in the following colors:


Skin: E04, E11, E21, E00, E000
Cheeks: E95
Hair: E37, E35, E33, E31
White: N3, N1, 0
Blue: B97, B95, B93, B91
Green: G17, YR17, YG03
Brown: E37, E33
Pink (Heart): RV34, RV02, RV32

I used an Arteza silver metallic gel pen for the sandal buckles.


I created the sentiment using Microsoft Publisher. The dandelion is from Altenew and the hearts are from Simon Says Stamp. The frame die is from Gina Marie Designs.


This is a fast and easy card to make. I hope you give it a try! Thank you for stopping by. Have a creative day!


Monday, March 27, 2023

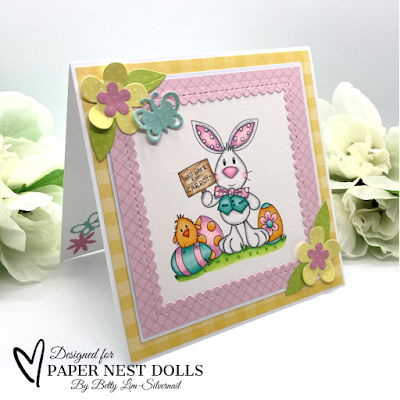
Will Work for CARROTS

Hi PND Fans! Betty here on the blog. Easter is just two weeks away so I’m getting my final Easter cards done today. I just love using digital stamps so that I can make the image the size I need. Today’s 5x5 card features the adorable digital stamp from Paper Nest Dolls called Will Work For Carrots. This stamp is also available in a red rubber stamp. I’m keeping the cards clean and simple since I’ll be making several of these cards. 


I printed the image 2-3/4”W x 3” H and colored it with Copic markers in the following colors:

White: N3, N1, 0
Pink: RV52, RV00
Yellow: Y38, Y35, Y32
Orange: YR04, YR02
Blue Green: BG13, BG23, BG11, BG000
Brown: E33, E31, E30
Green: YG07, YG05, YG01


I used the yellow patterned paper from Echo Park Welcome Spring and the pink patterned paper from Carta Bella Flora No. 4 to create the mats for the card.

The polka dot papers for the flowers, leaves, and butterfly are from PhotoPlay Say it With Stamps by Becky Moore. I used older flower and butterfly dies from Sizzix, but I don’t have the exact name of the set. These dies were given to me by a friend.


This is a fun, fast, and easy card to make for Easter. I hope you give this one a try!


Thank you for stopping by. Have a Happy Easter! ~Betty~

Tuesday, February 28, 2023

Just a Note to Say Thank You

Hello Everyone, it's Betty here on the blog! It's time to make some thank you cards to replenish my stash. I am using the cutest bee digital stamp from Paper Nest Dolls called Lulu Bee. It also comes in red rubber in the name of Lil Bee Emma. This adorable stamp makes the perfect A6 size shaker card. I used the Hexagon Stack Die from Paper Roses to create the shaker. 


Supplies used:
  • Paper Nest Dolls digital stamp Lulu Bee
  • Paper Roses Hexagon Stack Die
  • Stephanie Bernard/Sizzix/Stamps of Life Windows stamp set and dies
  • Penny Black Sentiment Collection
  • A6 white card base
  • Black cardstock (Mat layer 1)
  • Yellow cardstock (Mat layer 2)
  • White cardstock (card front)
  • Shaker bits
  • Clear acetate
  • 1/4" double sided foam tape


I colored the stamp using Copic markers in the following colors:

Skin: E13, E11, E21, E00, E000
Hair: E37, E35, E33, E31
Yellow: YR24, YR14, YR21
Black: T9, T7, T5, T3
Purple: V17, V15, V12
Green: G28, G14
Wings: T3, T2, T1, 0 Plus Arteza silver glitter gel pen


Thank you for stopping by today! Have a creative week! ~Betty~


Wednesday, February 1, 2023

Lovestruck Lulu - Happy Valentine's Day

Hello PND Fans! Betty here today. In just two weeks is Valentine's Day! A quick and fun way of making cards is using digital stamps from Paper Nest Dolls. I made this Valentine's Day card using the adorable the stamp called Lovestruck Lulu. This stamp comes in both digital and red rubber. I used the digital version so that I can get the stamp the same day I order it and make it the size I needed for this card. 


I printed the stamp at 3-1/4" tall and colored it with Copic markers in the following colors:

Skin: E04, E11, E21, E00, E000
Cheeks: E93
Hair: Y28, YR23,YR21, Y21
Pink: V95, RV95, RV93, RV91
Green: YG95,YG93, E81
Silver/Gray: C5, C3, C1


The supplies I used to make this card are:
  • A6 white card base
  • "I Love Love" patterned paper from Scrappy Boy Stamps
  • "Burlesque" patterned paper from Scrappy Boy Stamps
  • Cut & Emboss Heirloom Frames from Stampin' Up
  • Sentiment from The Stamps of Life
  • Heart die cuts from The Stamps of Life Heart Button Dies
  • Pink and white baker's twine

The pink mat underneath the patterned paper and the sentiment are white cardstock with the edges colored with RV93 to match the colored stamp. I could not find colored cardstock to match. 


Thank you for stopping by today and I hope you create some quick and fun Valentines Day cards with this Paper Nest Dolls Lovestruck Lulu stamp! Have a creative week! ~Betty~

Saturday, December 24, 2022

Happy Holidays

Merry Christmas Eve and Happy Holidays to everyone! It's Betty here on the blog. Today I'm sharing this adorable card using the digital snow couple stamp from the Snow Globe Bundle from Paper Nest Dolls. I duplicated the snow couple and decreased the size to make the snow kids to create this adorable snow family!


For this A6 card, I colored the digital stamps in the following colors:

Snow Dad:
Green: YG09, YG06, GY03
Orange: YR16, YR14,YR12, YR00
Pink cheeks: RV00
White: BV0000, BG000

Snow Mom:
Purple: BV04, BV02, BV00, BV000
Gray: C3, C1, C00
Pink: R85, R83, R81
Orange: YR16, YR14,YR12, YR00
Pink cheeks: RV00
White: BV0000, BG000

Snow Boy:
Blue: B04, B02, B01,B000
Orange: YR16, YR14,YR12, YR00
Pink cheeks: RV00
White: BV0000, BG000

Snow Girl:
Pink: R85, R83, R81
Gray: C3, C1, C00
Orange: YR16, YR14,YR12, YR00
Pink cheeks: RV00
White: BV0000, BG000

Sky and Snow: BV0000, BG000


The blue polka dot patterned paper is from Photoplay.

I hope you give digital stamps a try if you haven't already! So easy to make this snow family. 


Thank you for stopping by and wishing you and your family and safe and joyous holiday!

Thursday, December 15, 2022

Greetings From the North Pole

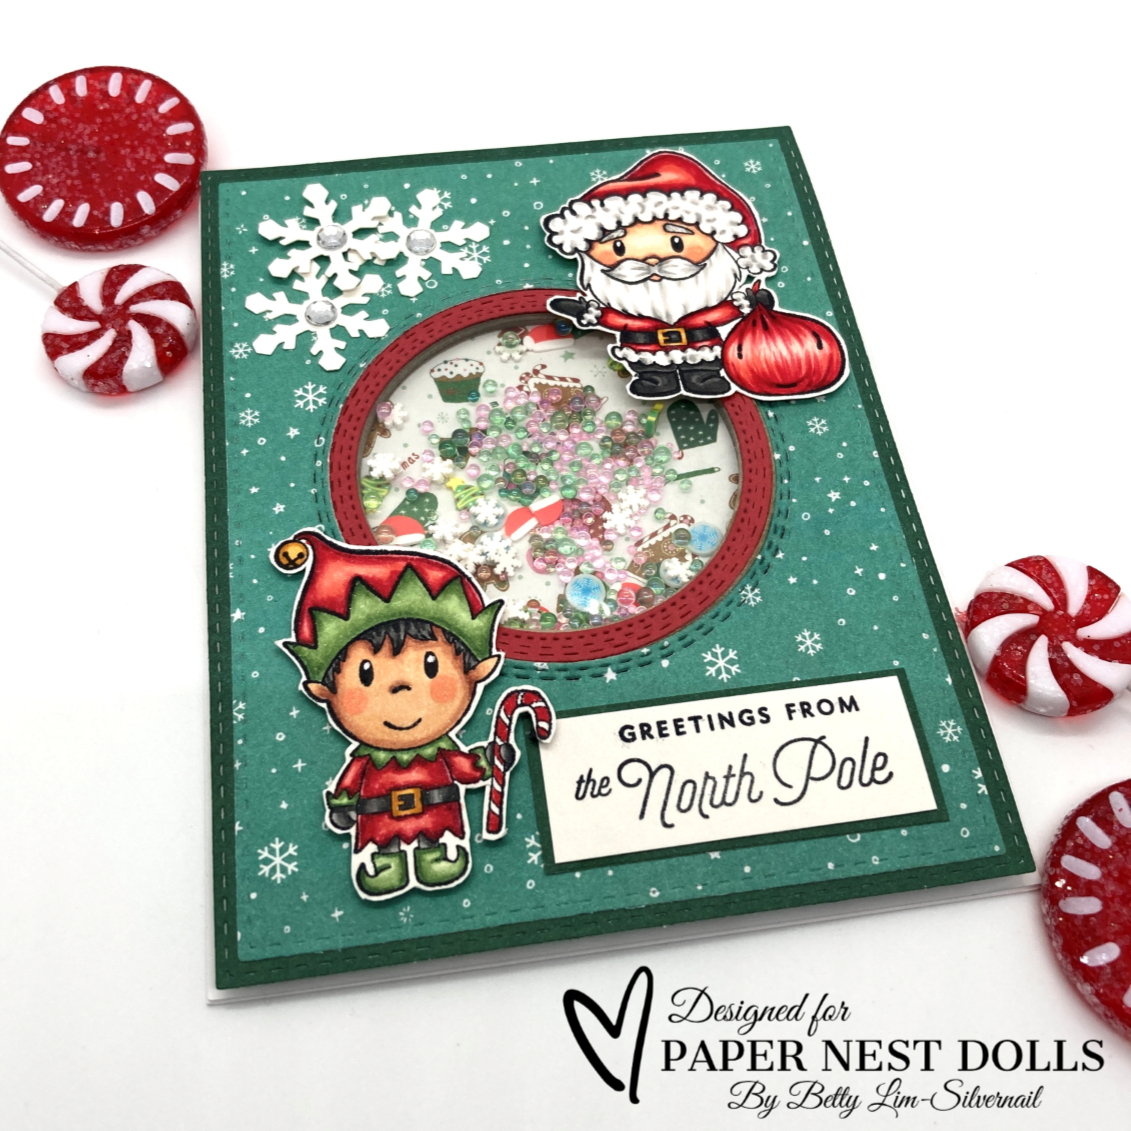
Hello PND Fans! Betty here on the blog. Christmas is just ten days away! There is still time to make some Christmas cards using these digital stamps called North Pole Collection from Paper Nest Dolls. This set comes with 7 digital stamps! Just print and color, cut them out, and place them on some patterned papers. To make it even fancier, add a shaker element. 

These stamps also come in red rubber for those who want physical stamps. 

For this A2 card, I colored the stamps using Copic markers in the following colors:

Santa:
Skin: E05, E11, E21, E00, E000
Cheeks and Lips: E93
Red: R37, R35, R32, R20
White: T3, T1, 0
Black: T9, T5, T3
Gold: YR24, YR21,YR20


Elf:
Skin: E17, E13, E11, E21
Cheeks: E93
Hair: T7, T5, T3
Green: G46, G24, G21, G40
Red: R37, R35, R32, R20
Gold: YR24, YR21
Black: T5, T3, T1


Supplies used:
Patterned papers: Photoplay
Sentiment: Hero Arts
Snowflake: Fiscars Punch
Rectangle Dies: Scrappy Boy Stamps
Circle Dies: Gina Marie Designs
Shaker Bits: Stamp Anniething
Rhinestones: From my stash


Thank you for stopping by. I hope you give digital stamps a try to make some last minute cards! 


Have a wonderful holiday season and a happy new year!

Tuesday, November 29, 2022

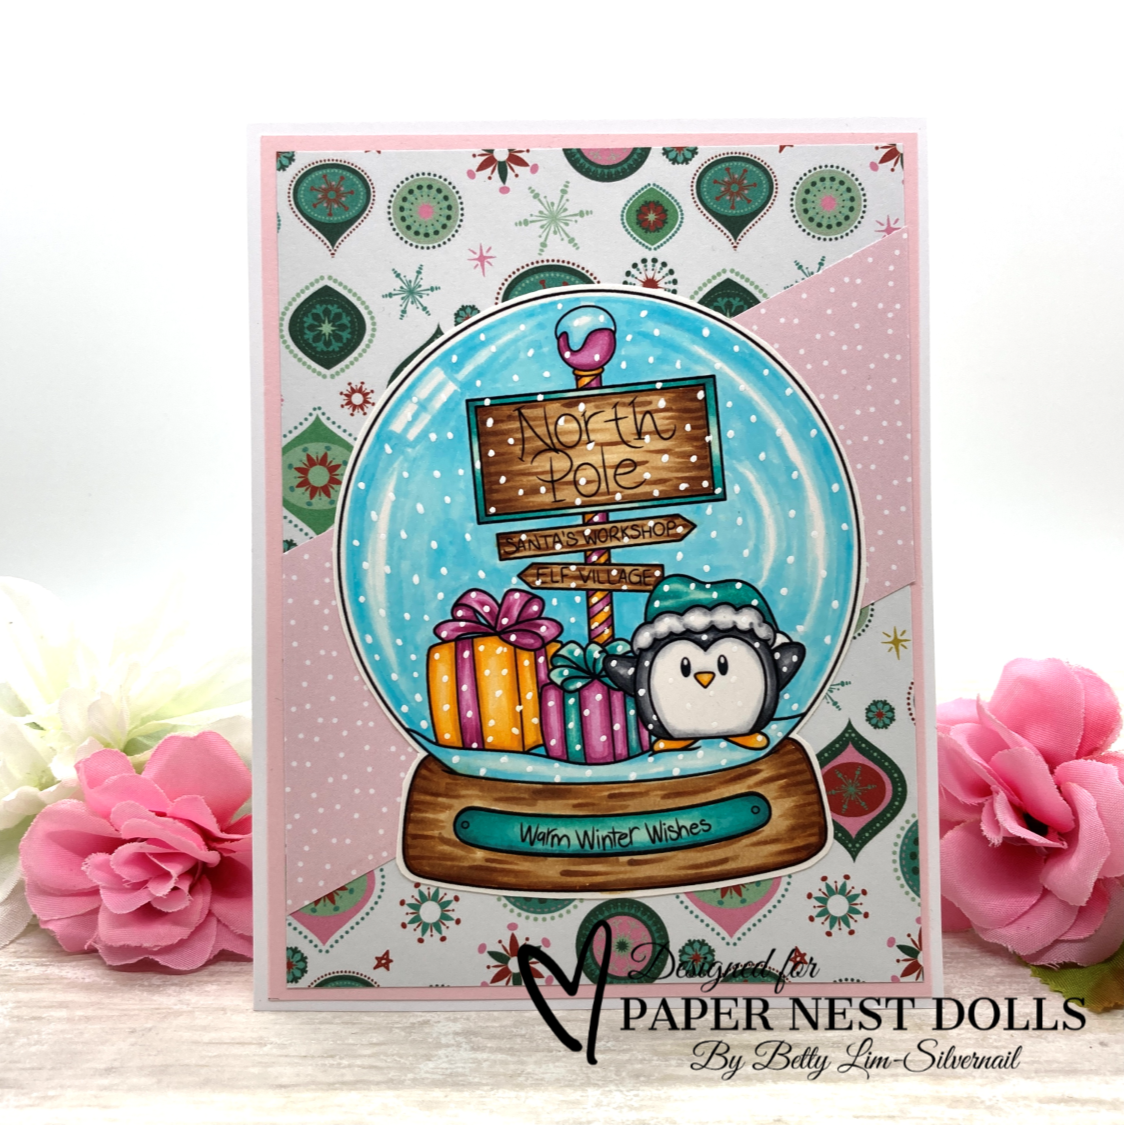
Snow Globe Bundle: Warm Winter Wishes

Hello Paper Nest Dolls fans! Betty here on the blog. Ever since I was a kid, I've always loved snow globes. They are just fun to shake and so pretty to watch as the snow comes down. I just love the stamps from the Snow Globe Bundle by Paper Nest Dolls. This bundle comes with 10 stamps that include images and sentiments, all for $10 for a limited time!


To make this A2 top folding card, I first printed the stamp at 3-1/4"W x 3-3/4"H and colored it with Copic markers. I then fussy cut the image leaving a small white border.

Copic Markers used:
Penguin
Black: N9, N5, N3, N1
White: N4, N1, 0
Yellow: Y38, Y35, Y32
Blue Green: BG18, BG15, BG13,BG10
Pink: RV66, RV55, RV63
Brown: E37, E35, E31
snow & Snow globe glass (blue): B01, B00, B000


The patterned papers I used are from Carta Bella and Photoplay. They were perfect for a wintery card. 

I hope you give this snow globe card a try! Digital stamps are so easy to work with and you can make them any size you want. 


Thank you for visiting today. Have a creative week!

Friday, November 11, 2022

New Release: Snow Globe Bundle

Hi PND Fans, Betty here today! It is the perfect time to start your holiday cards if you haven't already! So easy to make cards with digital stamps like I have here using the Paper Nest Dolls new release called Snow Globe Bundle. This bundle comes with 10 stamps that include images and sentiments, all for $10 for a limited time!


I printed the stamp at 3-1/4"W x 3-3/4"H and colored it with Copic markers.

Copic markers used:

Santa & Sleigh
Skin: E04, E11, E21, E00, E000
Cheeks and Lip: E93
White: N4, N1, 0
Red: R39, R29, R24, R22
Black: C9, C5, C3
Green: YG67, YG17, YG07, YG05, YG03
Gold: E23, Y38, YR21

Reindeer
Light Brown: E25, E23, E21
Dark Brown: E47, E41, E25, E23
Red: R39, R29, R24, R22

Globe & Snow
Blue: B01, B00, B000


Patterned papers from CC Designs
Clay snowflakes from Stamp Anniething


I hope you give this card a try! The digital stamps are so easy to work with. Make them any size you want. 


Thank you for stopping by and have a creative week!

Sunday, October 16, 2022

Have a Haunted Halloween

Hello PND Fans! Betty here today. Have you ever visited a haunted house? When I was in high school, my friends and I went to a Halloween haunted house and it was so scary! It was the last time I went to one. I don't like being scared and this is also the reason I avoid horror movies! However, I don't mind cute scary things, like this adorable "Frankie" stamp from Paper Nest Dolls. This stamp comes in red rubber and in digital formats.

Supplies used:
  • Frankie digital stamp
  • Perfect Pearls in Mint, Perfect Pearl, and Perfect Gold
  • Graveyard Gate die and sentiment:  Stampin' Up-Graveyard Gate

Copic markers and Prismacolor pencils used:
Skin: YG67, YG63, YG61
Hair: BV08, BV13, BV11 + Prismacolor: PC932, PC938
Orange: YR18, YR16, YR12
Yellow: Y19, Y15, Y13
White: N3, N1, 0


For the background, I mixed Perfect Pearls with water to create some glitter watercolors and painted the sky and moon on black Bristol paper. I wanted to create an eerie, scary feeling for a haunted Halloween card. I added the graveyard gate to the scene. 


I hope you give this card a try! It's a cute and fun card to make. Thank you for stopping by and I hope you have a Happy Halloween! ~Betty~

Wednesday, October 12, 2022

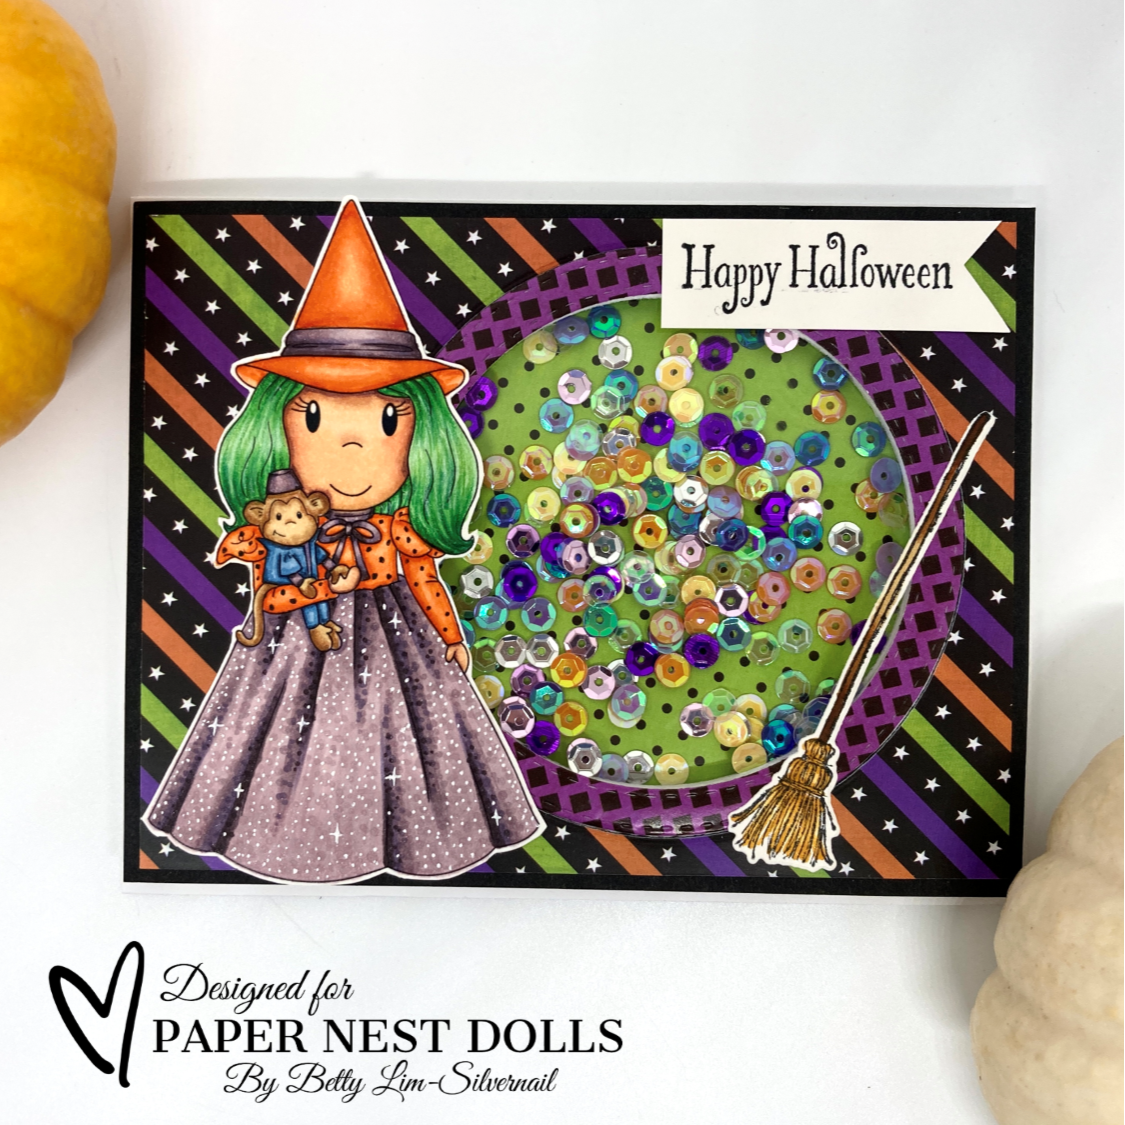
Happy Halloween With Bad Witch Ellie

Hi PND Fans! It's Betty here today. I can't believe Halloween is less than three weeks away! I love creating cute Halloween cards to send to friends. I made this shaker card using the adorable Paper Nest Dolls stamp called Bad Witch Ellie. Bad Witch Ellie comes in both red rubber and digital formats. I used the digital format so that I could make the image the size I want.

Products used:
  • Paper Nest dolls Bad Witch Ellie Digital Stamp
  • Broom die:  Stampin' Up
  • Patterned papers: Stamp Anniething
  • Sequins: Hobby Lobby
Copic Markers & Prismacolor Pencils Used:

Witch:
Skin: E04, E11, E21, E00, E000
Cheeks: E93
Hair: G17, G14, G12 + PC908, PC909, PC912, PC938
Dress/Purple: V99, V25, V95, V93
Orange: YR07, YR68, YR02, YR61

Monkey:
Brown: E35, E33, E31, E30
Blue: B97, B95, B93
Purple: V99, V25, V95, V93

Broom: YR24, YR23, YR21


This stamp is so cute and fun to color! I hope you give it a try. 

Thank you for visiting today. I hope you have a wonderful and creative week! ~Betty~

Tuesday, July 26, 2022

New Release - Dinosaurs!

Hi PND Fans! It's Betty here today.  Paper Nest Dolls came out with the cutest dinosaur stamp set called Dino Party Set. This fabulous set comes with 4 dinosaurs, a saber toothed tiger, a hatching egg, a set of 2 eggs, a volcano, and a palm tree. These stamps are available in digital format and in red rubber.


The birthday card I'm sharing today features one of the dinosaurs, the hatching egg, the volcano, and the palm tree. I used the digital stamps so that I can make the stamps into the sizes I needed. After printing the stamps, I colored them with Copic markers, then fussy cut them out.

Copic markers used:
Dinosaur:
Green: G17, G01, G14, YR23, YR21
Blue: BG07, BG05, BG02, BG01

Hatching Egg:
Purple: BV29, V17, V15, V12, BV000
Yellow: YR27, YR24, Y19, Y18, Y13
Green: G17, G05, G14, YG23
Gray: C7, C5, C3

Volcano:
Brown: E49, E47, E44, E43
Red: R08, R05, R02

Palm Tree:
Green: G17, G05, G14, YG23
Brown: E18, E17, E13, E11

White gel pen to add some white dot highlights.


To create the sky, I used a clouds stencil from Stamp Anniething and inked it with Distress Oxide ink in Abandoned Coral. The rocky mountains are created using a mountains stencil from Stamp Anniething and inked with Distress Oxides in Gathered Twigs. After inking, I splattered water on the oxide inks and then blotted it with a paper towel. I then used a wonky stitched rectangle die from Gina Marie Designs to cut out this panel.


I adhered the volcano and the palm tree using liquid glue and used double-sided foam tape for the two dinosaurs. I created and printed the sentiment on my computer and cut it to size then added a brown cardstock mat and adhered it to the card front.

I used a stitched rectangular die from Scrappy Boy Stamps to cut out a white cardstock mat then adhered it onto a top folding A2 white card base. Then I adhered the card front to the mat and added a few enamel dots to finish the card.


This is such a cute and fun set of stamps! I hope you give this a try. 
Thank you for stopping by and I hope you have a creative day! ~Betty~

Tuesday, July 12, 2022

Time to Celebrate Your Special Day

Hi PND Fans! Betty here today. I love creating celebration cards that can be used for different occasions. The card I made using Paper Nest Dolls digital Love Train Set can be used for celebrating a birthday, graduation, birth of a baby, or an award. This amazing set comes with eight images: a train engine, five cars, a boy conductor, and a girl conductor.


I made this mini-slimline card 7"W x 3"H to fit all the train images I wanted on the card.


I first colored all the images with Copic markers then I fussy cut them out.

Copic markers used:
Conductor:
Skin: E04, E11, E21, E00, E000
Cheeks: E93
Hair: E59, E57, E55, E53
Yellow: Y38, Y35, Y32
Blue: B97, B95, B93, B91
White: C5, C3, C1

Engine:
Blue: B97, B95, B93, B91
Green: G07, YG06, YG03
Pink: R85, R83, R83, RV11

Car with Cat:
Yellow: Y38, Y35, Y32
Green: G07, YG06, YG03
Pink: R85, R83, R83, RV11
Black: C7, C5, C3
Cat: C5, C3, C1, C00


Car with Bear:
Green: G07, YG06, YG03
Pink: R85, R83, R83, RV11
Black: C7, C5, C3
White: C5, C3, C1, C00
Bear: E57, E55, E53

Car with Dog:
Green: G07, YG06, YG03
Pink: R85, R83, R83, RV11
Black: C7, C5, C3
Dog: E57, E55, E53


I first created clouds using a clouds stencil with Distress Oxide in Tumbled Glass directly on the slimline card base for a single layer card. I added a strip of blue striped patterned paper from Carta Bella. I stamped the sentiment from Simon Says Stamp. I then adhered the images onto the card and the card was finished. 

A simple but fun card to make. I hope you give this card a try! 

Thank you for visiting. Have a wonderful and creative day! ~Betty~

copyright © 2013 the paper nest · graphics by erica belton · web design by red peach designs