Showing posts with label digital stamp. Show all posts

Wednesday, December 6, 2023

Yeti for the Holidays?


Hello Crafty Friends! It's Laurie here! I am sharing my Yeti for the Holidays? as my Design Team Inspiration Card for Paper Nest Dolls using Yeti Father and Son. I just love these cuties. There is a Yeti Mom and Baby that you could add to this card for the whole family! Lol!

The Details of My Yeti for the Holidays?

I had a lot of fun colouring these two with my Copic markers! I decided to create a fur texture with individual strokes in the shadows and left the highlights white. The tree was also coloured with individual strokes to create texture. The Father Yeti’s tie pulled together my colour scheme of red and green.

For my card, I wanted to use the Whimsy paper with these cuties. This paper is perfect for those wintery scenes! In fact, I used it for another card that I made a few years ago and will post it at the end.

So, I created a slimline card using the Dotted Slimline Dies by Studio Katia. I used all three dies that came in the set to create my card. I thought it would be fun having the yetis stepping out of the wintery scene with their Christmas tree.

To complete my wintery scene and to add interest, I used a Stitched Hillside Die to add an extra layer to the scene. I made sure that my “snowbank” did not cover up the snow-covered trees on the background.

Next, I typed and printed my sentiment out on my computer. There are so many great sentiments out there that it was hard to pick one! Lol! The sentiment was die cut out with another stitched die.

For embellishments, I used some wooden snowflakes that I had in my stash for that rustic look and a scattering of red rhinestones to add sparkle.

--------------------------

Copic Markers

Fur: W3/W1/W0/0
Faces: E43/E42/E41/E40/RV00/0
Horns/Nails/Tree Trunk: E44/E43/E42/E41
Reds: R29/R27/R24/R22
Greens: G29/YG63/YG03

--------------------------

Card Recipe for My Yeti for the Holidays?

Yeti Father and Son, Paper Nest Dolls
Paper Basics - Stamper's Select White Cardstock, Papertrey Ink
Frozen Slimline Designer Paper Pack, Whimsy Stamps
Dotted Slimline Dies, Studio Katia
Slimline Stitched Hillside Border Dies, Lawn Fawn
Stylish Shapes Dies, Stampin’ Up!
Wooden Snowflake Embellishments, Stampin’ Up!
Red Rhinestone Jewels, Stampin’ Up!
Garden Green and Real Red Card Stock, Stampin’ Up!

Finished card size: 8 ½” x 3 ½”

Stamp Size: 3”

--------------------------

My Merry Penguins Card

For more information on my other card, please click here.

Hope you like my Yeti for the Holidays? Card using
Yeti Father and Son by Paper Nest Dolls!

Thank you for stopping by!

Hugs,
Laurie

Monday, March 27, 2023

Will Work for CARROTS

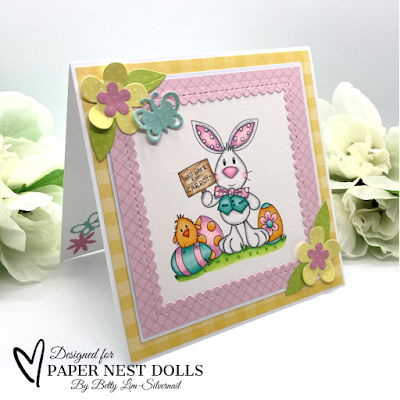
Hi PND Fans! Betty here on the blog. Easter is just two weeks away so I’m getting my final Easter cards done today. I just love using digital stamps so that I can make the image the size I need. Today’s 5x5 card features the adorable digital stamp from Paper Nest Dolls called Will Work For Carrots. This stamp is also available in a red rubber stamp. I’m keeping the cards clean and simple since I’ll be making several of these cards. 


I printed the image 2-3/4”W x 3” H and colored it with Copic markers in the following colors:

White: N3, N1, 0
Pink: RV52, RV00
Yellow: Y38, Y35, Y32
Orange: YR04, YR02
Blue Green: BG13, BG23, BG11, BG000
Brown: E33, E31, E30
Green: YG07, YG05, YG01


I used the yellow patterned paper from Echo Park Welcome Spring and the pink patterned paper from Carta Bella Flora No. 4 to create the mats for the card.

The polka dot papers for the flowers, leaves, and butterfly are from PhotoPlay Say it With Stamps by Becky Moore. I used older flower and butterfly dies from Sizzix, but I don’t have the exact name of the set. These dies were given to me by a friend.


This is a fun, fast, and easy card to make for Easter. I hope you give this one a try!


Thank you for stopping by. Have a Happy Easter! ~Betty~

Friday, February 3, 2023

My Love Potion Card


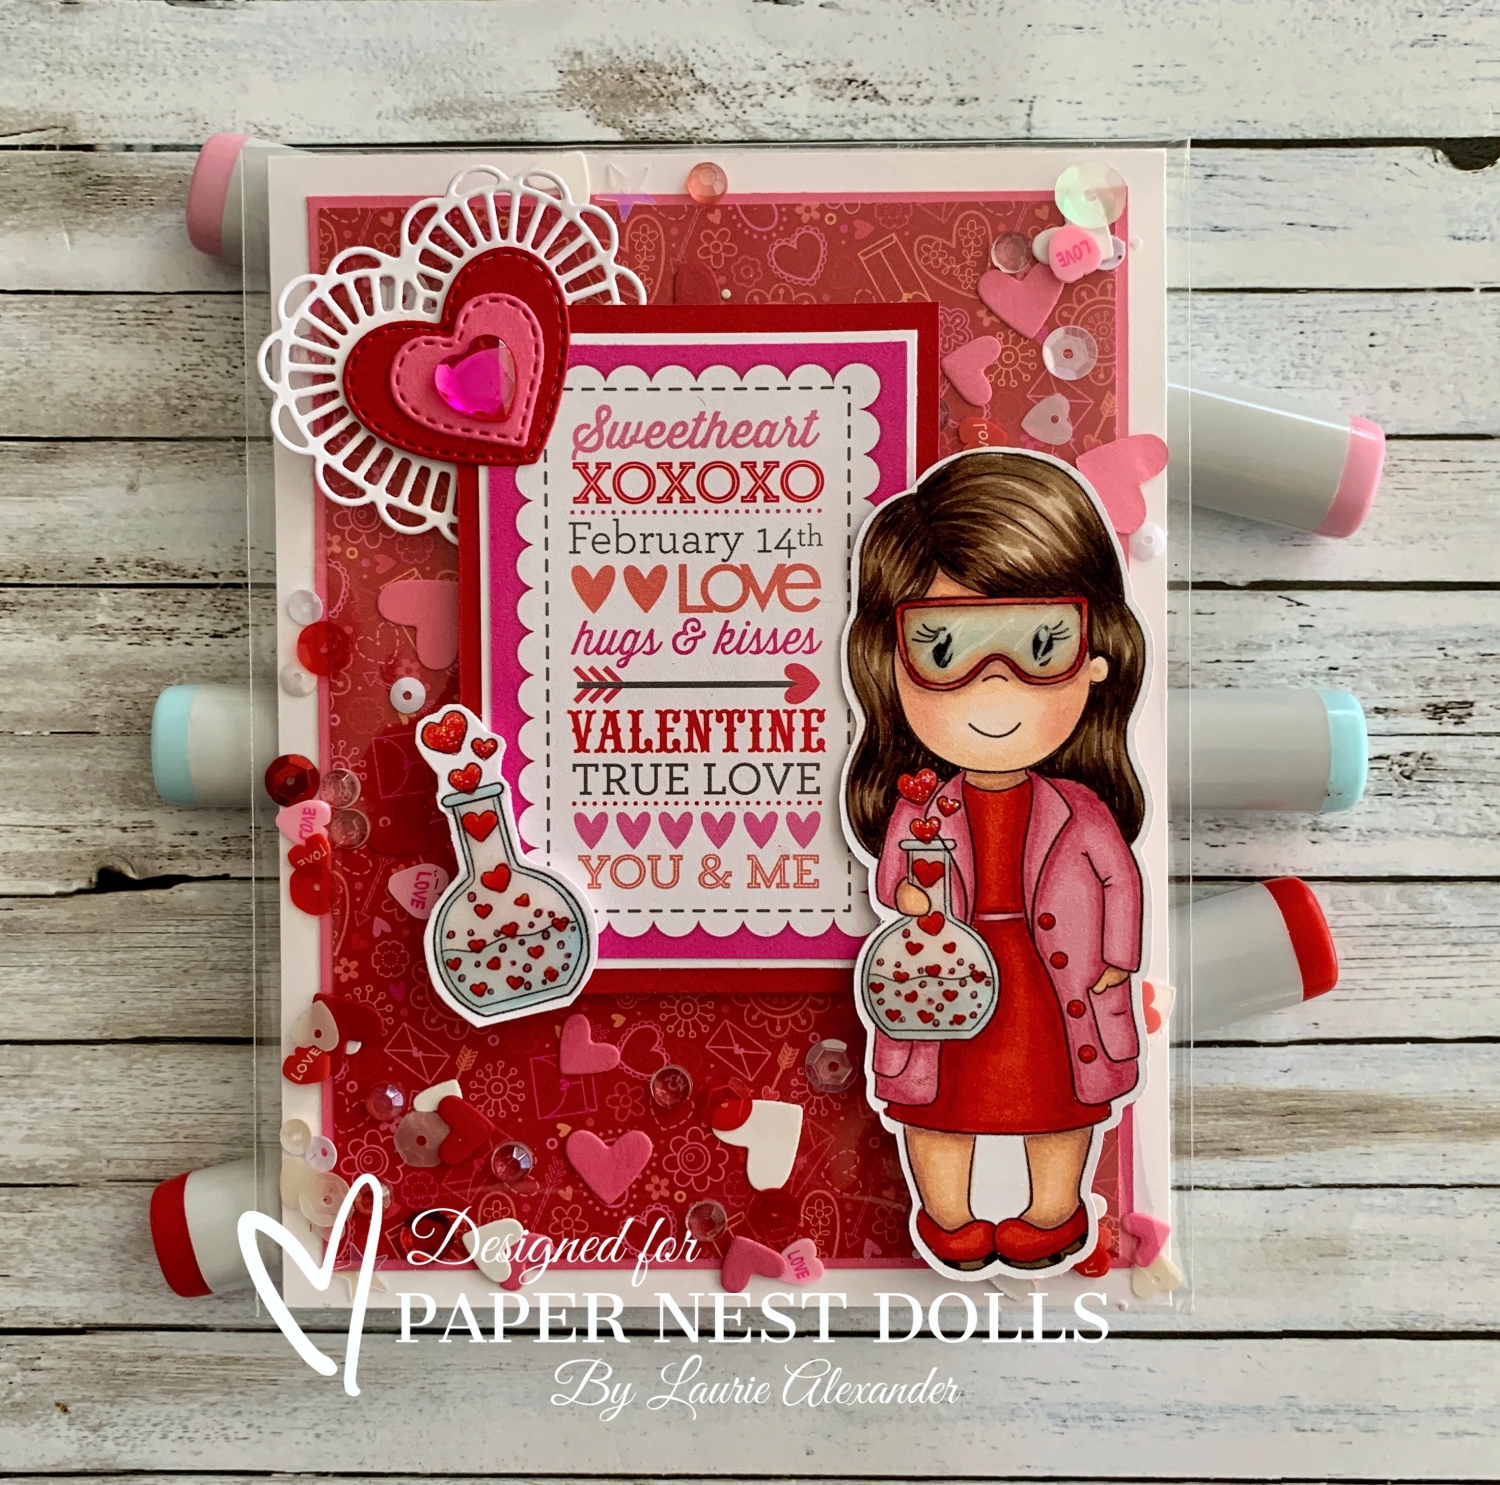
Hello Crafty Friends! It's Laurie here! I am sharing My Love Potion No. 9 Card as my Design Team Inspiration Card for Paper Nest Dolls using Love Potion Avery from the Love Potion Set. This Set includes 3 stamps which are Love Potion Amara, Love Potion Avery, and the Love Potion.

The Details of My Card

For my card, I decided to create a fun faux shaker card. I have been wanting to make one for a while and thought this would a perfect card for it! My card is super easy and fast to make!

For those of you who don’t know what a faux shaker card is, I used a clear envelope over my project. I then added my shaker bits to the bag and sealed it. Easy peasy!

I love the Valentine Doodlebug paper that I used for the backdrop of my card. The sentiment piece was also from the Doodlebug paper pad, and I just framed it with my colour scheme.

Since I added sequins and hearts as my shaker pieces, I decided to go simple with the other embellishments. I added layered die cut hearts to one corner of the sentiment with a heart gem on top.

The Love Potion Set comes with the Love Potion by itself. So, I coloured it like the one Avery is holding and added it to another corner of the sentiment.

The finishing touch was Glossy Accents to her glasses and beaker and Stickles to the hearts in the potions.

--------------------------

Copic Markers:

Skin: E000/E00/E21/E11/E04/R20
Hair: E49/E47/E44/E43/E42
Reds: R85/R83/R81
Pinks: R81/R83/R85
Blues: B000/B00

--------------------------

Card Recipe for My Love Potion Card:

Love Potion Set, Paper Nest Dolls
Paper Basics - Stamper's Select White Cardstock, Papertrey Ink
Love Bugs 6” x 6” Paper Pad, Doodlebug Design Inc.
Detailed Hearts Die, Stampin’ Up!
Two of Hearts Dies, Cheery Lynn Designs
Clear Medium Envelopes, Stampin’ Up!
Love Affair Sparkletz Embellishments, Buttons Galore & More
Peppermint Jazz Sparkletz Embellishments, Buttons Galore & More
Rouge Sequins, Craft Medley
Marshmallow Premium Sequins, 28 Lilac Lane
Valentine Day Stickers, Recollections
Glossy Accents, Ranger
Star Dust Stickles, Ranger
White Gelly Roll Pen, Sakura
Basic White, Real Red, and Polished Pink Card Stock, Stampin’ Up!

Finished card size: 5 ½” x 4 ¼”

--------------------------

Hope you like my Design Team card for Paper Nest Dolls!

Thank you for stopping by!

Hugs,
Laurie

Friday, January 6, 2023

Wintertime Wishes Card


Hello Crafty Friends! It's Laurie here! I am sharing my Wintertime Wishes Card as my Design Team Inspiration Card for Paper Nest Dolls using the sweet Emma with Snowflake Banner. Don’t you love her beautiful snowflake banner!

The Details of My Card

For my card, I coloured Emma with my Copic markers in one of my favourite colour combos of pinks, blues, and tans! I added Glossy Accents to the hearts on her snowflake banner and Stardust Stickles to her hat pompom, bows and the snowflakes.

The Snowed In Paper was perfect for my card since the knitted snowflake pattern created a cozy warm feel and suited my snowflake theme. Even the “Wintertime” sentiment was from the Paper Pad.

I had the Frostyville Corner Die from Memory Box in my stash and thought it would work for a mini slimline card. I love how it peeks put from under the sentiment creating interest over the knitted snowflake paper! A few more glimmery snowflakes from punches and a die were added for sparkle. To ground Emma, I added a stitched snowbank and ran some Glittered Organdy Ribbon over it to add more sparkle. I also added the ribbon across the top of the so that the sentiment hangs from it.

The finishing touch was a scattering of rhinestones on the knitted paper to add even more sparkle!

--------------------------

Copic Markers:

Skin: E000/E00/E21/E11/E04/R20
Hair: E99/YR24/YR23
Blues: B91/B93/B95/B97
Browns: E41/E42/E43/E44
Pinks: R81/R83/R85


Card Recipe for Wintertime Wishes Card:

Emma with Snowflake Banner, Paper Nest Dolls
Paper Basics - Stamper's Select White Cardstock, Papertrey Ink
Snowed In 6” x 6” Paper Pad, Echo Park
White Glimmer Paper, Stampin’ Up!
Slimline Stitched Hillside Border Dies, Lawn Fawn
Frostyville Corner Die, Memory Box
Seasonal Layers Thinlits Dies, Stampin’ Up!
Snowflake Border Punch, Martha Stewart
Snowflake Corner Punch, Martha Stewart
Glittered Organdy Ribbon, Stampin’ Up!
Rhinestone Basic Jewels, Stampin’ Up!
Glossy Accents, Ranger
Star Dust Stickles, Ranger
Basic White, Rococo Rose, and Crumb Cake Card Stock, Stampin’ Up!

Finished card size: 6 ½” x 3 ½”

Stamp Size: 4 ½” Tall

--------------------------

Hope you like my Design Team card for Paper Nest Dolls!

Thank you for stopping by!

Hugs,
Laurie


Tuesday, December 20, 2022

Candy Cane Wishes Card 


Hello Crafty Friends! It's Laurie here! I am sharing my Candy Cane Wishes Card as my Design Team Inspiration Card for Paper Nest Dolls using the cute Tiny Elf Ellie

The Details of My Card

For my card, I coloured Ellie with my Copic markers in traditional Christmas colours. She went perfectly with the Sweetest Christmas DSP by Stampin’ Up!, plus its theme was candy canes! Couldn’t get better than that!

The diagonal striped Real Red die cut piece allowed the DSP to show through. So, I matched the openings in the die cut to the DSP stripes which added to my candy cane striped theme. Even the die cut candy canes behind the sentiment were from the DSP.

The sentiment “Candy Cane Wishes and Mistletoe Kisses” summed up my card perfectly! I threaded some Garden Green ribbon through the die cuts holes in the sentiment piece. A flat jingle bell trinket tied with white Baker’s Twine mirrored her bell on her hat. I kept the tails of the twine long so that I could make them swirl on the card.

Some Red Rhinestones and Glossy Accents on the Candy Cane added some nice sparkle to the card.

--------------------------

Copic Markers:

Skin: E000/E00/E21/E11/E04/R20
Hair: E29/E27/E25/E23
Reds: R39/R29/R24/R24
Greens: G99/G94/G21
Jingle Bell/Buckle: Y26/Y23/Y21/Glossy Accents
Belt: C6/C4/C3
Candy Cane: R39/R37/R31/C3/C1/0/Glossy Accents


--------------------------

Card Recipe for My Candy Cane Wishes Card:

Tiny Elf Ellie, Paper Nest Dolls
Paper Basics - Stamper's Select White Cardstock, Papertrey Ink
Sweetest Christmas Designer Series Paper, Stampin’ Up!
Sweet Candy Canes Bundle, Stampin’ Up!
Real Red & Garden Green Ribbon Combo Pack, Stampin’ Up!
Flat Jingle Bell Trinkets, Stampin’ Up!
Baker's Twine Essentials Pack, Stampin’ Up!
Red Rhinestone Basic Jewels, Stampin’ Up!
Glossy Accents, Ranger
Basic White and Real Red Card Stock, Stampin’ Up!

Finished card size: 5 ½” x 4 ¼”

Stamp Size: 4” Tall

--------------------------

Hope you like my Design Team card for Paper Nest Dolls!
Thank you for stopping by!

Hugs,
Laurie

Tuesday, November 22, 2022

My Fa La La Card

My Fa La La Card


Hello Crafty Friends! It’s Laurie here! I am sharing My Fa La La Card as my Design Team Inspiration Card for Paper Nest Dolls using Snow Globe Bundle. This Bundle includes a clear snow globe with a selection of images and labels for the holiday season. I love the versatility of this bundle since you can interchange the images in the globe or use the images by themselves.

The Details of My Card


For my card, I decided to use the singing snow people without the globe. They are just too cute, and I had the perfect Fa La La die for them. In fact, I had two Fa La La dies. Lol! The cover plate behind them and the red glimmer falala.

I pulled the colours of the DSP to colour my snow people in a red and a blue/green. I used my favourite technique for their snow bodies where I use two light makers along the edges and then use my colourless blender to soften the transition between the colour and the paper. The same technique was used for their song books.

Since these cuties are singing, I had to add some musical notes floating up from them! Some glimmery snowflakes and snowbank add even more sparkle to my card. The finishing touch was Star Dust Stickles on their hat trim and the hearts.

————————–

Copic Markers:


Reds: R29/R24/R24/R22
Blue/Greens: BG09/BG57/BG53
Whites: BG0000/BG000/0
Carrots: YR12/Y38/YR12
Song Books: E42/E40/0


————————–

Card Recipe for My Fa La La Card:


Snow Globe Bundle, Paper Nest Dolls
Paper Basics – Stamper’s Select White Cardstock, Papertrey Ink
Santa Express Design Series Paper, Stampin’ Up!
Real Red & White Glimmer Paper, Stampin’ Up!
Slimline Stitched Hillside Borders, Lawn Fawn
Frosted Flurries Dies, Stampin’ Up!
Fa La La Cover Die, The Stamp Market
Music Notes Die, From my Stash
Star Dust Stickles, Ranger
Basic White, Bermuda Bay and Petal Pink Card Stock, Stampin’ Up!

Finished card size: 5 ½” x 4 ¼”
Stamp Size: 3” Tall

————————–

Hope you like my Design Team card for Paper Nest Dolls!

Thank you for stopping by!

Hugs,
Laurie

Tuesday, November 8, 2022

Joy to the World Card

 Joy to the World Card

Hello Crafty Friends! It's Laurie here! I am sharing my Joy to the World Card as my Design Team Inspiration Card for Paper Nest Dolls using Penguin Joy.

The Details of My Card

The Penguin Joy digital stamp comes horizontal, but I thought it would be fun to fussy cut them out and place them vertical like the penguin is balancing the letters. Then, I decided to create a slimline shaker card! Who doesn’t love a fun shaker card!

The slimline cloud die was perfect backdrop for my scene! I just had to add a snowbank that the penguin could balance on and that I could stamp my sentiment. Of course, I had to have some die cut snowflakes falling like on the DSP and to mirror the snowflake sequins. To add more shimmer, I adhered rhinestones to the centre of the die cut snowflakes.

--------------------------

Copic Markers:

Letter J:
Reds: R29/R24/R24/R22
Whites: C3/C1/C0


Penguin:
Black Feathers: C9/C7/C5/C4
White Feathers: C3/C1/C0/R20
Hat: R29/R24/R24/R22
Hat Trim: C3/C1/C0/Star Dust Stickles
Beak/Feet: YR12/Y38/Y35/Glossy Accents


Letter Y:
Reds: R29/R24/R24/R22
Greens: G99/G94/G21


--------------------------

Card Recipe for My Joy to the World Card:

Penguin Joy, Paper Nest Dolls
Paper Basics - Stamper's Select White Cardstock, Papertrey Ink
Snowflake Splendor Design Series Paper, Stampin’ Up!
Window Sheet, Stampin’ Up!
Slimline Cloud Die Set, Whimsy Stamps
Slimline Stitched Hillside Borders, Lawn Fawn
Frosted Flurries Dies, Stampin’ Up!
Peace & Bright Stamp Set, Stampin’ Up!
Snowflake Sequins, Stampin’ Up!
Rhinestone Basic Jewels, Stampin’ Up!
Glossy Accents, Ranger
Star Dust Stickles, Ranger
Foam Adhesive Strips, Stampin’ Up!
Basic White, Balmy Blue and Misty Moonlight Card Stock, Stampin’ Up!

Finished card size: 3 ½” x 8 ½””

Stamp Size: 3” Tall

--------------------------

Hope you like my Design Team card for Paper Nest Dolls!

Thank you for stopping by!

Hugs,
Laurie

Tuesday, September 13, 2022

Back-To-School Mini Slimline Card

My Back-To-School Mini Slimline Card

Hello Crafty Friends! It's Laurie here! I am sharing my Back-To-School Mini Slimline Card using the digital stamp School Girl Avery by Paper Nest Dolls as my Design Team Inspiration Card.

The Details of My Card

I can’t believe that it’s September and the kiddos are back in school! Where did the summer go??

I had fun colouring Avery with my Copic markers to match my Doodlebug paper! Look at those gorgeous curls! They were a blast to colour in a strawberry blond! I decided to give her a “Mad Men” look with black glasses, but the red and green make her look like the schoolgirl she is.

The Photo Play Notebook die was a recent purchase, and I knew it would be perfect for my mini slimline card! I couldn’t resist using the practice letters paper from Doodlebug. Who else remembers practicing their letters in school? The die cut flags in various Doodlebug paper were from the Photo Play Die set.

The circle tag with the apple was something I picked up a long time ago and thought it suited my theme. Of course, I had to thread some linen thread through the hole and tied it with a bow! I strategically placed the tag so that an apple on the flag beneath shows through the die cut apple on the tag.

Don’t you just love the shaker apple! It’s a sticker from Michael’s that I had in my stash waiting for a back-to-school card. The stars are Doodlebug Sprinkles that tied in my colour scheme.

--------------------------

Copic Markers:

Skin: E000/E00/E21/E11/E04/R20
Hair: E18/E15/YR23/Y21
Reds: R29/R27/R25/R22/C5
Greens: YG67/YG63/YG03
Blacks: C7/C5/C3
School Bag: E37/E35/E33/E31/R27/R22


-------------------------

Card Recipe for My Back-To-School Mini Slimline Card:

School Girl Avery, Paper Nest Dolls
Paper Basics - Stamper's Select White Cardstock, Papertrey Ink
School Days, 6” x 6” Paper Pad, Doodlebug Design Inc.
Notebook & Banners Etched Dies, Photo Play 
Circle Tag with Apple Die, From My Stash
Apple Shaker Stickers, Recollections, Michael’s Arts & Crafts
School Sprinkles Shapes, Doodlebug Design Inc.
Linen Thread, Stampin’ Up!
Star Dust Stickles, Ranger (on heart on bag)
Glossy Accents, Ranger (on glasses and apple)
Real Red and Granny Apple Green Card Stock, Stampin’ Up!

Digital Stamp Size: 4 ¼” Tall

Finished card size: 3 ½” x 6 ¼”

--------------------------

Hope you like my Design Team card using
School Girl Avery by Paper Nest Dolls!

Thank you for stopping by!

Hugs,
Laurie

Tuesday, August 30, 2022

Love You Lots Card


Hello Crafty Friends! It's Laurie here! I am sharing Love You Lots Card using Raining Hearts by Paper Nest Dolls for my Design Team Inspiration Card.

The Details of My Card

My 28th wedding anniversary is coming up and I thought this cutie would be perfect for my hubby’s card from me!

I had fun colouring her with my Copic markers, especially the red! My hubby knows it’s one of my favourite colours. I even coloured her hair to look like mine when we first met. Don’t you love the falling hearts and her bucket filled with love!

The Smitten paper pulled out the red and pinks of my colouring. It has roses and hearts with keys on it. So, I decided to pull out my key embellishments as a nod to my Hubby having the key to my heart. I threaded it through some Real Red Ruffled ribbon to make it look like it was hanging from the card.

The die cut pink heart border added some popped up dimension to one side. All I added was some resin hearts to tie in the red colour scheme.

A pink stitched die cut heart and wooden heart added the perfect backdrop to my white embossed sentiment tying in my red and pink colour scheme!

--------------------------

Copic Markers:

Skin: E000/E00/E21/E11/E04/R20
Hair: E29/E27/E25/E23/E21
Reds: R29/R27/R25/R22
Yellows: Y38/Y35/Y32/E15
Hearts: R85/R83/R81
Soles of Boots: E27/E25/E23
Ground: E51/E50
Sky: B000/B000/0


--------------------------

Card Recipe for Love You Lots Card:


 Raining Hearts, Paper Nest Dolls
Paper Basics - Stamper's Select White Cardstock, Papertrey Ink
Smitten, 6 x 6 Paper Pad, Authentique Paper
Cross Stitched Frame Borders Dies, Memory Box
Give it a Whirl Dies, Stampin’ Up!
Love Notes Framelits Dies, Stampin’ Up!
Sealed with Love Stamp Set, Stampin’ Up!
VersaMark Ink Pad, Stampin’ Up!
White Stampin’ Emboss Powder, Stampin’ Up!
Real Red Mini Ruffled Ribbon, Stampin’ Up!
Resin Hearts Embellishments, Stampin’ Up!
Metal Key Embellishment, Michaels Arts & Crafts
Sending Love Embellishments, Wooden Heart, Stampin’ Up!
Clear Wink of Stella, Stampin' Up! (on hearts)
Glossy Accents, Ranger (on boot and bucket)
Real Red and Rococo Rose Card Stock, Stampin’ Up!

Digital Stamp Size: 4” Tall

Finished card size: 5 ½” x 4 ¼”

--------------------------

Hope you like my Design Team card using
Raining Hearts by Paper Nest Dolls!


Thank you for stopping by!

Hugs,
Laurie

Thursday, July 21, 2022

Stayin Alive Disco Card

Stayin Alive Disco Card

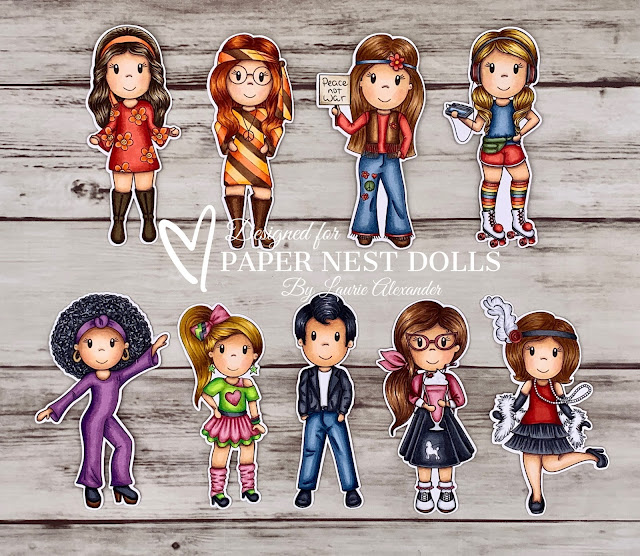
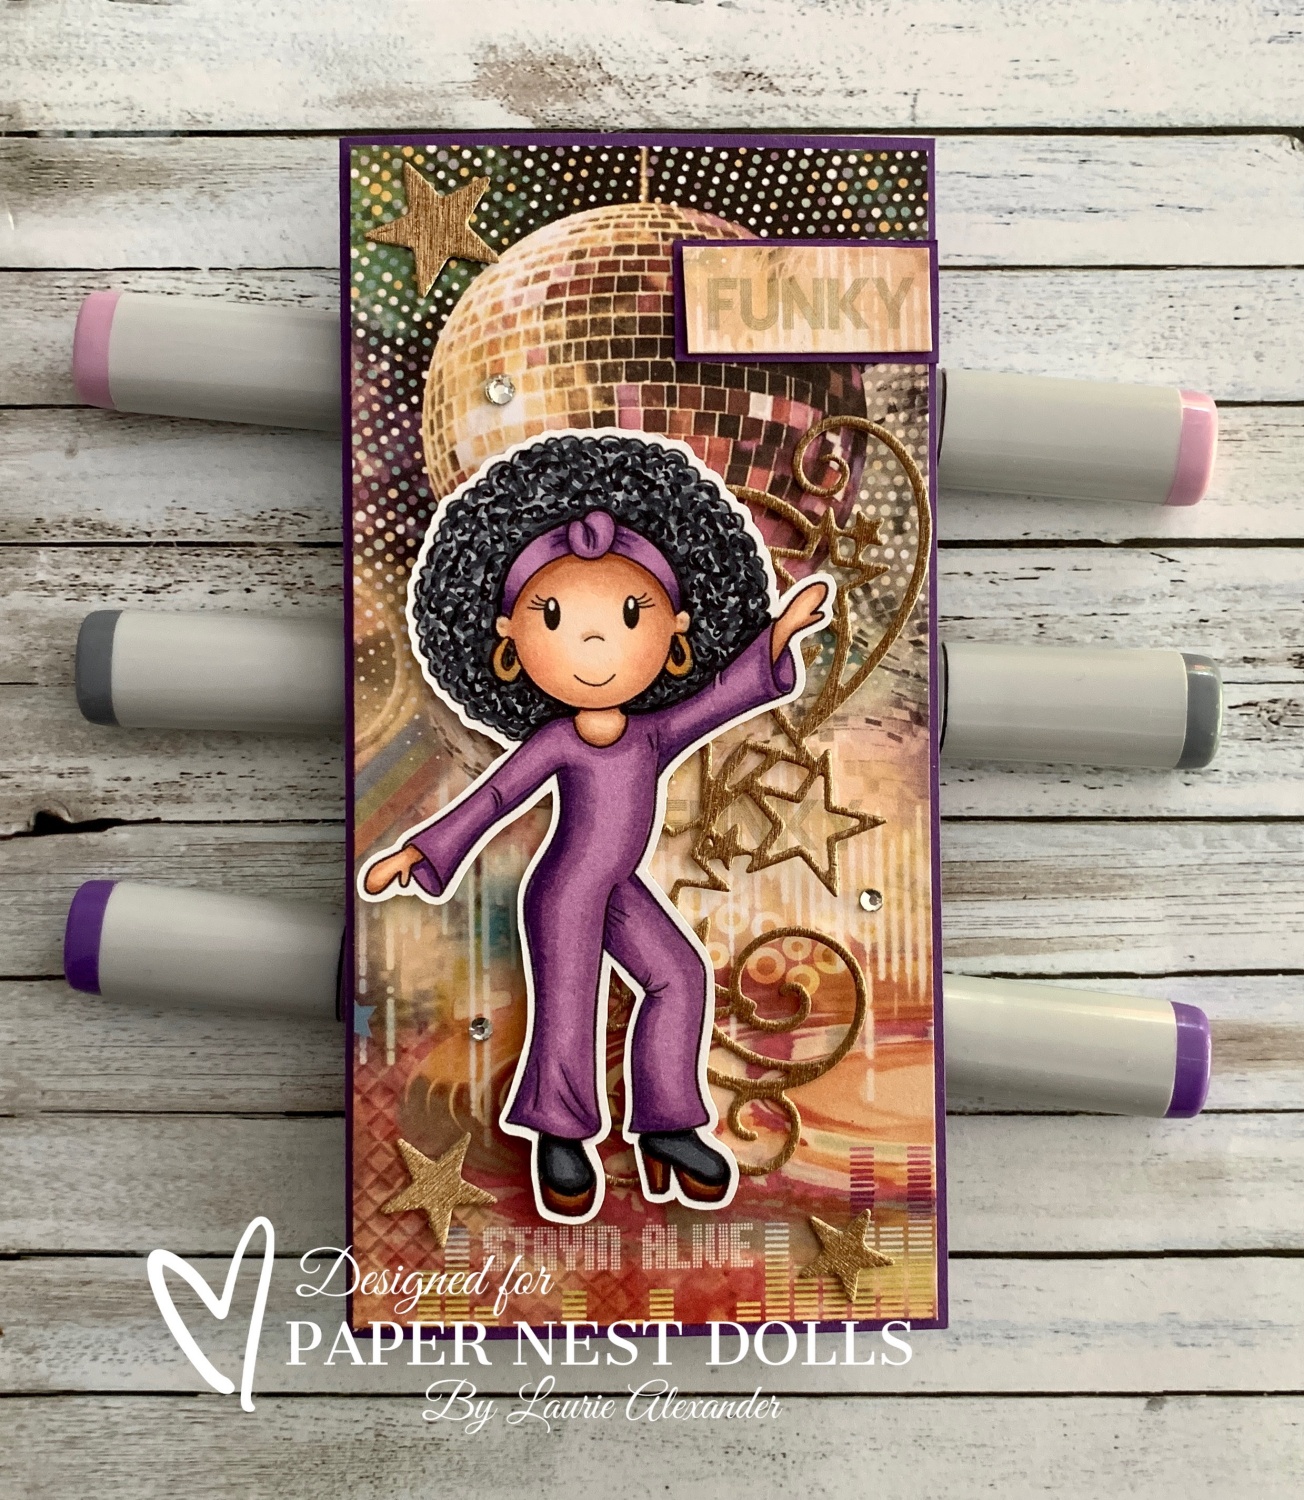
Hello Crafty Friends! It's Laurie here! I am sharing my Stayin Alive Disco Card as my Design Team Inspiration Card for Paper Nest Dolls using Decade Collection Disco Amara. There are ten dolls in the Decade Collection that come in both rubber and digital stamps. You can find all the digital versions here.


The Details of My Card


For my card, I used the Seventies Ciao Bella Paper again to create my mini slimline card. This piece of paper is the left-over piece from my Roller Disco Babe card! So, I was able to get 2 cards made using one sheet of the paper! I love the disco ball and the “Stayin Alive” words under her feet!! The “Funky” sentiment was snipped from the paper as well. Perfect for Disco Amara!

To match the glitz of a disco ball, I added stars in Gold Metallic Paper. I even added a star flourish behind Amara. Love the way the curls and swirls of the flourish mimic movement…almost like Amara is dancing off the card! The only other things the card needed was a scattering of rhinestones and Gold Gelly Roll Pen on her earrings.

--------------------------

Copic Markers


Skin: E15/E13/E11/E00/E000/R20
Hair: C9/C7/C5/C3
Outfit: V17/V15/V12
Boots: C9/C7/C5/E25/E23


--------------------------

Card Recipe for My Stayin Alive Disco Card


Paper Basics - Stamper's Select White Cardstock, Papertrey Ink
Seventies 6” x 6” Paper Pad, Ciao Bella
Gold Metallic Specialty Paper, Stampin’ Up!
Rhinestone Basic Jewels, Stampin’ Up!
Stitched Stars Dies, Stampin’ Up!
Gold Gelly Roll Pen, Sakura
Gorgeous Grape Card Stock, Stampin’ Up!

Finished card size: 6” x 3 ½”

Stamp Size: 4”

--------------------------

Hope you like my Design Team Inspiration Card using
Decade Collection Disco Amara by Paper Nest Dolls!

Thank you for stopping by!

Hugs,
Laurie

Sunday, June 19, 2022

A Viking Father’s Day Card


Hello Crafty Friends! It's Laurie here! I am sharing A Viking Father’s Day Card for my Design Team Inspiration for Paper Nest Dolls using the Viking Bundle. This bundle has three characters and two animals - Viking Andrew (with and without the mustache ties), Viking Owen, Viking Dragon, and Viking Boar. I love this bundle and made another card using just Viking Andrew without the mustache ties.

Details of my Card

I thought using Viking Andrew and Viking Owen together would make a perfect Father’s Day card! I had so much fun colouring with my Copic markers this brawny guy and his son in appropriate Viking colours!

For my card, I kept it simple to make the stamps stand out. I used the High Seas Embossing Folder to emboss the waves on Night of Navy card stock. This was placed on a Mossy Meadow card base. Next, I used a frame with Viking imagery that came with the digital papers for the perfect backdrop for my father and son! My simple sentiment was layered on a scrap of the Cozy Winter paper. This paper pack is not just for winter but has all-purpose patterns as well. The finishing touch was the Viking chipboard ship and some black matte dots.

--------------------------

Copic Markers

Viking Andrew
Skin: E04/E11/E21/E00/E000
Hair: W7/W6/W5/W3
Top: YG99/YG97/YG95/YG93/YG91
Pants/Mitts: R39/R37/R35/R32
Fur Trim: C7/C5/C3
Boots: E49/E47/E44
Axe: C7/C5/C4/C3/E49/E47/E44
Brass/Belt/Bracers: E18/E15/E11
Steel on Helmet: C7/C5/C3
Skull on Belt: E42/E41/E40/0
Horns on Helmet: E41/E40/0


Viking Owen
Skin: E04/E11/E21/E00/E000
Hair: E49/E39/E19/E13
Top/Boots/Shield: E29/E37/E35/E33
Pants: YG99/YG97/YG95/YG93/YG91
Fur Vest: C7/C5/C3
Steel: C7/C5/C3
Helmet/Belt: E18/E15/E11
Skull on Belt: E42/E41/E40/0
Horns on Helmet: E41/E40/0

--------------------------

Supplies for A Viking Father’s Day Card:

Viking Bundle, Paper Nest Dolls
Paper Basics - Stamper's Select White Cardstock, Papertrey Ink
Cozy Winter 12” x 12” Designer Paper Pack, P13
Viking Digital Paper, Happy Watercolor Shop
High Seas Embossing Folder, Stampin’ Up!
Home & Garden Stamp Set, Stampin’ Up! (Sentiment)
Tuxedo Black Memento Ink Pad, Stampin’ Up!
Seafaring Chipboard, Kraftin’ Kimmie Stamps
Classic Matte Dots, Stampin’ Up! (Hearts)
Night of Navy, Mossy Meadow and Basic White Card Stock

Stamp Sizes
Viking Andrew: 4”
Viking Owen: 3 ½”

Finished card size: 5 ½” x 4 ¼”

--------------------------

Hope you like A Viking Father’s Day Card using the Viking Bundle by Paper Nest Dolls!

Thank you for stopping by!

Hugs,
Laurie


Thursday, June 9, 2022

My Grease Lightning Card


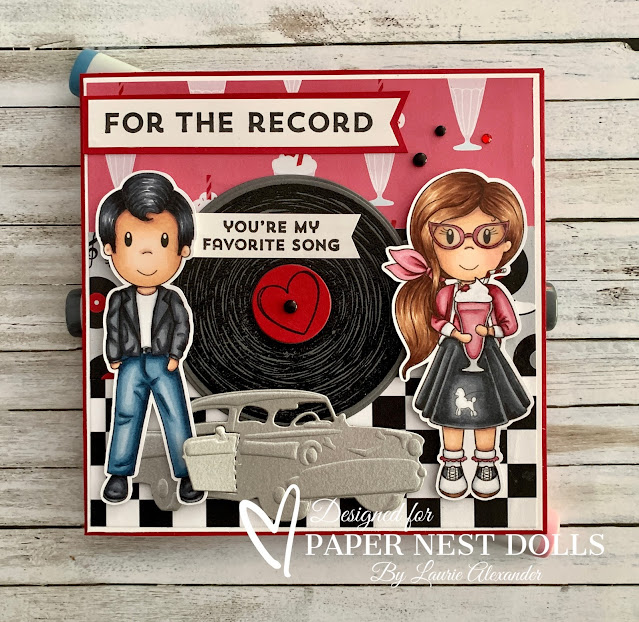
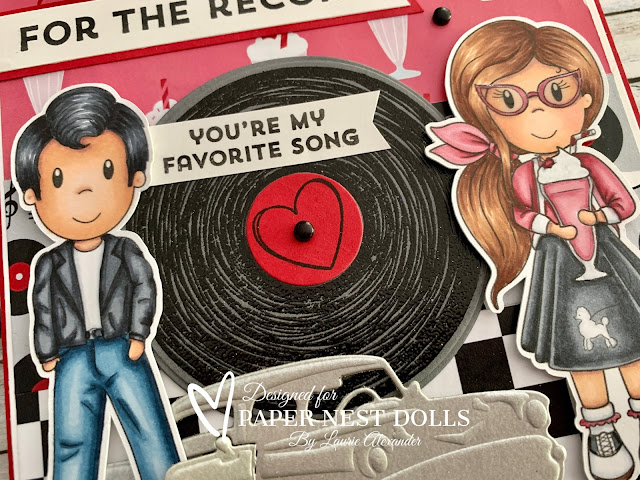
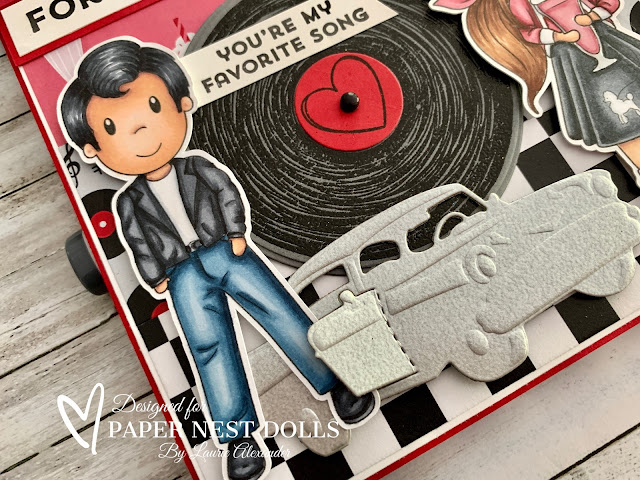
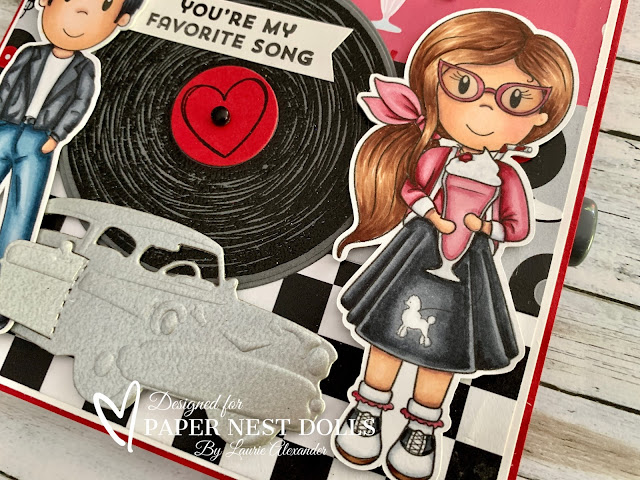
Hello Crafty Friends! It's Laurie here! I am sharing My Grease Lightning Card as my Design Team Inspiration Card for Paper Nest Dolls using Decade Collection Greaser Owen and Decade Collection Poodle Skirt Emma. There are ten dolls in the Decade Collection that come in both rubber and digital stamps. You can find all the digital versions here.


The Details of My Card


When I saw these two stamps, I knew that I had to create a card with them both on it! I had a lot of fun colouring them with my Copic markers! I even added Glossy Accents to the milkshake glass and Emma’s glasses.

For my card, I decided to create a 50s diner vibe using the most perfect paper with milk shakes, records, and black/white tiles that I found on Amazon.

I heat embossed with black embossing powder the record from the For the Record Stamp Set twice. Once on gray card stock and once on red card stock. Then, using several circle dies, I die cut the pieces out. I couldn’t resist using the red card stock for the heart part in the centre of the record! And the grooves really show up well with the black embossing on the gray card stock. Don’t you love the sentiments, especially the puny one, that come with the stamp set!


Isn’t the car die so fun! I thought it would suit my 50’s vibe as an homage to Grease Lightning from the movie Grease. The door even opens. So, I had Owen’s leg halfway in almost like he was getting out of the card.

A red rhinestone and several black dot embellishments tie into my colour scheme.

--------------------------

Copic Markers


Greaser Owen
Skin: E04/E11/E21/E00/E000
Hair: C9/C7/C6
Jacket/Boots: C9/C7/C6/C4
Jeans: B99/B97/B95/B93/B91
Belt: C9/C6/C7C3
Shirt: C3/C1/0


Poodle Skirt Emma
Skin: E04/E11/E21/E00/E000/R20
Hair: E29/E27/E25/E23/E21
Sweater/Scarf: R89/R85/R83/R81/C3/C1/0
Skirt: C9/C7/C6/C4
Glasses: R85/Glossy Accents
Shoes: C9/C6/E25/E23/C3/C1/0
Socks: C3/C1/0/R85
Milkshake: R85/R83/R81/C1/0/Glossy Accents
Cherry: R89/R85
Straw: R89/C3/0


--------------------------

Card Recipe for My Grease Lightning Card


Paper Basics - Stamper's Select White Cardstock, Papertrey Ink
50’s Diner Red & Black 8” x 8” Scrapbook Paper,
Crafters Delight by Leska Hamaty
Galvanized Metallic Paper, Stampin’ Up!
For The Record Stamp Set, Stampin’ Up!
Route 66 Dies, Local King Rubber Stamps
Layering Circles Dies, Stampin’ Up!
Standard Circle Dies, Spellbinders
Tuxedo Black Memento Ink Pad, Stampin’ Up!
VersaMark Ink, Stampin’ Up!
Basics Embossing Powder, Stampin’ Up!
Heat Tool, Stampin’ Up!
Classic Matte Dots, Stampin’ Up!
Rhinestone Basic Jewels, Stampin’ Up!
Glossy Accents, Ranger
Real Red, Basic Gray, and Basic White Card Stock, Stampin’ Up!

Finished card size: 5 ½” x 5 ½”

Stamps Size: 4”

--------------------------

Hope you like my Design Team Inspiration Card using

Thank you for stopping by!
Hugs,
Laurie

Thursday, April 28, 2022

Give Peace a Chance

My Make Peace, Not War Card

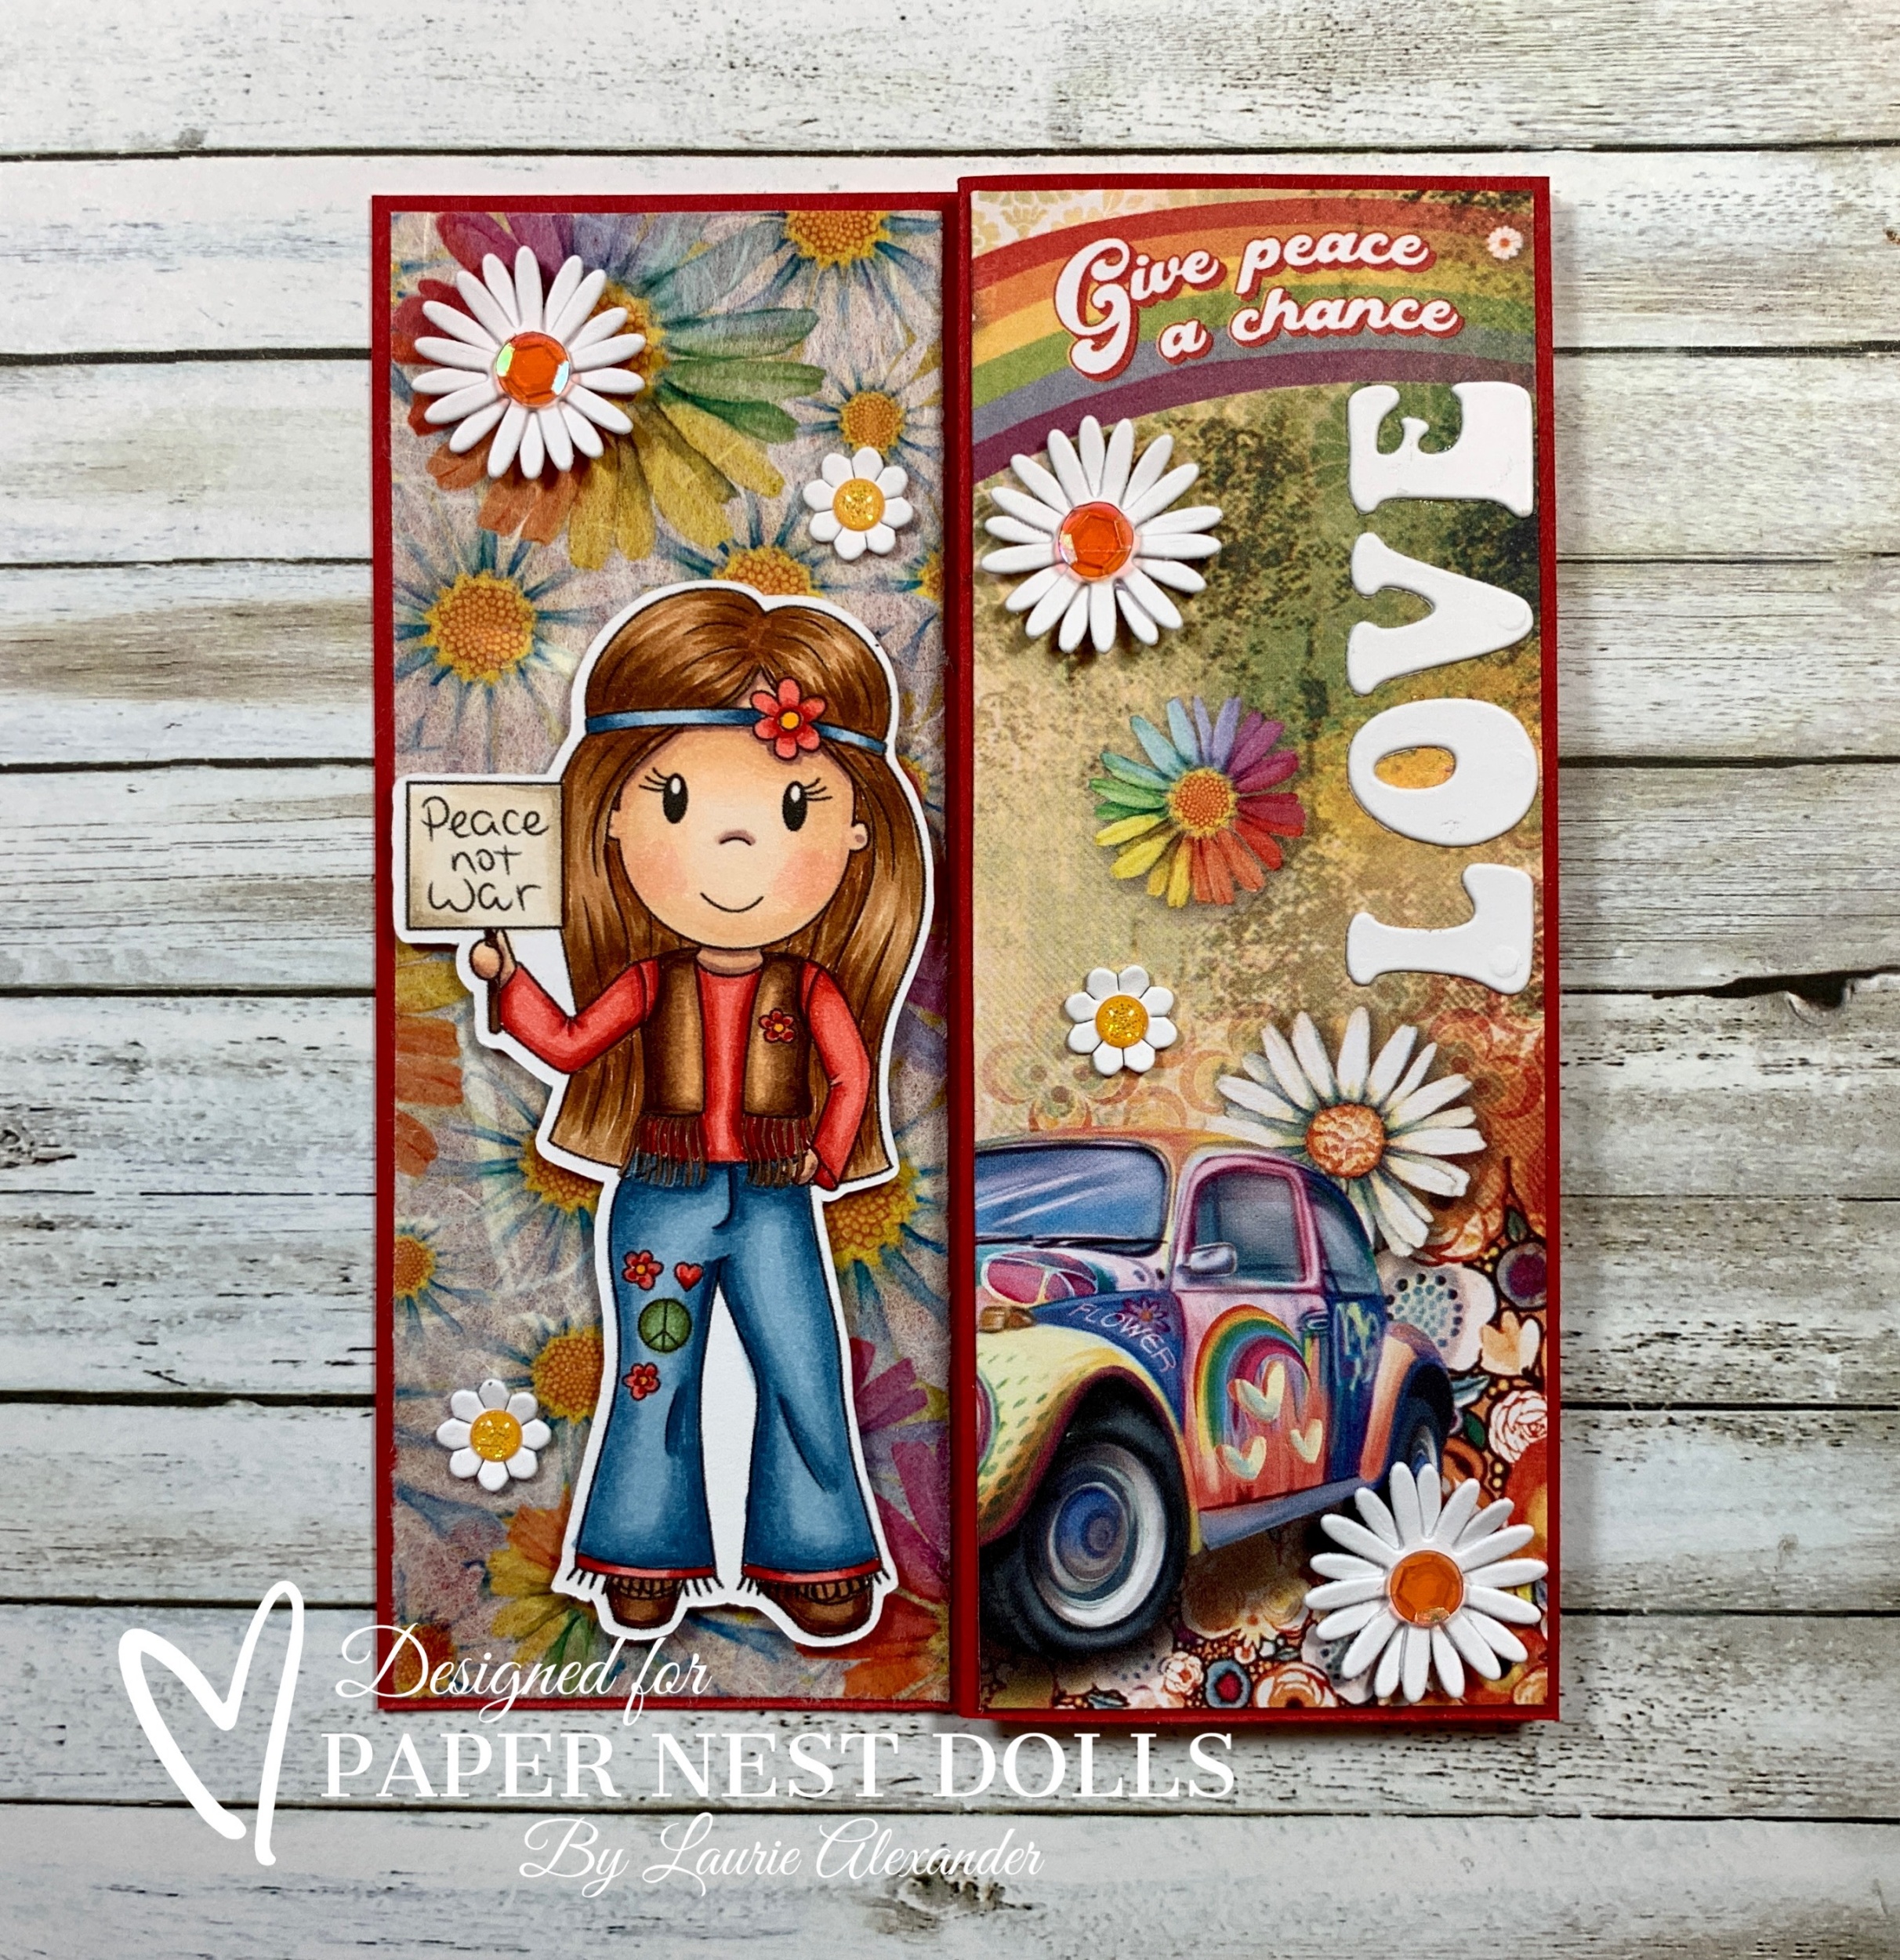
Hello Crafty Friends! It's Laurie here! I am sharing my Give Peace a Chance as my Design Team Inspiration Card for Paper Nest Dolls using the new release Decade Collection Hippie Ellie. With everything going on in the world right now, I thought this was a very appropriate card for the times!

The Details of My Card

I had a lot of fun colouring Hippie Ellie with my Copic markers! Don’t you just love her jeans with the patches and her suede fringe vest! She is such a groovy hipster!

For my card, I found this perfect paper that had a Seventies theme! I loved it so much that I wanted to use a whole sheet for my card front! So, I used a fun fold called a Z-Fold Card for the card base, but I reversed it into a backwards Z. I wanted the love bug to show on the front with Ellie when the card is closed. This type of card folds up to a regular A2 card but allows for lots of room to decorate! It also is neat how you open it, and the paper continually keeps going!  

Full Card Laid Flat

Since the paper was so detailed, I only used a few dies to dress it up such as the Love, Peace, daisies, and peace sign. They were from the Retro Bus by Elizabeth Craft Designs. I bought this set planning to use them for the Decade Dolls and they were perfect for Hippie Ellie! A couple of sequins and glimmery dots for the flower centres was all the embellishments this card needed.

Measurements

Card Base:  5 ½” x 8 ½”, score at 4 ¼” and 2 1/8”.  Cut the Seventies 6” x 6” paper to 5 ¼” tall, then cut at 2” and 4:”. You could leave the last panel for your sentiment, but I decided to add a fourth panel using a 2” piece of floral rice paper as a background for my coloured stamp.

--------------------------

Copic Markers

Skin: E04/E11/E21/E00/E000/R20
Hair: E39/E37/E35/E33
Jeans: B99/B97/B95/B93/B91
Top: R29/R27/R24/R22
Vest: E29/E27/E25/E23/E21
Shoes: E29/E27/E25/E23
Green: G99/G94/G21
Flowers: R29/R24/R22/Y38

Close Up of Hippie Ellie

--------------------------

Card Recipe for My Give Peace a Chance

Paper Basics - Stamper's Select White Cardstock, Papertrey Ink
Seventies 6” x 6” Paper Pad, Ciao Bella
1928: Retro Bus Dies, Elizabeth Craft Designs
Rice Paper A4 Love Peace Joy, Ciao Bella
Artistry Blooms Adhesive-Backed Sequins, Stampin’ Up!
Glittery Enamel Dots, Stampin’ Up!
Real Red and Basic White Card Stock, Stampin’ Up!

Finished card size: 5 ½” x 4 ¼”

--------------------------

Hope you like my Design Team Inspiration Card using
Decade Collection Hippie Ellie by Paper Nest Dolls!

Thank you for stopping by!

Hugs,
Laurie

copyright © 2013 the paper nest · graphics by erica belton · web design by red peach designs