Showing posts with label Decade Dolls. Show all posts

Wednesday, February 28, 2024

My Favorite Song Card

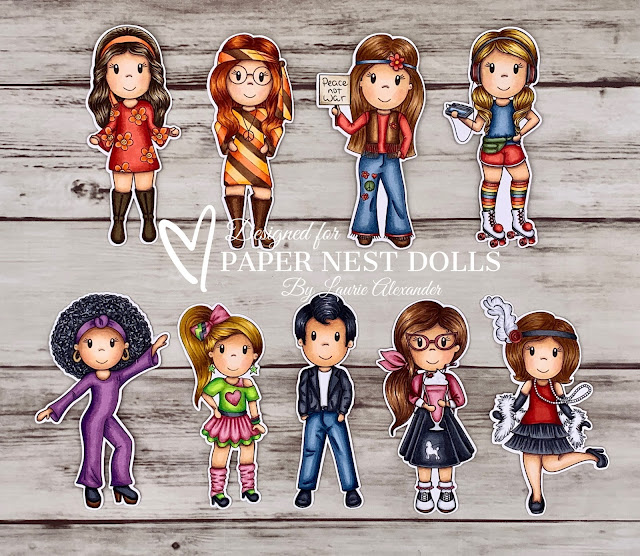
Hello Crafty Friends! It's Laurie here! I am sharing My Favorite Song Card as my Design Team Inspiration Card for Paper Nest Dolls using Decade Collection Roller Skating Ellie. There are ten dolls in the Decade Collection that come in both rubber and digital stamps. You can find all the digital versions here.


The Details of My Favorite Song Card

I had coloured this stamp with my Copic markers a while back…in fact, since I liked her so much, I coloured her twice at the time! Lol! So, I decided to finally get this one onto a card especially since I bought the perfect Walkman dies by My Favorite Things!

For my card, I thought that the Walkman would make a fun shaker. So, I built my Walkman using the dies and even added four layers to the red foam ear pieces to give them some dimension! I used a Window Sheet for where my shaker sequins would go. Once that was built, I added Foam Adhesive Strips between the top and the cassette paper to enclose my sequins. I thought that the cassette paper was a great backing for my Walkman! The skates and disco ball paper behind my focal point was perfect for my theme!

The sentiment was from a retired Stampin’ Up! Stamp Set, but you could easily type this out on your computer and printing it. It was stamped in black ink and die cut out using the Stitched Rectangles.

To add some sparkle to the card, I used Stickles on Ellie’s pompoms on her skates. For the musical notes, I used holographic paper to give them an iridescent look! Very hip for the 80’s. Lol! The final touch was adding Glossy Accents to her Walkman case.

--------------------------

Copic Markers

Skin: E04/E11/E21/E00/E000/R20
Hair: Y21/Y26/YR24/E25
Shirt: B99/B97/B95/B93/B91
Shorts: R29/R24/R22/C3/C1/0
Tummy Sack: G99/G94/G21
Black on Skates: C7/C6/C4
White on Skates: C3/C1/0
Red on Skates: R29/R24/R22
Headphones: C7/C6/C4/R29/R24/R22
Walkman: C7/C6/C4/B91/B95/Glossy Accents
Socks: R29/R24/R22/G99/G94/G21/Y38/Y35/Y32/YR09/YR07/YR02

--------------------------

Card Recipe for My Favorite Song Card

Decade Collection Roller Skating Ellie, Paper Nest Dolls
Paper Basics - Stamper's Select White Cardstock, Papertrey Ink
Seventies 6” x 6” Paper Pad, Ciao Bella
Portable Jams Dies, My Favourite Things
Violin and Music Notes Dies, Cottage Cutz
Holographic Trio Specialty Paper, Stampin’ Up!
Galvanized Metallic Paper, Stampin’ Up!
Window Sheet, Stampin’ Up!
Stitched Rectangle Dies, Stampin’ Up!
For the Record Stamp Set, Stampin’ Up!
Versafine Black Ink, Tsukineko
Glossy Accents, Ranger
Star Dust Stickles, Ranger
Peaceful Poppies Sequins, Stamin’ Up!
Foam Adhesive Strips, Stampin’ Up!
Real Red, Basic Black, Basic Gray, 
and Basic White Card Stock, Stampin’ Up!

Finished card size: 5 ½” x 4 ¼”

Stamp Size: 4”

--------------------------

Hope you like my Design Team Inspiration Card using

Thank you for stopping by!

Hugs,
Laurie

Monday, March 13, 2023

Like TOTALLY Awesome Birthday


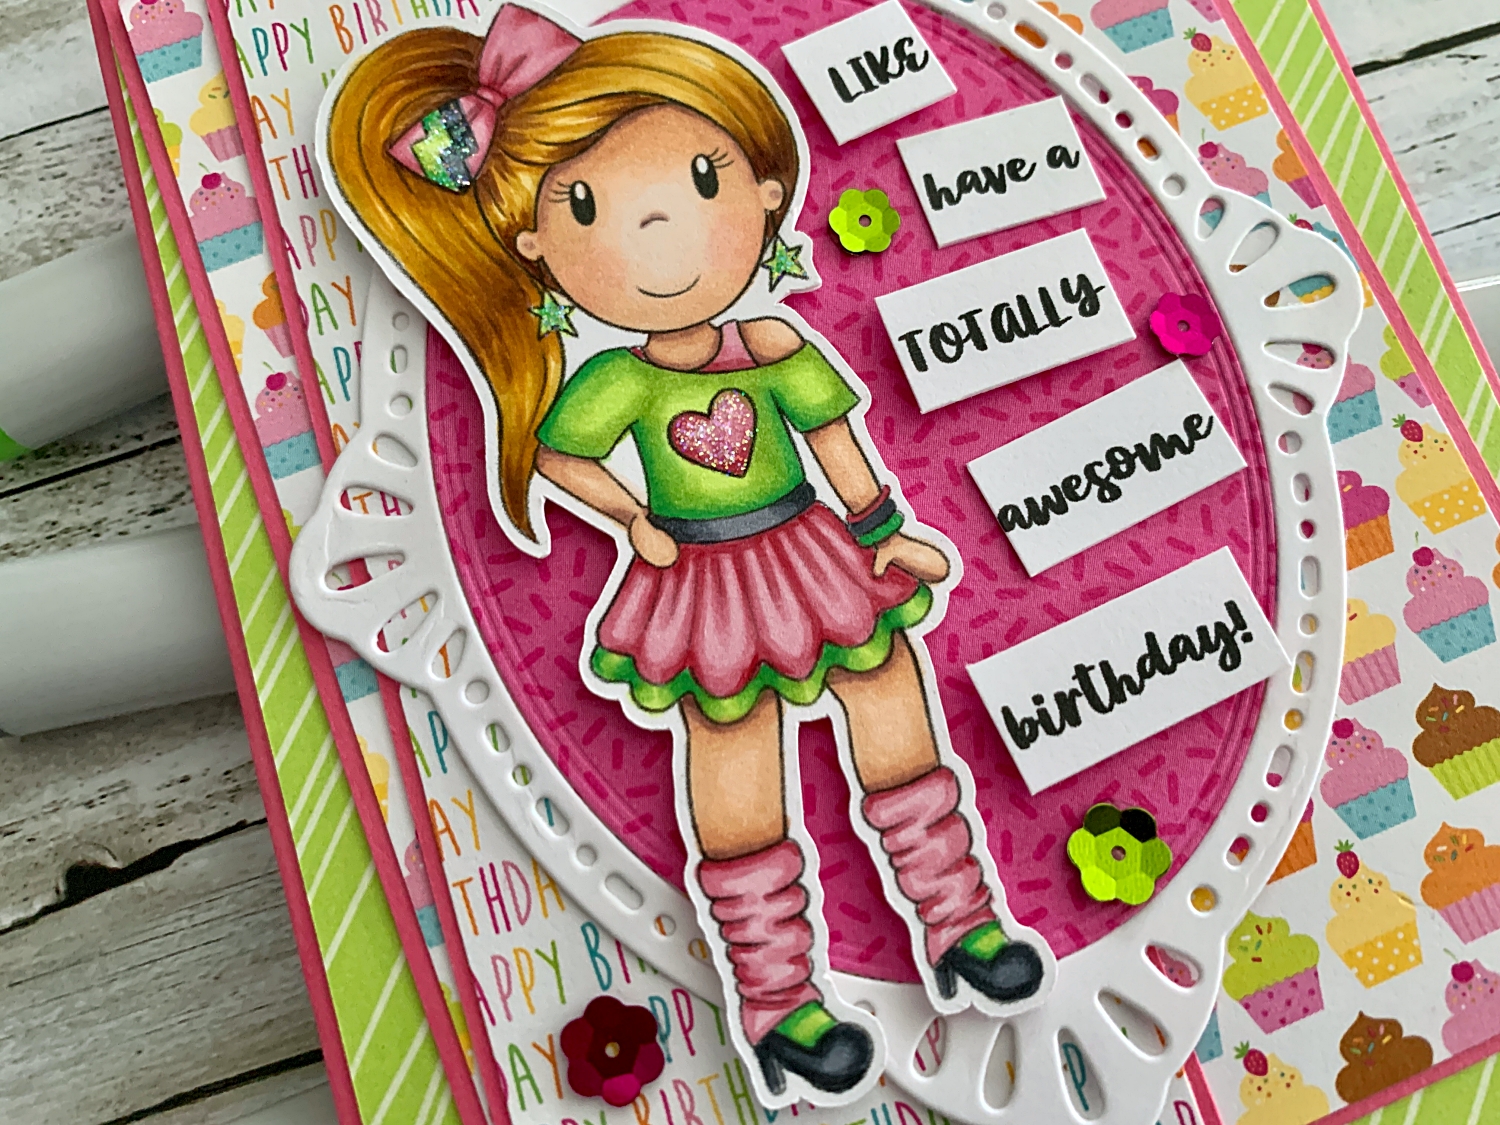
Hello Crafty Friends! It's Laurie here! I am sharing my Like TOTALLY Awesome Birthday as my Design Team Inspiration Card for Paper Nest Dolls using Decade Collection 80's Girl Ellie. There are ten dolls in the Decade Collection that come in both rubber and digital stamps. You can find all the digital versions here.


The Details of My Card

For my card, I decided to go with the bright neon colours of the 80’s. I usually don’t use these colours, but it was fun to go outside my comfort zone! I even used Copic markers that I haven’t used before! This might be dating me, but do you remember leg warmers and “Gag me with a Spoon” (said with my best Valley Girl voice)? Lol!

Doodlebug paper is always so bright and colourful that I decided to go with the Hey Cupcake paper. Perfect for my birthday theme in these bright colours! I also wanted a bright neon green and went with a piece of Parakeet Party DSP.

The Framed Florets Dies gave me a perfect backdrop for Ellie and I couldn’t resist using the bright pink sprinkles paper behind her to make her pop.

The sentiment was printed out on my computer. I used a fun script called Mystical Woods Smooth Script at 12pt which I cut apart so that I could run it beside Ellie. I popped up “Like”, TOTALLY” and “birthday” to give visual interest and to highlight these words since they are what my card is all about!

To add to the birthday theme, I added a banner that was die cut from the Doodlebug paper.

I found some bright sequins in my stash that went beautifully with my bright neon colours. Star Dust Stickles was added to the heart on her top, her earrings and the accents on her bow.

--------------------------

Copic Markers

Skin: E15/E13/E11/E00/E000/R20
Hair: E25/YR24/Y26/Y21
Pinks: R85/R83/R81
Greens: YG09/YG06/YG03/YG01
Blacks: C7/C6/C4
Bracelets: YG09/R85/C6
Earrings: YG09/YG01


--------------------------

Card Recipe for My Like TOTALLY Awesome Birthday Card

Paper Basics - Stamper's Select White Cardstock, Papertrey Ink
Hey Cupcake 6” x 6” Paper Pad, Doodlebug Design Inc.
Butterfly Kisses 6” x 6” Designer Series Paper, Stampin’ Up!
Framed Florets Dies, Stampin’ Up!
Flag Banner Dies, from my Stash
Sequins, from my Stash
Star Dust Stickles, Ranger
Polished Pink and Basic White Card Stock, Stampin’ Up!

Finished card size: 5 ½” x 4 ¼”

Stamp Size: 4”

--------------------------

Hope you like my Design Team Inspiration Card using
Decade Collection 80's Girl Ellie by Paper Nest Dolls!

Thank you for stopping by!
Hugs,
Laurie

Thursday, February 23, 2023

Have a Flappable Birthday


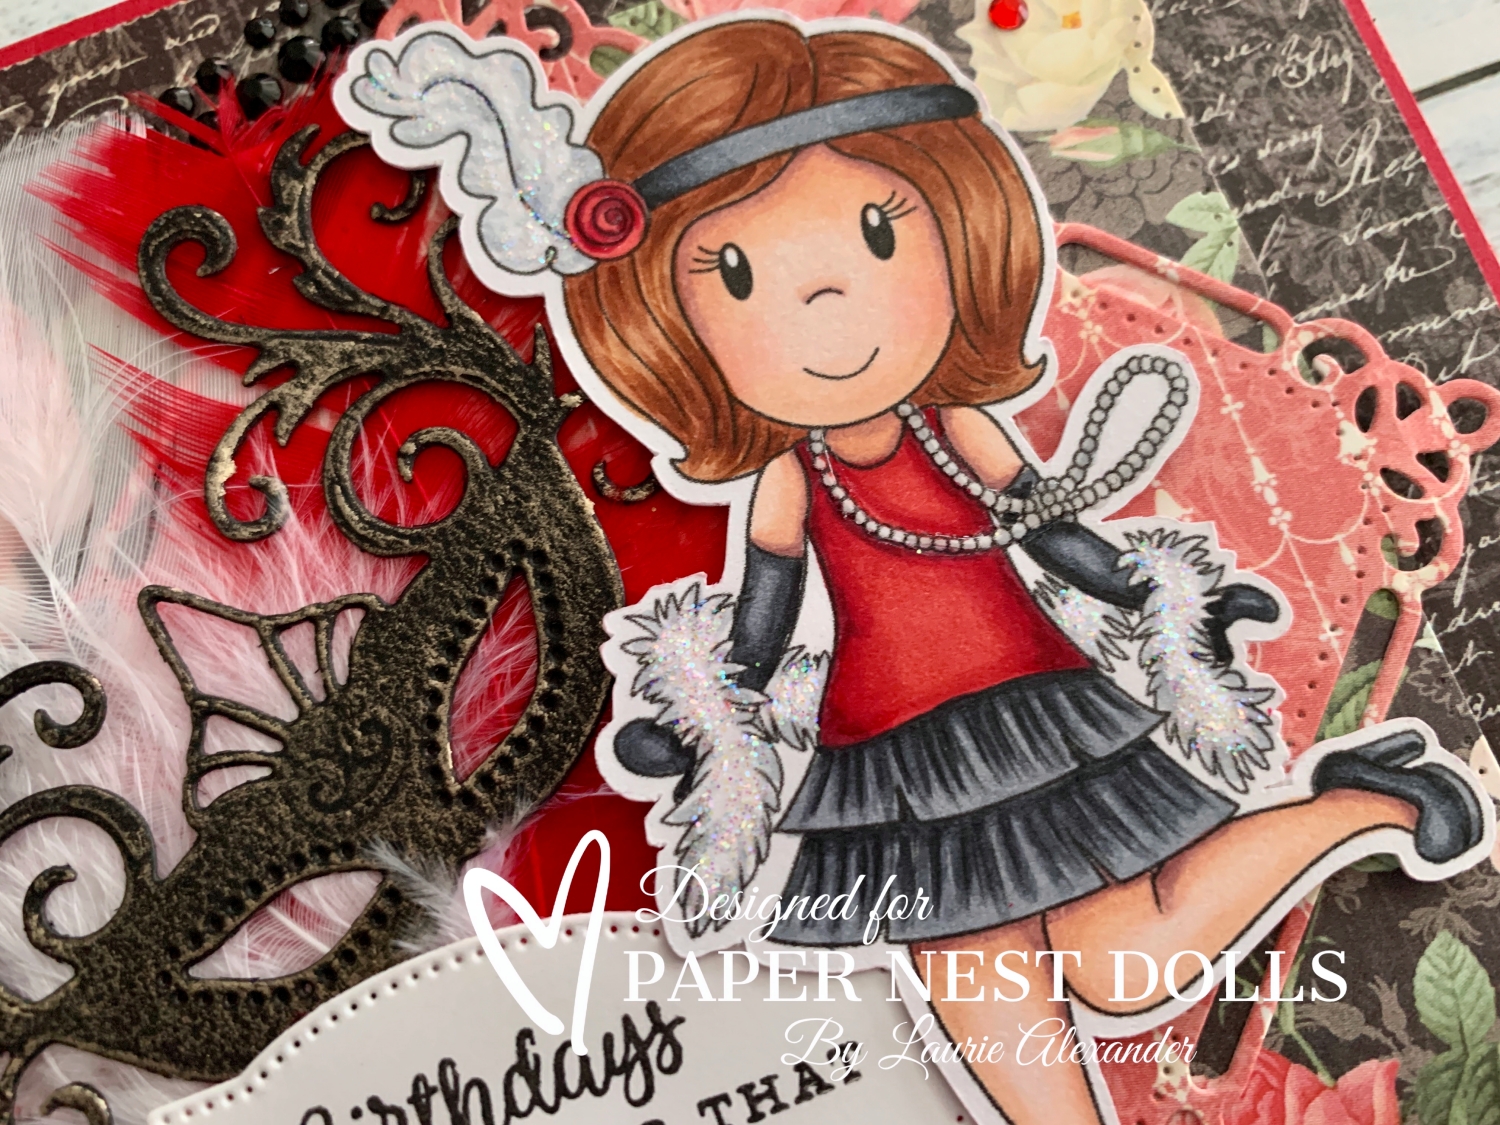
Hello Crafty Friends! It's Laurie here! I am sharing Have a Flappable Birthday as my Design Team Inspiration Card for Paper Nest Dolls using Decade Collection Flapper Girl Emma. There are ten dolls in the Decade Collection that come in both rubber and digital stamps. You can find all the digital versions here.


The Details of My Card

For my card, I used my Copic markers to colour Flapper Emma’s outfit in a very striking colour scheme of red and black to create a Roaring 20s theme. I love this Era with all it’s gorgeous outfits, Art Deco, and the dance/music scene!

The Mon Amour Papercrafting Paper by Graphic 45 had women with vintage style clothing on it, but I decided to go with the more neutral designs since I wanted the embellishments and Emma to shine. I felt that the Marvelous Squares Dies created an Art Deco feel with their die cuts adding to my Roaring Twenties theme.

Since Emma had a boa on, I decided to add some real feathers in white and red to tie in my colour scheme. Also, since it’s Mardi Gras week, I thought a mask would be a fun accent to add in front of the feathers. To bring out the details of the mask, I rubbed some white gold wax across it.

Don’t you love the sentiment! Perfect for my card since the Roaring 20s was all about living life to the fullest!

To add some sparkle, I used black and clear rhinestone sticker flourishes in opposite corners and a scattering of red rhinestones. I also added Star Dust Stickles to Emma’s boa and her headpiece. Glossy Accents was added to her pearls.

--------------------------

Copic Markers

Skin: E15/E13/E11/E00/E000/R20
Hair: E39/E37/E35/E33
Reds: R59/R29/R27/R24
Blacks: C9/C7/C6/C4

--------------------------

Card Recipe for My Have a Flappable Birthday Card

Paper Basics - Stamper's Select White Cardstock, Papertrey Ink
Mon Amour Papercrafting Paper, Graphic 45
Nestabilities Majestic Elements Marvelous Squares Die, Spellbinders
Venetian Accents Shapeabilities Dies, Spellbinders 
White Gold Metallique Wax, Art Alchemy
Potted Geraniums Bundle, Stampin’ Up!
White Feathers, Creatology, Michaels Arts & Crafts
Red Feathers, Creatology, Michaels Arts & Crafts
Red Rhinestone Basic Jewels, Stampin’ Up!
Recollection Bling Stickers, Michaels Arts & Crafts 
Star Dust Stickles, Ranger
Glossy Accents, Ranger
Real Red and Basic Black Card Stock, Stampin’ Up!

Finished card size: 5 ¼” x 5 ¼”

Stamp Size: 4”

--------------------------

Hope you like my Design Team Inspiration Card using

Thank you for stopping by!

Hugs,
Laurie

Thursday, July 21, 2022

Stayin Alive Disco Card

Stayin Alive Disco Card

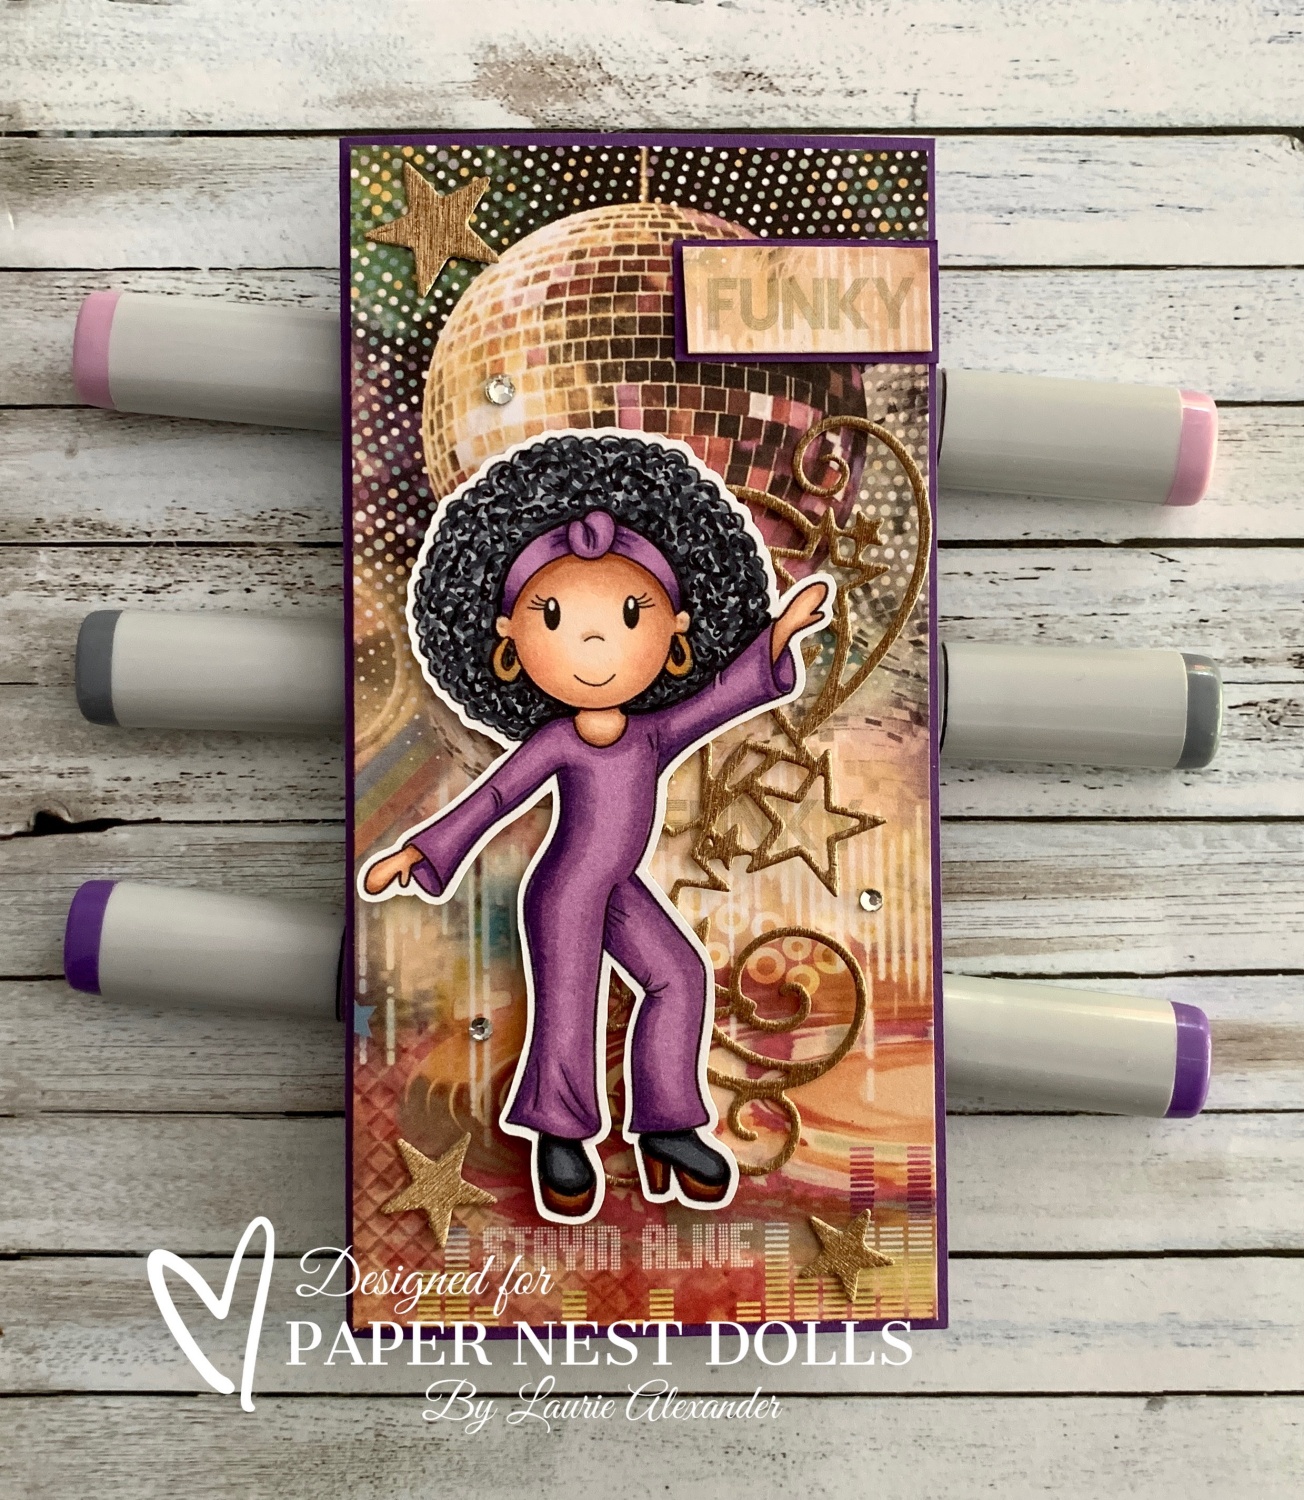
Hello Crafty Friends! It's Laurie here! I am sharing my Stayin Alive Disco Card as my Design Team Inspiration Card for Paper Nest Dolls using Decade Collection Disco Amara. There are ten dolls in the Decade Collection that come in both rubber and digital stamps. You can find all the digital versions here.


The Details of My Card


For my card, I used the Seventies Ciao Bella Paper again to create my mini slimline card. This piece of paper is the left-over piece from my Roller Disco Babe card! So, I was able to get 2 cards made using one sheet of the paper! I love the disco ball and the “Stayin Alive” words under her feet!! The “Funky” sentiment was snipped from the paper as well. Perfect for Disco Amara!

To match the glitz of a disco ball, I added stars in Gold Metallic Paper. I even added a star flourish behind Amara. Love the way the curls and swirls of the flourish mimic movement…almost like Amara is dancing off the card! The only other things the card needed was a scattering of rhinestones and Gold Gelly Roll Pen on her earrings.

--------------------------

Copic Markers


Skin: E15/E13/E11/E00/E000/R20
Hair: C9/C7/C5/C3
Outfit: V17/V15/V12
Boots: C9/C7/C5/E25/E23


--------------------------

Card Recipe for My Stayin Alive Disco Card


Paper Basics - Stamper's Select White Cardstock, Papertrey Ink
Seventies 6” x 6” Paper Pad, Ciao Bella
Gold Metallic Specialty Paper, Stampin’ Up!
Rhinestone Basic Jewels, Stampin’ Up!
Stitched Stars Dies, Stampin’ Up!
Gold Gelly Roll Pen, Sakura
Gorgeous Grape Card Stock, Stampin’ Up!

Finished card size: 6” x 3 ½”

Stamp Size: 4”

--------------------------

Hope you like my Design Team Inspiration Card using
Decade Collection Disco Amara by Paper Nest Dolls!

Thank you for stopping by!

Hugs,
Laurie

Wednesday, July 6, 2022

Roller Skating Ellie

Roller Skating Ellie

Hello Crafty Friends! It’s Laurie here! I am sharing my Roller Skating Ellie as my Design Team Inspiration Card for Paper Nest Dolls using Decade Collection Roller Skating Ellie. There are ten dolls in the Decade Collection that come in both rubber and digital stamps. You can find all the digital versions here.


The Details of My Card


When I was a teenager, roller skating was all the rage and you needed those multicoloured striped socks, Nike red shorts and tunes on your Walkman! So, when I saw this stamp, it bought back so many memories! Lol!

For my card, I coloured Ellie with my Copic markers to match my roller disco paper! I love this paper! I have used it for so many of the Decade Dolls whether it be 60’s, 70’s or 80’s! The skates and cassette tapes (do you remember cassette tapes? Lol) on the paper were perfect for my theme.

The sentiment was from a retired Stampin’ Up! Stamp Set, but you could easily type this out on your computer and printing it. It was die cut using the Stitched Rectangles.

To add some sparkle to the card, I used Stickles on a stitched Real Red heart and Ellie’s pompoms on her skates. I also added a few gold glimmer stars and red rhinestones.

Glossy Accents was added to her Walkman case.

————————–

Copic Markers

Skin: E04/E11/E21/E00/E000/R20
Hair: Y21/Y26/YR24/E25
Shirt: B99/B97/B95/B93/B91
Shorts: R29/R24/R22/C3/C1/0
Tummy Sack: G99/G94/G21
Black on Skates: C7/C6/C4
White on Skates: C3/C1/0
Red on Skates: R29/R24/R22
Headphones: C7/C6/C4/R29/R24/R22
Walkman: C7/C6/C4/B91/B95/Glossy Accents
Socks: R29/R24/R22/G99/G94/G21/Y38/Y35/Y32/YR09/YR07/YR02


————————–

Card Recipe for My Roller Skating Ellie


Paper Basics – Stamper’s Select White Cardstock, Papertrey Ink
Seventies 6” x 6” Paper Pad, Ciao Bella
Gold Metallic Specialty Paper, Stampin’ Up!
Stitched Rectangle Dies, Stampin’ Up!
Skating By Stamp Set, Stampin’ Up!
Rhinestone Basic Jewels, Stampin’ Up!
Give It a Whirl Dies, Stampin’ Up!
Stitched Stars Dies, Stampin’ Up!
Glossy Accents, Ranger
Star Dust Stickles, Ranger
Real Red, Dapper Denim,
and Basic White Card Stock, Stampin’ Up!

Finished card size: 5 ½” x 4 ¼”

Stamp Size: 4”

————————–

Hope you like my Design Team Inspiration Card using

Thank you for stopping by!
Hugs,
Laurie

Thursday, June 23, 2022

My Groovy Love Card

My Groovy Love Card


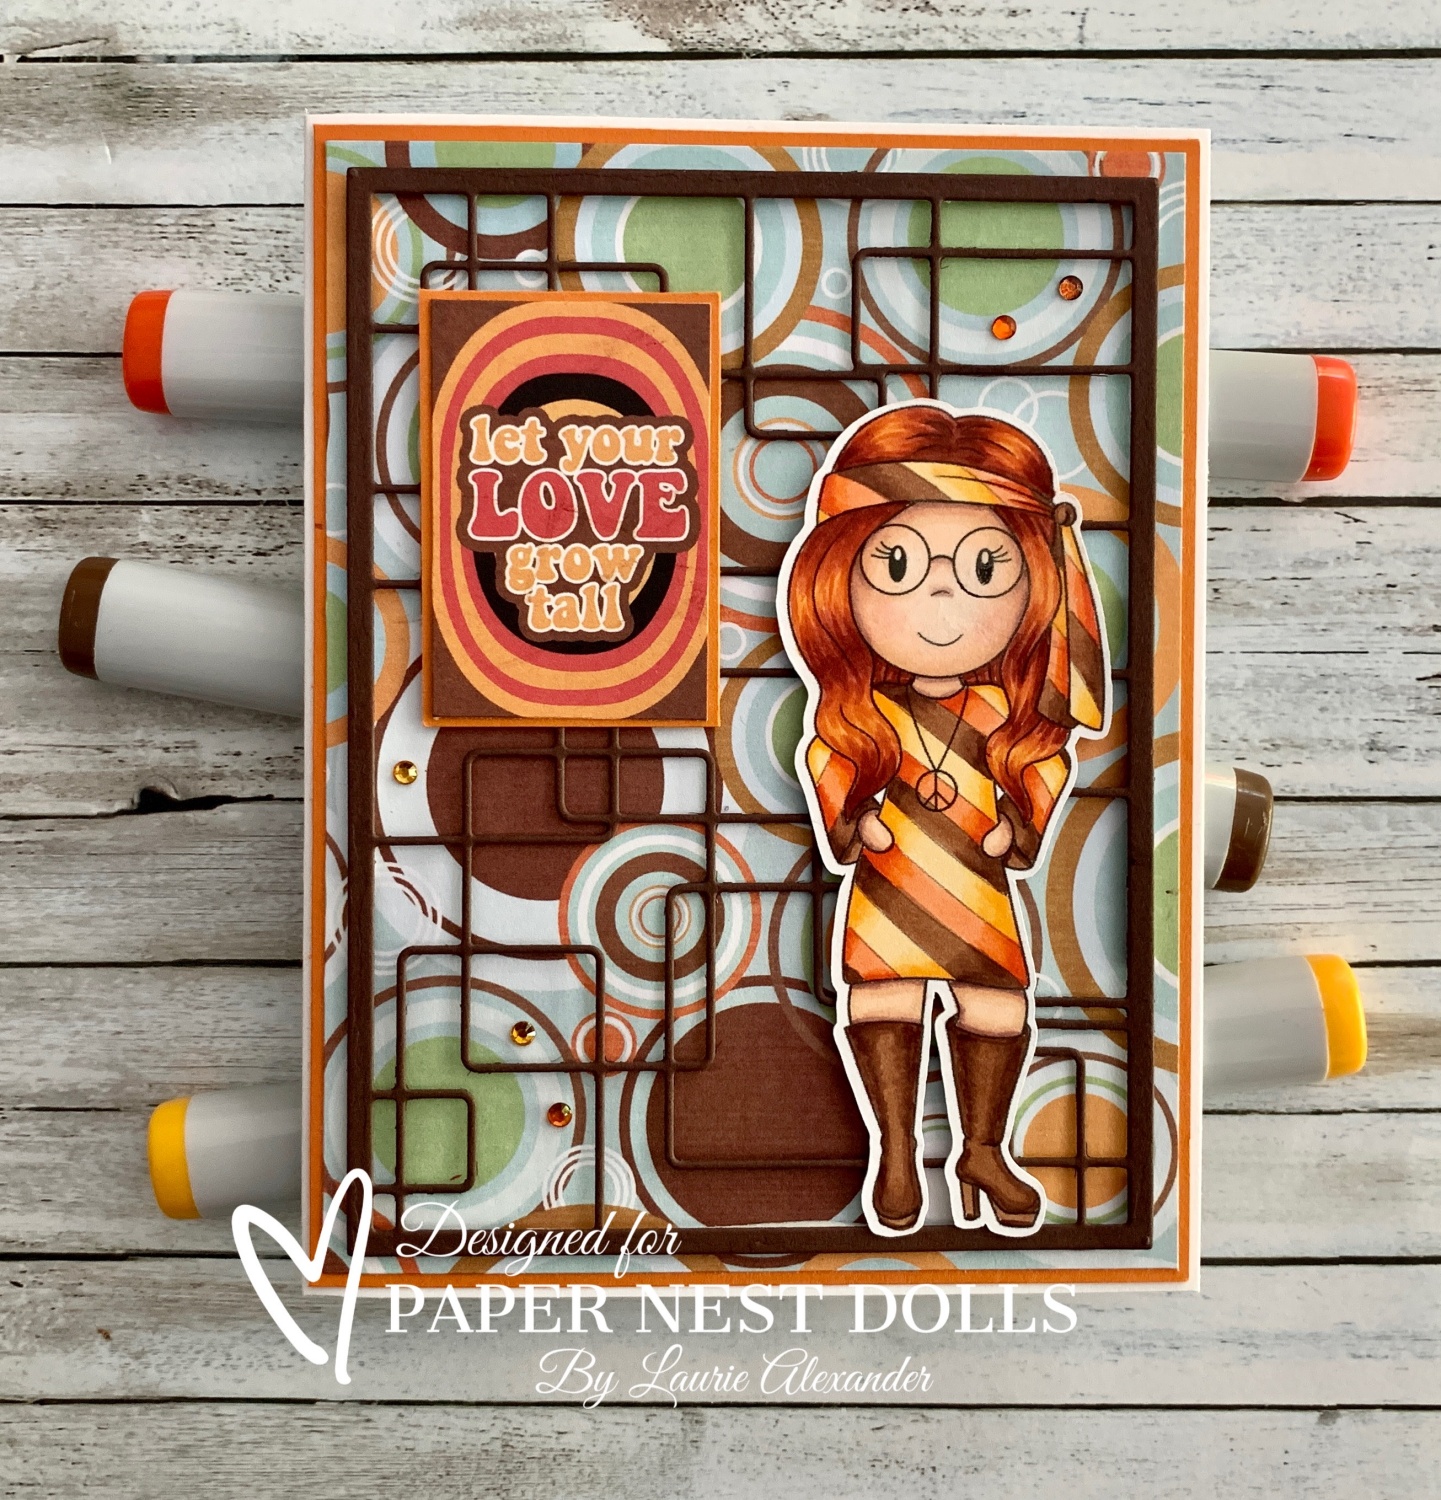
Hello Crafty Friends! It's Laurie here! I am sharing My Groovy Love Card as my Design Team Inspiration Card for Paper Nest Dolls using Decade Collection Hippie Avery. There are ten dolls in the Decade Collection that come in both rubber and digital stamps. You can find all the digital versions here.


The Details of My Card

For my card, I coloured Avery with my Copic markers to match my Seventies paper! Do you remember when chocolate brown and orange were in? Lol! I just had to give Avery red hair to go with my card!

I love the juxtaposition of the paper with circles and the square retro panel die floating on top. The paper pack included a sheet of sentiments, and I thought the “Let your Love grow tall” matched my card in colours and theme.

The finishing touch was a scattering of rhinestones that I coloured with my Copic markers to match Avery.

--------------------------

Copic Markers

Skin: E04/E11/E21/E00/E000/R20
Hair: YR14/YR18/E08/E18
Oranges: YR09/YR07/YR02
Browns: E27/E25/E23
Yellows: Y38/Y35/Y32
Boots: E27/E25/E23
Rhinestones: YR09/Y38/E27

--------------------------

Card Recipe for My Groovy Love Card

Paper Basics - Stamper's Select White Cardstock, Papertrey Ink
Seventies 6” x 6” Paper Pad, Ciao Bella
Retro Card Panel Precision Cutting Die, Frantic Stamper Inc.
Rhinestone Basic Jewels, Stampin’ Up!
Glossy Accents, Ranger
Thick Basic White, Pumpkin Pie, 
and Early Espresso Card Stock, Stampin’ Up!

Finished card size: 5 ½” x 4 ¼”

Stamp Size: 4”

--------------------------

Hope you like my Design Team Inspiration Card using
Decade Collection Hippie Avery by Paper Nest Dolls!

Thank you for stopping by!
Hugs,
Laurie


Thursday, June 9, 2022

My Grease Lightning Card


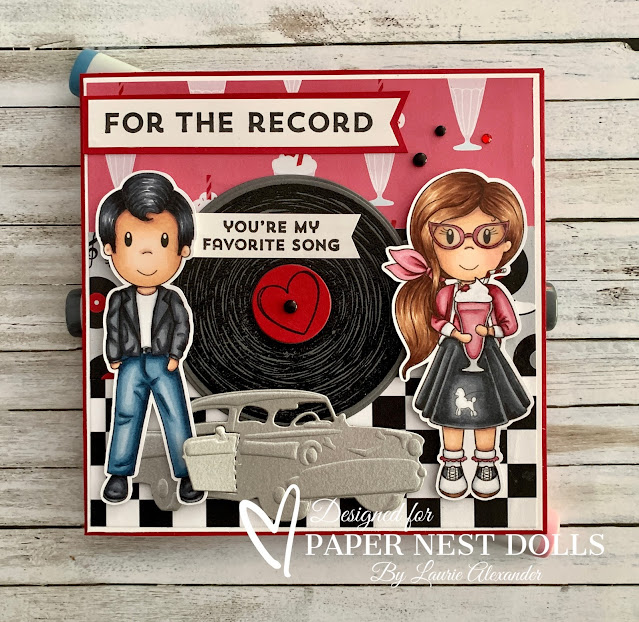
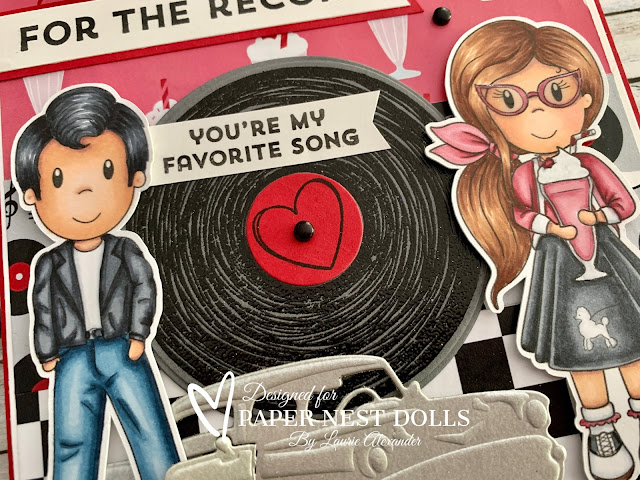
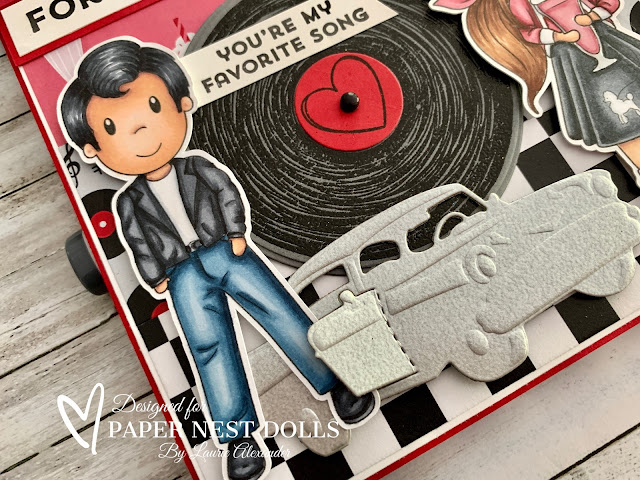
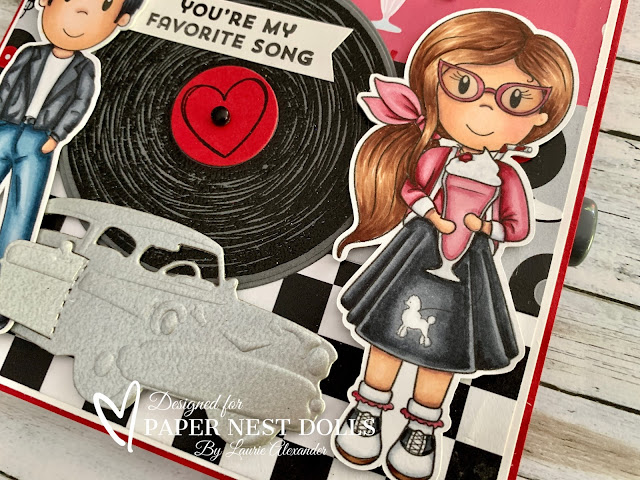
Hello Crafty Friends! It's Laurie here! I am sharing My Grease Lightning Card as my Design Team Inspiration Card for Paper Nest Dolls using Decade Collection Greaser Owen and Decade Collection Poodle Skirt Emma. There are ten dolls in the Decade Collection that come in both rubber and digital stamps. You can find all the digital versions here.


The Details of My Card


When I saw these two stamps, I knew that I had to create a card with them both on it! I had a lot of fun colouring them with my Copic markers! I even added Glossy Accents to the milkshake glass and Emma’s glasses.

For my card, I decided to create a 50s diner vibe using the most perfect paper with milk shakes, records, and black/white tiles that I found on Amazon.

I heat embossed with black embossing powder the record from the For the Record Stamp Set twice. Once on gray card stock and once on red card stock. Then, using several circle dies, I die cut the pieces out. I couldn’t resist using the red card stock for the heart part in the centre of the record! And the grooves really show up well with the black embossing on the gray card stock. Don’t you love the sentiments, especially the puny one, that come with the stamp set!


Isn’t the car die so fun! I thought it would suit my 50’s vibe as an homage to Grease Lightning from the movie Grease. The door even opens. So, I had Owen’s leg halfway in almost like he was getting out of the card.

A red rhinestone and several black dot embellishments tie into my colour scheme.

--------------------------

Copic Markers


Greaser Owen
Skin: E04/E11/E21/E00/E000
Hair: C9/C7/C6
Jacket/Boots: C9/C7/C6/C4
Jeans: B99/B97/B95/B93/B91
Belt: C9/C6/C7C3
Shirt: C3/C1/0


Poodle Skirt Emma
Skin: E04/E11/E21/E00/E000/R20
Hair: E29/E27/E25/E23/E21
Sweater/Scarf: R89/R85/R83/R81/C3/C1/0
Skirt: C9/C7/C6/C4
Glasses: R85/Glossy Accents
Shoes: C9/C6/E25/E23/C3/C1/0
Socks: C3/C1/0/R85
Milkshake: R85/R83/R81/C1/0/Glossy Accents
Cherry: R89/R85
Straw: R89/C3/0


--------------------------

Card Recipe for My Grease Lightning Card


Paper Basics - Stamper's Select White Cardstock, Papertrey Ink
50’s Diner Red & Black 8” x 8” Scrapbook Paper,
Crafters Delight by Leska Hamaty
Galvanized Metallic Paper, Stampin’ Up!
For The Record Stamp Set, Stampin’ Up!
Route 66 Dies, Local King Rubber Stamps
Layering Circles Dies, Stampin’ Up!
Standard Circle Dies, Spellbinders
Tuxedo Black Memento Ink Pad, Stampin’ Up!
VersaMark Ink, Stampin’ Up!
Basics Embossing Powder, Stampin’ Up!
Heat Tool, Stampin’ Up!
Classic Matte Dots, Stampin’ Up!
Rhinestone Basic Jewels, Stampin’ Up!
Glossy Accents, Ranger
Real Red, Basic Gray, and Basic White Card Stock, Stampin’ Up!

Finished card size: 5 ½” x 5 ½”

Stamps Size: 4”

--------------------------

Hope you like my Design Team Inspiration Card using

Thank you for stopping by!
Hugs,
Laurie

Friday, May 13, 2022

Have a ROARING Good Time on Your Birthday!

Hello PND Fans! It's Betty here. I am so loving the Paper Nest Dolls release called the Decade Dolls Collection. Previously, I made projects with Hippie Ellie and Disco Amara. Today, I am sharing a card I made with Flapper Girl Emma. It's hard to chose a favorite, since I love them all, but I really had fun coloring and making this glitzy card. She just makes the perfect birthday card, but of course, you can change the sentiment for another occasion. These stamps come in digital and in red rubber. I used the digital version so that I can make the stamp the size I needed.


To make this A2 size card, I printed the stamp 3-3/4" tall, colored it with Copic markers, then fussy cut her out. 

Copic markers used:
Skin: E04, E11, E00, E50
Hair: E59, E57, E55, E53
Cheeks: E93
Red: R39, R37, R35, R32


I used a white gel pen to create the sparkles and a silver gel pen to create the swirl on her headband.

The back panel is created using a stencil from a pack I got from Amazon and white pigment ink from Stampin' Up. I used a blending brush to ink this stencil onto black cardstock.


To create the silver stenciled background, I used a stencil from the pack I got from Amazon and Ranger Transparent Gloss Texture Paste with silver glitter mixed in. I cut the corners of this panel using a Corner Edger Die from Stamp Anniething then adhered it to the back panel.

I cut out three feathers from red glitter cardstock using Leaf Dies from Stamp Anniething. I created the sentiment on my computer, printed it, trimmed it to size, and added a black cardstock mat. I adhered the feathers under the sentiment. I adhered Flapper Girl Emma using double-sided adhesive foam tape. 
I adhered this card front on a top folding A2 white card base. To finish the card, I added a few sparkly rhinestones I had in my stash. 

Such a fun card to make! I hope you give this one a try! 


Thank you for stopping by today. Have a creative day! ~Betty~

Thursday, May 5, 2022

A Groovy Road Trip Card

A Groovy Road Trip Card

Hello Crafty Friends! It's Laurie here! I am sharing A Groovy Road Trip Card as my Design Team Inspiration Card for Paper Nest Dolls using Decade Collection Flower Power Ellie. There are ten dolls in the Decade Collection that come in both rubber and digital stamps. You can find all the digital versions here.


Decade Doll Collection by Paper Nest Dolls

The Details of My Card

For my card, I coloured Ellie with my Copic markers to match my Seventies paper and her retro bus! This paper was perfect for my card with the musical revolution icons since Ellie has her dancing boots on and is off to Woodstock!

Of course, if Ellie is having a road trip, she needs a retro bus. This Retro Bus Kit comes with dies to build a mini booklet in the shape of a retro bus, but I decided to use it for my card. So, I just trimmed the three ring holes off the back piece. I had a ton of fun decorating my bus with the matching paper, flowers, peace symbol, windshield wipers, Road Trip die and so on. I even used a piece of a window sheet for the windows. For the metal parts, I brushed on some iron wax to give them a metal look.

The finishing touches were some wooden musical notes to match my theme a couple of rhinestone coloured to match my card.

--------------------------

Copic Markers

Skin: E04/E11/E21/E00/E000/R20
Hair: E49/E47/E44/E43/E42
Dress: R29/R27/R24/R22
Flowers: YR09/YR07/YR02/Y38/Y32
Boots: E49/E47/E44
Rhinestones: YR09 (on Bus)

Close Up of Flower Power Ellie

--------------------------

Card Recipe for A Groovy Road Trip Card

Paper Basics - Stamper's Select White Cardstock, Papertrey Ink
Seventies 6” x 6” Paper Pad, Ciao Bella
Window Sheet, Stampin’ Up!
1928: Retro Bus Dies, Elizabeth Craft Designs
Art Alchemy-Metallique Wax-Brushed Iron, Prima Marketing
Laser-Cut Wood Shapes, Craft Medley
Rhinestone Basic Jewels, Stampin’ Up!
Real Red, Crushed Curry, Basic Gray, Basic Black
and Basic White Card Stock, Stampin’ Up!

Finished card size: 5 ¾” x 5 ¾”

--------------------------

To view my other card in this Collection, please click here.


Hope you like my Design Team Inspiration Card using

Thank you for stopping by!
Hugs,
Laurie


Saturday, April 30, 2022

Decade Dolls: Have a GROOVY Birthday

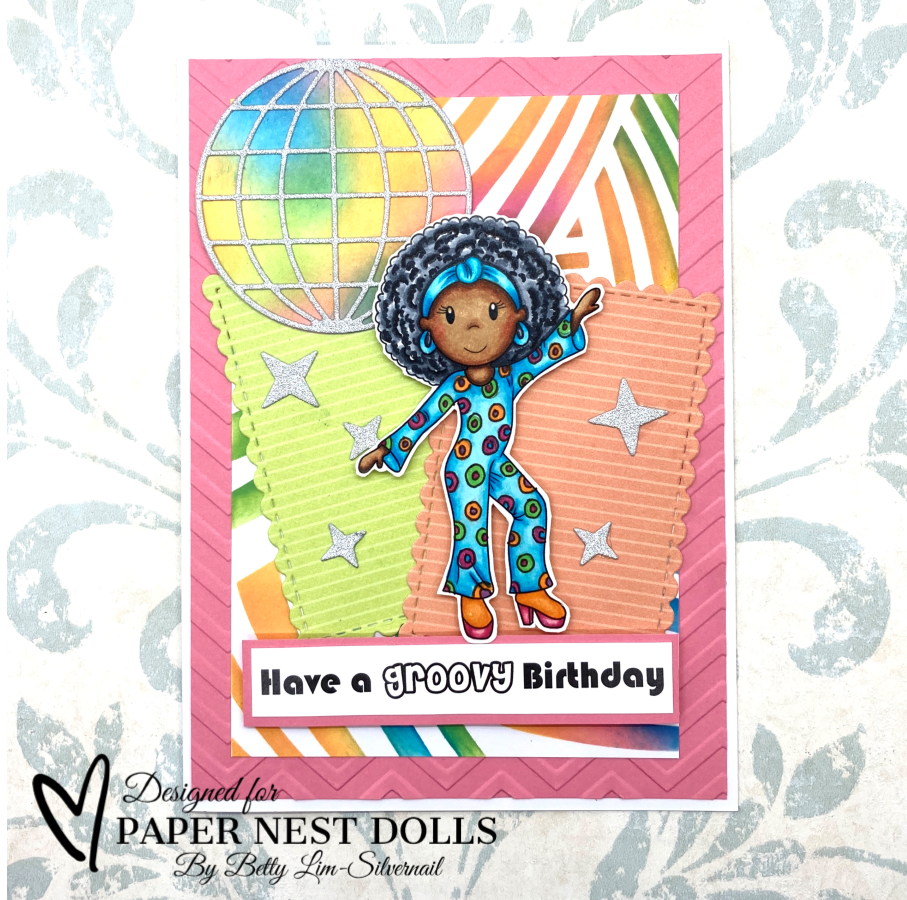
Hello PND Fans! Betty here today. What is your favorite decade? My favorite is the 70's, because I love the bright color fashions, the music, the disco! Paper Nest Dolls came out with new stamps called Decade Dolls and the first one I had to color is Disco Amara. Of course, I had to make a disco scene for Amara! There are 10 Decade Dolls that you can find on the Paper Nest Dolls digital store. They are  available in red rubber stamps as well.


To make this A6 card, I printed the stamp, colored it with Copic markers, then fussy cut her out. I created the sentiment on my computer and printed it at the same time I printed the stamp.

Copic makers used:
Skin: E59, E57, E15, E33, E31
Cheeks: R32
Hair: 100, C9, C7, C5, C3
Dots on dress- Purple: V15, Green: YG07, Pink: RV17, Orange: YR16
Blue: BG04, BG02, BG01, BG000
Shoes: Pink: RV17, RV14, RV11; Orange: YR16, YR14, YR12


Supplies:
-Pink cardstock: Michaels Crafts
-Chevron Embossing folder: Darice
-Geometric Stencil: Amazon
-Distress Oxide: Mermaid Lagoon, Carved Pumpkin, Picked Raspberry, Mowed Lawn
-Patterned paper: Photoplay
-Scalloped Edge Dies: Scrappy Boy Stamps
-Disco Ball & Stars: Stamp Anniething
-Silver glitter cardstock: JoAnn's Crafts

I first created the pink mat layer by embossing it using the chevron embossing folder. Then I created stenciled background by using the Geometric Stencil and Distress Oxide inks. I used a ink blending brush and overlapped some of the colors. I adhered this onto the pink layer. I cut out the patterned papers using the scalloped edge dies and adhered them to the stenciled background.


To create the disco ball, I first inked white cardstock using the Distress Oxide inks, making sure to ink the different colors in different spots. Then I used the disco ball circle to cut it out. I cut out the front part of the disco ball using silver glitter cardstock and adhered it to the inked circle. At this time I cut out the stars and adhered them to the patterned papers along with the disco ball.

I adhered Amara onto the card front using double-sided adhesive foam squares. To finish the card, I matted the sentiment then adhered it using the double-sided adhesive foam squares.


Such a fun stamp to color and card to make! I'll for sure be coloring more Decade Dolls! 

Thank you for stopping by. Have a wonderful and creative day! ~Betty~

Thursday, April 28, 2022

Give Peace a Chance

My Make Peace, Not War Card

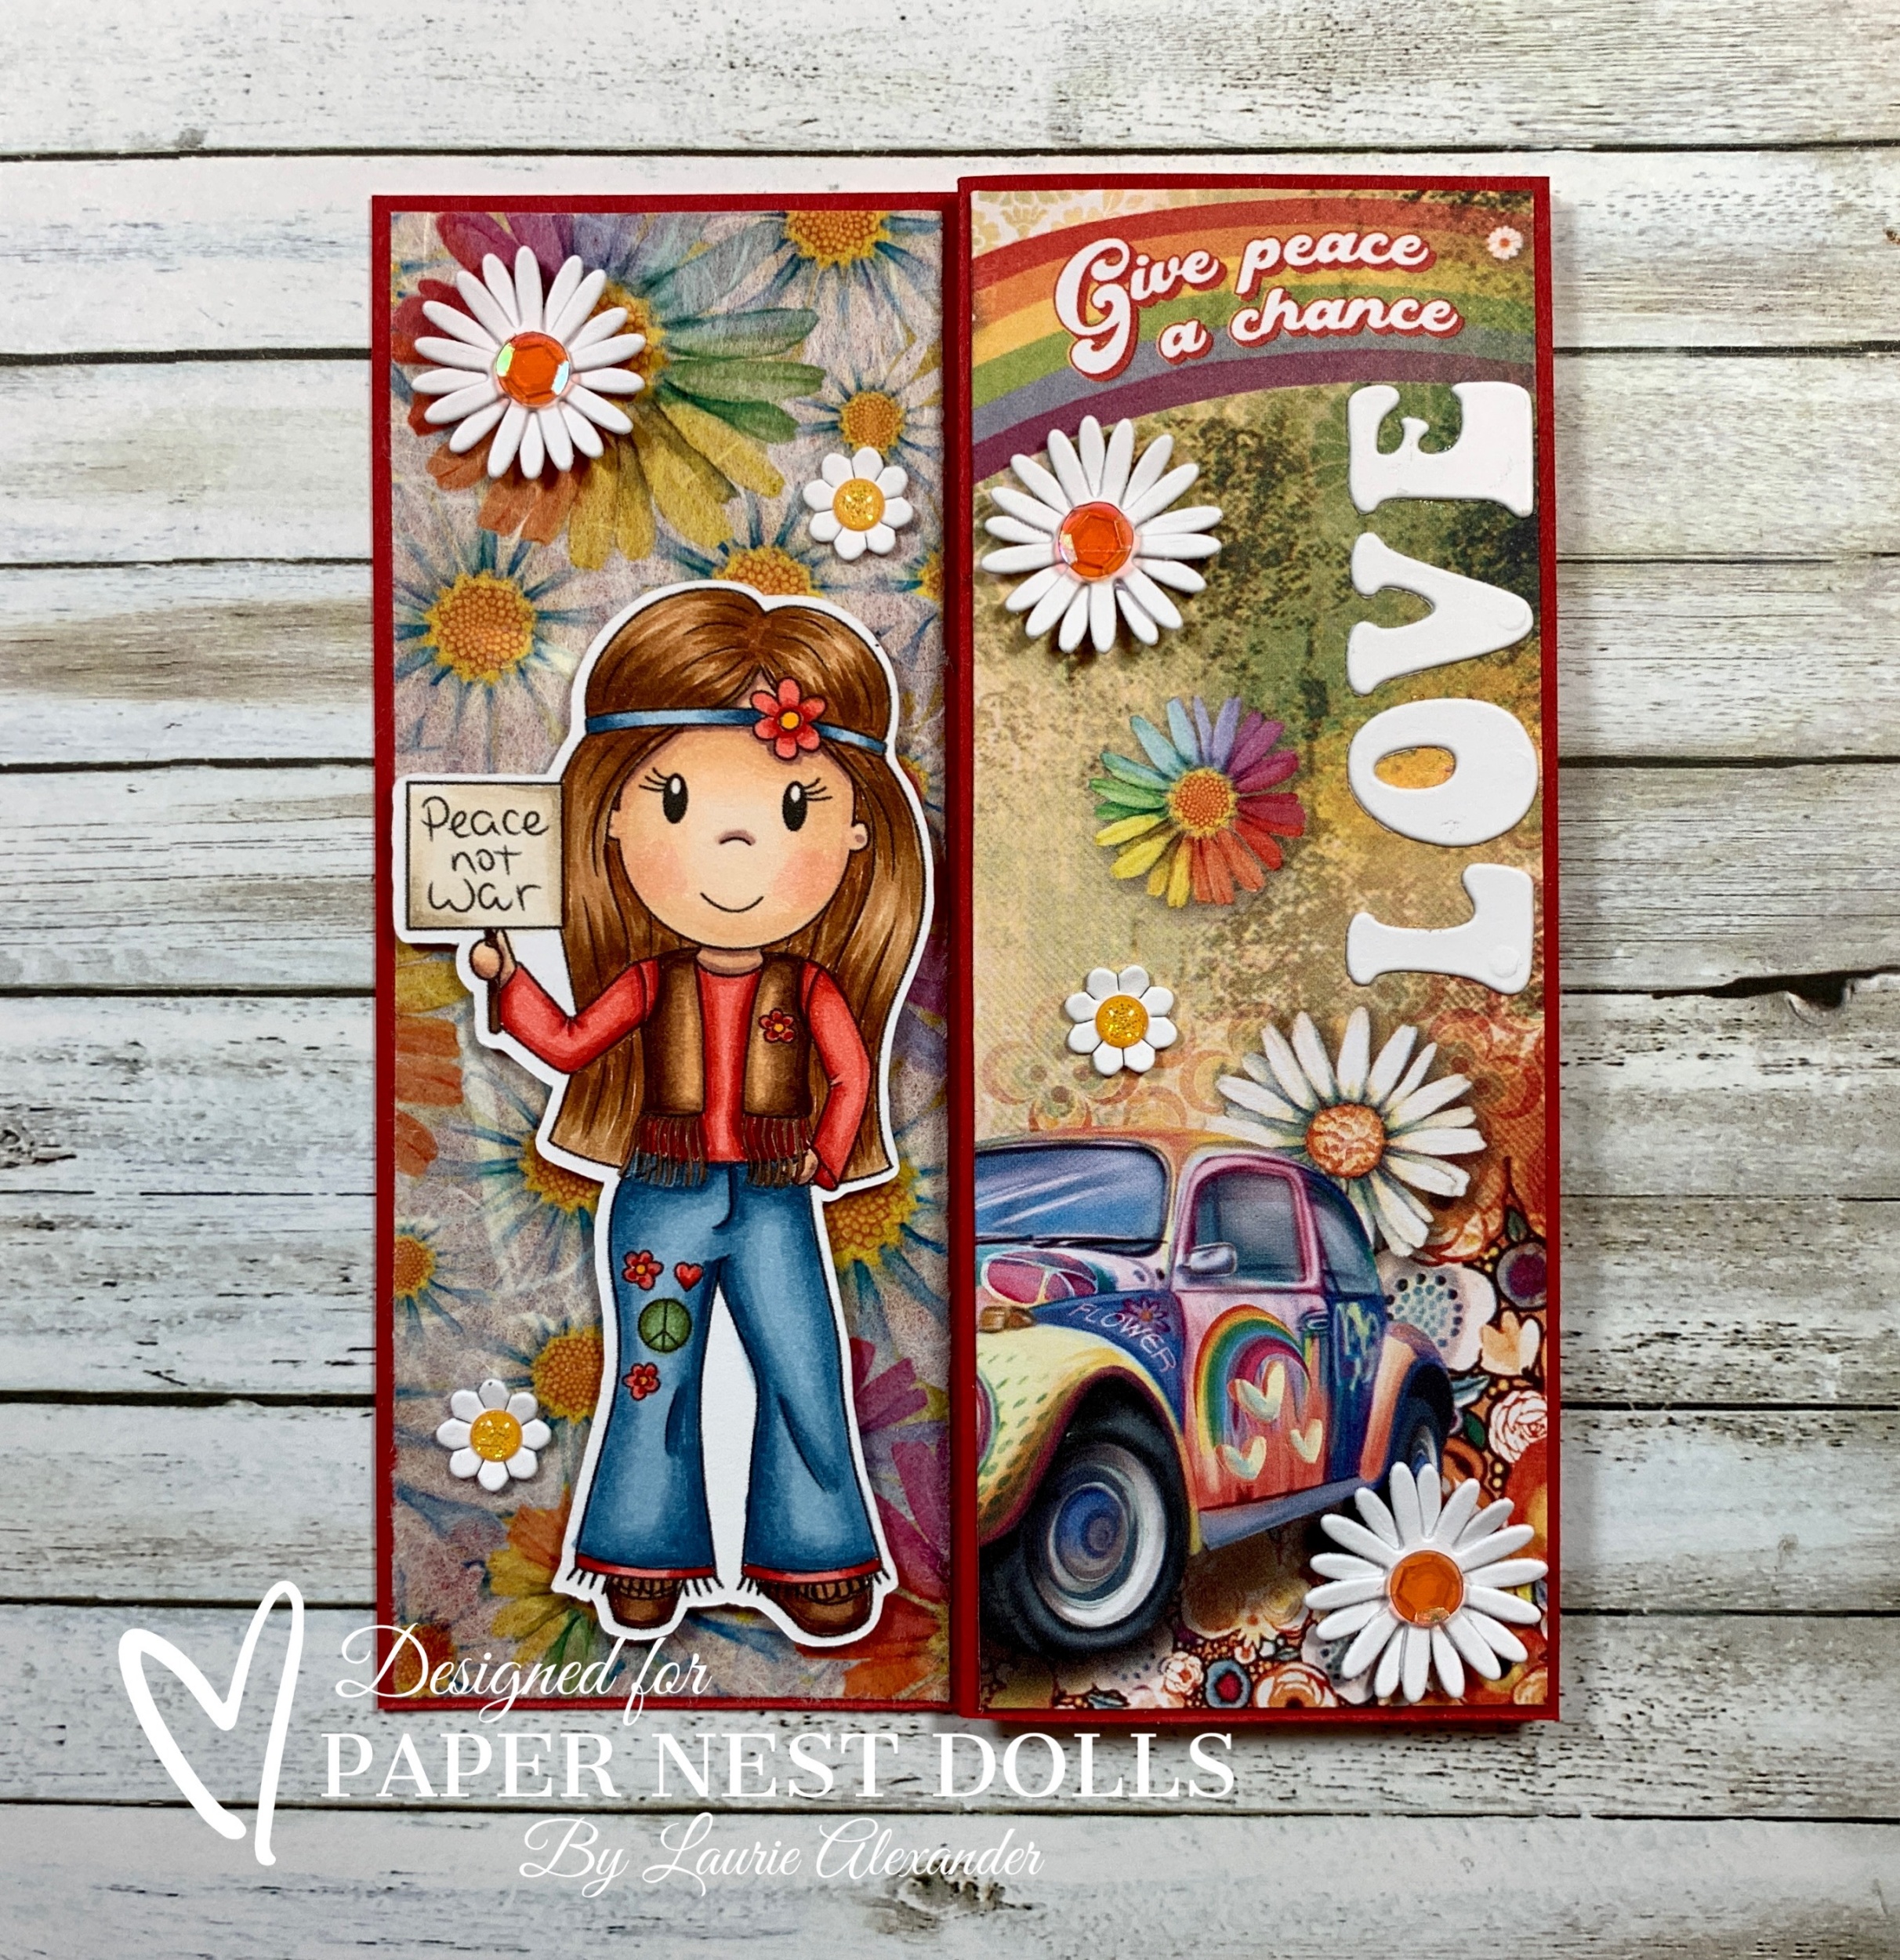
Hello Crafty Friends! It's Laurie here! I am sharing my Give Peace a Chance as my Design Team Inspiration Card for Paper Nest Dolls using the new release Decade Collection Hippie Ellie. With everything going on in the world right now, I thought this was a very appropriate card for the times!

The Details of My Card

I had a lot of fun colouring Hippie Ellie with my Copic markers! Don’t you just love her jeans with the patches and her suede fringe vest! She is such a groovy hipster!

For my card, I found this perfect paper that had a Seventies theme! I loved it so much that I wanted to use a whole sheet for my card front! So, I used a fun fold called a Z-Fold Card for the card base, but I reversed it into a backwards Z. I wanted the love bug to show on the front with Ellie when the card is closed. This type of card folds up to a regular A2 card but allows for lots of room to decorate! It also is neat how you open it, and the paper continually keeps going!  

Full Card Laid Flat

Since the paper was so detailed, I only used a few dies to dress it up such as the Love, Peace, daisies, and peace sign. They were from the Retro Bus by Elizabeth Craft Designs. I bought this set planning to use them for the Decade Dolls and they were perfect for Hippie Ellie! A couple of sequins and glimmery dots for the flower centres was all the embellishments this card needed.

Measurements

Card Base:  5 ½” x 8 ½”, score at 4 ¼” and 2 1/8”.  Cut the Seventies 6” x 6” paper to 5 ¼” tall, then cut at 2” and 4:”. You could leave the last panel for your sentiment, but I decided to add a fourth panel using a 2” piece of floral rice paper as a background for my coloured stamp.

--------------------------

Copic Markers

Skin: E04/E11/E21/E00/E000/R20
Hair: E39/E37/E35/E33
Jeans: B99/B97/B95/B93/B91
Top: R29/R27/R24/R22
Vest: E29/E27/E25/E23/E21
Shoes: E29/E27/E25/E23
Green: G99/G94/G21
Flowers: R29/R24/R22/Y38

Close Up of Hippie Ellie

--------------------------

Card Recipe for My Give Peace a Chance

Paper Basics - Stamper's Select White Cardstock, Papertrey Ink
Seventies 6” x 6” Paper Pad, Ciao Bella
1928: Retro Bus Dies, Elizabeth Craft Designs
Rice Paper A4 Love Peace Joy, Ciao Bella
Artistry Blooms Adhesive-Backed Sequins, Stampin’ Up!
Glittery Enamel Dots, Stampin’ Up!
Real Red and Basic White Card Stock, Stampin’ Up!

Finished card size: 5 ½” x 4 ¼”

--------------------------

Hope you like my Design Team Inspiration Card using
Decade Collection Hippie Ellie by Paper Nest Dolls!

Thank you for stopping by!
Hugs,
Laurie

Saturday, April 23, 2022

Decade Dolls: Have a FAR OUT Birthday!

Hi PND Fans! Betty here today. I just love the bright colors of the hippie era of the 60's and 70's. Although I was a young child, I still remember hearing some of the events, such as the Woodstock Music Festival and the Summer of Love. I still listen to the music from the 60's and 70's since they're my favorite. When Paper Nest Dolls released these Decade Dolls, I knew I wanted to color Hippie Ellie. I may have had an outfit just like her when I was younger! 


I first printed this digital stamp at 3-1/4" tall, colored it with Copic markers, then fussy cut it out.

Copic markers used:
Skin: E04, E11, E21, E00, E000
Hair: E39, YR24, YR23, YR20
Blue: B97, B95, B93, B91
Orange: YR09, YR07, YR04, YR12
Green: YG09
Pink: RV55, RV11
Brown: E57, E55, E53
White: C5, C3, C1, 0


The background patterned paper is free printable digital paper from Freepik. I imported it into Microsoft Publisher and cropped it to the size I needed. I printed it on a laser printer then trimmed it. I placed a purple cardstock mat behind it the adhered it to a top folding A2 card base.


I created the sentiment in Microsoft Publisher, printed it, then trimmed it to size, then adhered it to the card front. 

I adhered Hippie Ellie onto the card with double-sided adhesive foam tape and the card was finished. Such an easy, but cute card to make! I hope you give this a try!


Thank you for visiting and I hope you have a wonderful and creative day! ~Betty~ 


copyright © 2013 the paper nest · graphics by erica belton · web design by red peach designs