Friday, May 24, 2013

Get Well Soon!


Hi everyone!!  Well, I'm back with another of those adorable images from The Paper Nest Store  This time I'm using, "Bedtime Ellie" in my design.  I couldn't even begin to resist that rolled up hair! Hee

Of course I colored my Ellie with Copic markers.  I used my Blender Pen a lot on this image.  After coloring her robe, I dotted it with the Blender Pen which, as you may know, removes color.  It gave me just the texture I was hoping for on the robe.  You may also know there are several ways to achieve "texture" on a Copic colored image such as... putting Blender Solution onto a dish rag and pressing it to your colored area.  LOVE that look as well.

After I colored Ellie I then roughed up the edges for a bit of a distressed look and added some Tim Holtz Distress ink, "Vintage Photo" as well.

My DP is from the Prima "Romance Novel" pack and the coordinating flowers.  LOVE that paper pack!!!  I added a bit of lace along the edge of my image and a simple cameo stick pin which I THINK might be from Websters Pages.

I really like how this turned out.  A bit muted but still with some beautiful color.  Oh yes... not only did I "dot" with my Blender Pen... I also dotted the bear with different Copic colors to get texture on him as well.  ;-)

The Paper Nest images are so much fun and it seems she adds tons and tons more every week!!  Stop on over and check out all the other fabulous Ellie stamps, as well as some adorable Avery, Emma and Owen stamps too.

It's Friday!!!  Hope you can go out and enjoy the weather and that wherever you are, if you have the rain and thunderstorms you stay safe!! Thanks for stopping by, as always.  *HUGS*


Signature Follow Me on Pinterest
 Copics I used:

Wednesday, May 22, 2013

Ant Farm Owen


Good Wednesday morning all you lovely bloggers out there!! Hope you are all well and are feeling fine. It's Lydia here and today is my post day over at the Paper Nest Dolls blog and this week I'm sharing with you a card using Ant Farm Owen.


Hehehe how cute is this little guy ?!?!? To make the tank look like glass I have added glossy accents to it ... look how shiny it is .....


Skin- E00, E000, E21, R20
Hair- E11, E35, E37
Earth- E70, E74


And to add to the cleverness of this .... have you seen the sentiment? LOL - took me a while to come up with this one, but I'm totally loving it.

Tuesday, May 21, 2013

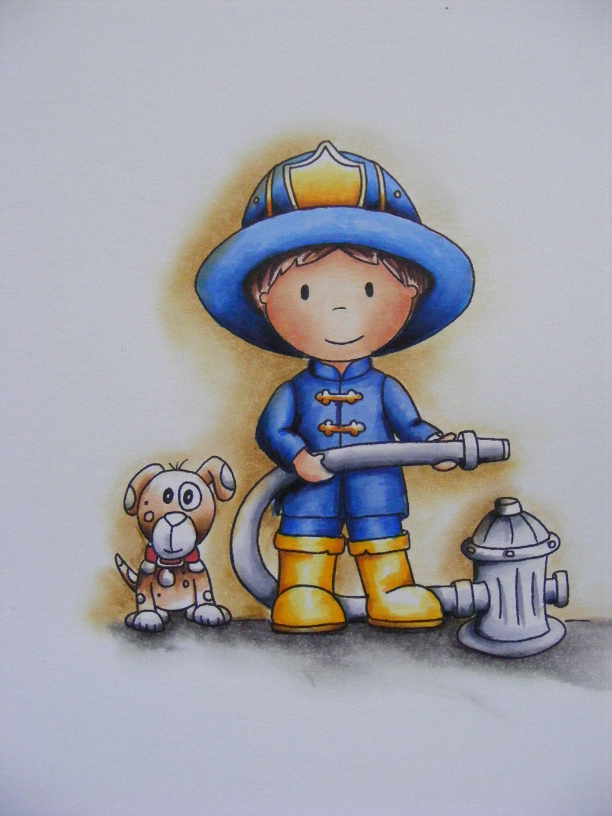
Fireman Owen

Hello Everyone ...
This is a card done by June Nelson...how sweet is this ????? She used Fireman Owen  . 
I LOVEEEE what she did with him ! ( but i love everything she does, so i am bias !! lol ) 
Enjoy!! = )


Monday, May 20, 2013

Mermaid Ellie with Seahorse


Hi Everyone!
It's Michele Here with my Card, using " Mermaid Ellie with seahorse

You can pick her up as a Digital image or rubber:-)
I colored this pretty little mermaid with Copic markers and added just a bit of Prisma pencil with a Polychromos pencil around bottom part to give an added dimension of water. 
I added some pretty Lace around the circle , and a Bakers twine bow in pretty aqua, I also added a few pieces of a Prima Flourish in the pearls for a little hint of bubbles or waves LOL 
A close up for you below so you can see the fins that I Used my version of the Stipple effect, Only using the very tip of the marker to make dots which I think looks wonderful for fins:-)

Supplies used were:
Image: Mermaid Ellie with Sea horse, The paper nest Dolls
Design paper: MME "My Girl"
Bakers twine, and ribbon in Aqua 
Copic Markers used were: Y21,YR21, YR23 Hair, E11,000,00 R20 Skin, BG13, BG11, BG10, R01 Fin/Tail, B01,B05 YG21,YG23,YG25 Seahorse, Polychromos Lt Phthalo Blue, and Aqua Marine Prisma with OMS to blend just a bit

Please remember the Paper Nest Dolls Challenge blog Where you can enter and have a chance at winning wonderful goodies:-) 
Have a wonderful day!
Hugs
Michele

Sunday, May 19, 2013

Shopping Ellie and Birthday Owen


Good morning dear crafters, it’s Jasmina, I’m back with another card using this beautiful image Shopping Ellie.
Isn’t she adorable! She was in the shop – there is a hanger, doll for clothes on paper. She bought a lot – and there is she – our shopping Ellie with bags.
I’m really quite pleased with how pretty this one turned out. You can see more pictures on my blog.


Dies: Spellbinders Nestabilities, C.C. Design
Paper: Pion design Alma’s Sewing room, Purple room
Stamp: Shopping Ellie
I’ve used a few goodies: Love hangers, Vintage brad, Melissa Frances pearls, Shabby seam binding, Hortensia flower, Rayher blossoms;

Colours I used:
Skin: E000, E00, E21, R11
Hair: YR00, E11, E15, E17
Outfit: V000, B0000, RV13


I have one more card to share. It’s Birthday Owen. I think this stamp is popular because he is so sweet and suitable for birthday cards. I made his trousers with a little dots different colours and made interesting effect. Hope you like it too.

Dies: X-cut big ovals
Paper: Doodlebug design – Hello spring
I used: Pearl stars, lace stars

Colours I used:
Skin: E000, E00, E21, R11
Hair: E11, E53, E55
Hat: B000, B00, Y11
Trousers: Y11, B000, G40
Shirt: Y11

Don’t miss our Challenge Pearls there are still five days to join us. We have a Contest – don’t miss this opportunity, the prizes are magnificent.

Thank you very much for your visit, enjoy your weekend!


Saturday, May 18, 2013

Country Boy Owen

Howdy!

It's Loriann from Craftymama_3.blogspot.com

Today I'm going to share with you Country Boy Owen from The Paper Nest.He is the cutest thing! There is a lot of detail in this image so I took it slow on coloring him, but I think he turn out great!


I just happened to find the John Deer 
looking ribbon and I knew it would be perfect
for Country Boy Owen, then I just picked paper to match and Howdy as a sentiment, and he was done. An up close of him 


The little frog is so cute!
The grass was hand done using copics.
 (I didn't write down the colors I used...sorry !)
Here's a pic of the inside... its a bit blurry sorry but the card is already gone, so here it is.


I just added the colors to make it match... simple, but cute.
Here he is one more time....Country Boy Owen !


Thank you for looking, stop by The Paper Nest to see all the other cute images. Don't forget about The Paper Nest Dolls Challenge Blog ... enter for a chance to win great prizes!! 

Thanks again stop by soon


Friday, May 17, 2013

Making Envelopes......=)


Hey it's Nikki here for The Paper Nest Dolls. As part of our term we were asked to complete a tutorial. This made me a little nervous because I have never done ANYTHING like this before, so please be gentle. As most of you are aware, I am a member of YouTube but have absolutely NO CLUE how to do videos so my tutorial is going to be a blog tutorial.
          I chose to do a tutorial on how to make envelopes, something I do a lot for my cards because 1: it is really hard to find envelopes that fit my big cards that I like and 2: I can coordinate them with the cards I make, either with paper or embellishments.


Supplies Needed

8.5X11 or 12X12 piece of card stock
Ruler
Pencil
Scissors (sharp and small)
Scor Pad (I use Martha Stewart here)
Bone
Double-sided tape (I use Scor tape, because it is strong) or you can purchase envelope glue.

Picture 1a
Step 1: You start out by measuring the paper. I do like to use a medium weight card stock, it just holds up better with the folding, ect. This particular example I am making a card that is 5X5" square. For this a 8.5X8.5" piece of card stock is a good size as it gives a little bit of room for embellishments. See 1a.

Typical Measurements

5x5" - 8.5X8.5" card stock
5.5X5.5" - 8.75X8.75" card stock
6X6" - 9X9" card stock

Martha Stewart Envelope Attachment

Picture 1a - 1
Picture 2a.
Step 2: Although I am not a huge fan of the Martha Stewart Scor board, I DO LIKE the fact it has an envelope attachment that can help with the scoring of the card. I would scor all four corners at the 3.25" mark. Please see 1a -1. You WILL have overlapping and that IS what you want. Next see 2a.

Picture 3a.

Step 3: Cut all the overlapping corners as shown in picture 3a.

Picture 4a
Step 4: Use the bone to get a nice tight fold on all four corners. See 4a.

Picture 5a
Step 5: Tape the edges of the card with the double sided tape. You want to be as close to the edge as you can WITHOUT going over so you don't tape the inside of the card shut. See 5a.


Voila! You have your envelope! You can make the decision as to how you would like to decorate the envelope, I am a minimalist type of girl so I do not do too much decorating. If you choose to use a paper that coordinates with the card you are doing, just keep in mind to go with a lighter colour so you can address it and it can be seen (if you are mailing). Or you can make a label with a shaped spellbinder if you would like, just make sure it is STRONGLY attached to the envelope..... hope you enjoyed this tutorial.... xo
copyright © 2013 the paper nest · graphics by erica belton · web design by red peach designs